Turn Your Mac Mini M4 Into a Full Workstation — Acasis M002 Pro Review
Watch on YouTubeVideo summary
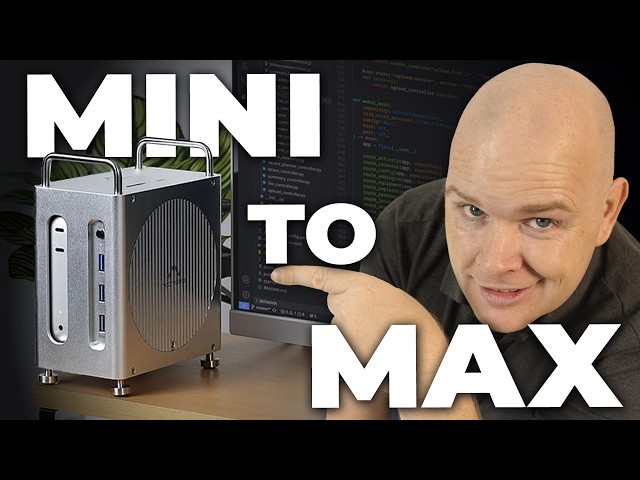
The Acasis M002 Pro is presented as an essential upgrade for owners of the compact Mac Mini M4, functioning simultaneously as a stand, a docking station, and an SSD enclosure. This device allows users to install up to two fast NVMe drives underneath the unit, significantly expanding storage capacity at a fraction of the cost compared to Apple's internal upgrades. Beyond storage expansion, the dock unlocks additional connectivity that enables powering three external monitors directly through DisplayPort connections on its rear panel. It also features built-in SD and microSD card readers along with extra USB ports, while solving a common ergonomic issue by moving the power button from underneath the device to an easily accessible location on top of the enclosure.
Assembly is straightforward, involving unscrewing four bottom screws to remove the original plate before sliding the Mac Mini into the vented aluminum chassis designed for optimal heat dissipation and airflow. Once installed, users can add their SSDs by removing a side panel that houses two drive bays; these drives are secured with rubber plugs and thermal protection pads before being covered again. The enclosure connects to the computer via a Thunderbolt cable linked from one of the Mac Mini's ports on the back, while an included 30-watt power supply ensures that peripherals do not drain excessive battery or internal resources from the host machine. This setup effectively transforms the small form factor into a robust workstation capable of handling heavy multitasking and high-resolution display outputs without relying on proprietary DisplayLink software for native monitor support.
Performance characteristics depend heavily on how the dual drives are configured, offering options such as RAID 0 for maximum speed by striping data across both disks, or mirrored setups for redundancy where one drive acts as a backup for the other. The review highlights that while RAID 0 provides the fastest read and write speeds ideal for performance-critical tasks like video editing, users seeking security should opt for mirroring instead. Furthermore, the dock's ability to natively power three displays is emphasized as superior to using DisplayLink hubs in scenarios requiring multiple monitors, though it does consume one of the Mac Mini's Thunderbolt ports internally. The unit also includes various USB-A and SD card slots, which are useful for legacy peripherals but noted by the reviewer as areas where future iterations could offer more modern USB-C options alongside higher wattage power supplies to support faster charging or additional high-speed connections.
Ultimately, this accessory is highly recommended for professionals who need to maximize their Mac Mini's potential without breaking the bank on official Apple upgrades. The presenter demonstrates using it in a studio environment with six total monitors, where three are driven natively by the dock while others utilize external hubs and DisplayLink technology to expand further if necessary. By allowing users to start with less internal storage—such as 500GB—and add larger drives later via the enclosure's bays, owners can maintain mission-critical applications on the primary drive while storing vast amounts of data or media libraries externally in a RAID configuration. Despite minor design preferences regarding port types and spacing that could be improved in future versions, the Acasis M002 Pro stands out as a versatile solution for expanding storage, connectivity, and display capabilities within a sleek, affordable package.
Read the full video transcript
What you're looking at is the Aasis
M00002 Pro. This is a dock, a stand, and
an SSD enclosure specifically designed
for the smaller form factor M4 Mac
minis. Uh this is the M4 Mac Mini Pro
that I've got inside this. Uh and what
this means is we can also now attach up
to two fast NVME drives uh underneath
it, giving significantly more storage
and at a fraction of the price that
Apple would charge you to upgrade your
storage on the Mac Mini itself at
checkout. Uh we can also now power three
external monitors through the additional
connectivity that this gives. Uh we've
also got SD and micro SD card reader on
the uh the enclosure as well. Plus we've
got some additional USB ports here as
well. It also solves one other problem
uh which you may be familiar with with
the uh the latest generation of Mac
minis which is that the power button is
now a lot easier to reach rather than it
being underneath the uh the Mac Mini
itself. So in this video what I'm going
to do is show you how it all goes
together. talk about what I love about
it. Uh things that I think could be
improved perhaps for the next version uh
and who this is actually for and
specifically uh talking about how I'm
going to be using this myself going
forward. So uh let's get into it and
we'll start with just looking at how we
put it all together. So here is the
empty enclosure made out of really solid
sturdy aluminum. And uh what you need to
do first of all to install the actual
Mac Mini is undo these four screws that
you'll find down the bottom. uh it does
include the screwdriver that you're
going to need to do that. Once you do
that, then this entire bottom plate is
going to drop off. And if we turn it uh
upside down, then we can see that over
on this side, you've basically got the
area that houses all of the uh the input
and output ports. Uh and then you've got
the uh the actual drive bay itself in
here, which we'll get into in a moment.
But now you've got this space here,
which is for the Mac Mini. Just notice
that there are these cutouts down this
side and this side. And then this is a
sort of vented grill on the back. And so
what we're going to do is take our Mac
Mini and put it in there. The way to do
this then is just notice that the grill
is lined up with the the fan on the
bottom of the Mac Mini. So it's going to
slot in this way. Uh and then also we've
got this button here which is the power
button. So that needs to line up
basically with the power button that
we've got on the bottom of the the Mac
Mini just down in this corner. So
assuming you've got that then it's just
a case of sliding this in. Uh you will
see that this is sort of padded inside.
So it's not metal on metal as such down
there. Uh and then as we slide that in,
you can actually see through those vents
now. Uh that this is basically
completely open to that that fan that
we've got in the bottom of the Mac Mini.
So it's going to allow for that air
flow. And then obviously the aluminium
itself is intended to help with that
heat dissipation itself. So that's all
there is to it really. Uh the button now
is lined up with that power button on
the Mac Mini. So now we just need to
replace that plate on the bottom. And so
it's just a case of taking that uh
placing it back into the uh into the
enclosure there like this and then uh
replacing those four screws, which is
what I'll do now. So having replaced
those four screws, um I'm now going to
open this uh side door here. So this is
on the uh the vent is on this side. On
this side, we've got this uh this door
that comes off here, which is where
we're going to put our SSD drive. So
just unscrewing this single screw,
you'll find that this whole plate just
lifts out. Uh, and now you can see that
we've got this area in here, uh, I don't
know if you can see that actually with
it being a bit dark, but there are two
slots in there basically, uh, for us to
put in our drives. And so these are
these types of drives here. Uh, and I'm
just going to sort of slot that in at
45°. Maybe easier if I've got it down on
the desk. And once it's slotted in, then
there are two little rubber plugs, uh,
one for each of the drives that will
hold it down. Uh, notice that you do
also, uh, get, they've actually included
four of these, but technically you only
need two, so I guess spare ones. Uh, but
these are intended for thermal
protection and so these are going to go
on your drive. Just make sure though
there is this plastic film on them that
you remove those first of all because
you don't want that melting onto a hot
drive. But once you got the plugs in,
uh, you just simply apply that to the
top of each of the drives and then you
replace the uh, top casing here. Now
that we've added the drives and the Mac
Mini, it's a case of connecting the two
things together. So, at the moment,
we've just got an enclosure with the Mac
Mini inside it, but there's nothing
actually connecting them. And so, that's
where we come onto these connectors on
the back. Obviously, uh the gap in the
enclosure there just gives us access to
all of the Mac Mini connections. Then,
on the Acasis itself, uh this connector
at the top says host. Uh there is a 40
megabits per second gigabits per second,
sorry, uh connector that comes with it.
And so, that just needs to connect from
uh the back of the dock there. and then
plug into one of those Thunderbolt
connectors on the the back of the Mac
Mini. Then we've obviously got access to
the power for the Mac Mini itself. Uh
there is also an included 30 W power
supply that comes with the Aasis as
well. Um and so that connects down here.
Um technically it might not be essential
to have that connected. However, I just
would recommend that you connect it
because otherwise all the power for all
of your peripherals would be just being
drawn through here from the Mac Mini. Uh
then you have still got obviously access
to those two Thunderbolt ports there as
well. Uh this is then to display port uh
to power two external monitors. Uh that
is how we've got now basically three
monitors powered from this uh Mac Mini.
So one HDMI out of the Mac Mini itself
and two display ports there. Uh we
mentioned earlier that you've got the um
SD cards on the top, a micro SD card.
You can use both of those at the same
time. And then uh over on the front then
we've got uh obviously the two
Thunderbolt ports on the front of the
Mac Mini itself. And then we've got
three ports just down here that are
USBA. Now I mentioned before about this
power button uh to actually turn on the
Mac Mini. Just notice that there is a
separate power button here which is
actually to turn on the power for the
dock at the front here. So, uh, when you
are switching this on, you're going to,
uh, turn on the Mac Mini itself and then
also turn on the power here. And there
is a little green indicator light there.
So, um, we've now got obviously
significantly improved storage on our
Mac Mini Pro and or Mac Mini M4 Mac
Mini. And we've also got this additional
sort of inputs and outputs and monitors.
Uh so let's take a look at some of the
specs then because the way that we
connect these um internal drives is
actually going to dictate the speeds
that we can get out of it. So you'll
find this link down in the description
as well, but I just want to draw your
attention to the model that I've got
here uh which is the M002 Pro. There is
also the M002 Plus. Um but just notice
that the Pro has the two drive bays that
I'm talking about. Uh the Plus just has
a single drive bay. So just make sure
that you notice that. And this one has
dual SSD. Uh this one here where it says
single SSD would be that other one.
Hopefully it should be obvious from the
picture, but just notice the one that
I'm talking about here. Um so then if we
just come down here, you'll see various
different things related to the speeds
and so on. It's worth just drawing your
attention and I won't go over every
single uh uh spec here. Um but just
notice if we scroll down a little bit,
uh you'll see that there are these
different uh speeds listed here. And so
just so that this is does not become too
confusing here. um where it's talking
about single uh M4. So that's the single
chip. Uh when you've got dual, that is
two chips in it. Uh two u um SSD cards,
I should say. But then we've got RAID
zero and RAID one. So it's worth uh just
explaining what that actually means.
Now, if you go into your disk utility on
your Mac uh and then go into the file
menu, uh you'll see that there's an
option for RAID assist. And so let's
just take a look at this because uh this
is to do with how you actually set up
those two uh drives that you've got in
the uh in the enclosure. So the first
option then is striped uh RAID zero.
This is basically where um your computer
is going to see these two drives and
effectively just see them as a single
drive and it's going to stripe across
them. So what that means is uh it's
going to split the data between those
two drives. And so uh it's not uh it's
not creating any backup but it's going
to give you additional speed because
essentially you can write to these two
things at the same time. The second
option is mirrored. Now this is one
where you want to have redundancy.
Basically the two drives that you've got
in there are going to just be a mirror
of one another assuming that they are
the same size. Obviously if they're not
the same size you're going to be limited
to the uh smaller drive size. But as if
you've got two uh let's say two terabyte
drives in there uh then the uh the total
space you're going to have is two
terabytes. However, um everything that
is being written to the drive is going
to be written simultaneously to both
drives. So that's going to give you that
redundancy. Um then uh we've got this
one concatenated or JB OD. Uh that is
just meaning that it's going to see
these things as two completely separate
drives and you could maybe have you know
store some things on one and some things
on the other. So basically, if you're
looking for security and redundancy,
then you want to go with mirrored. If
you're looking for additional speed,
then uh that's going to be this striped
RAID zero uh spreading out over two
drives, but uh and combining the total
of the drives. Um but uh you can't just
sort of assess address each drive
individually. Um or this one JBO is if
you want to have two separate drives
attached uh within the storage bay. So
the point to note there though is that
RAID zero is going to be the fastest and
RAID one and JBOD are not going to be
not going to give you that that uh same
speed. Now if we come back over to the
spec sheets then uh this is where you're
going to see the uh uh the difference
here with RAID zero and RAID one. Now,
uh just to add a slight another little
uh [laughter] twist in the story here,
uh it also depends on what you've got
connected in terms of the displays over
the uh display ports that are connected
into the back as well because obviously
if you're powering uh you know two
external displays uh then there is going
to be data transfer into that as well.
So uh that's just to explain what this
means down here. If you come and have a
look at this where we've got dual
displays 5K at 60 Hz uh 4K at 144 hertz
then uh this is now the read write speed
that you're going to get again in that
RAID zero and RAID one configuration and
it's just taken a couple of different
NVME SSDs here uh for uh uh for the the
test. So this is what this is based on.
Different drives may well have different
speeds. So that is just to explain uh
the different read write speeds that
you're getting from this. So just to
also be clear about the multiple
displays because this is a question that
comes up often with uh in particular the
Macs and Mac minis because there is a
limit on how many displays can be
powered by a particular Mac. Now the M4
Mac Mini uh Mac Mini Pro can power these
three external displays. So just so that
we're absolutely clear about this uh
because the naming is a little bit
confusing as well in in these terms.
These have display port connections on
the back. That is the type of connector.
So, it's an alternative to HDMI. Uh, if
you've got HDMI monitors, uh, then you
would require an H a display port to
HDMI adapter to then plug into those.
It's totally interchangeable and
there'll be no problem with that
whatsoever. Uh, the reason why I mention
this is because there is another thing
which we talk about when we're talking
about multiple displays, which is
display link. Display link is a software
technology um and built into certain uh
docs. For example, I've got a couple of
wavelength docs that power up to four or
five uh external monitors. Uh the reason
why I say that is because this is not
what's going on here. These are just
powering these uh monitors natively uh
with what we can power from the uh from
the Mac itself. So, don't worry that uh
you're going to need to have any other
piece of software. You just plug this in
and it will just work and be able to
power those monitors. So, let's just
take a look at some of the other specs.
Then, if we just come down here, I won't
go through all of these, but you can see
here a comparison. And this just gives
you an idea of those different speeds uh
that you're going to get from the the
data transfer, but also uh from those
USB sockets that we've got attached as
well. So, let's talk about some pros and
cons then. First of all, if you are a
fan of the Mac Pro, then I'm sure you'll
appreciate the sort of design aesthetic
of this and giving us that sort of
similar looking uh form factor in this
really teenytiny package obviously made
possible because of just the small size
of the the Mac Mini. So, I personally
really do love the form factor. Uh, of
course, Apple and design purists would
say uh you know, maybe the enclosure uh
gap here uh should completely match this
one to make them exactly the same and
make them exactly equal in terms of the
spacing and things like that. But hey,
I'm a designer, so those kind of things
leap out at me. But apart from that, the
build quality on it and everything is is
just really uh really great. The main
point about this though is obviously
with a Mac Mini, we can power up to
three monitors. Um, and I think these
days most people have got more than one
monitor or maybe these are just the
circles that I move in. So, the ability
to just uh get the full sort of three
monitor allowance, if you want to call
it that, that that we've got on the or
capability that we've got on the Mac
Mini out of this enclosure is is great
for that reason. But, of course, the
other thing though is the ability to
just maximize our storage or at least
increase it in a more affordable way.
Now, I say it more affordable because uh
the dock itself, so this unit is $169 at
the moment as it stands on the Cas's
website. Uh there are some offers that
run from time to time as well and you
may be able to get one at a different
price but that is the current cost of
it. And then when we pair that with
external drives um it still is going to
be significantly lower than uh you know
if we jump from say you know a terabyte
to two terabytes uh in on when we
actually spec out our Mac Mini. And what
that means is we can be a little bit
more conservative with the way that we
spec out the Mac Mini. Uh, and for me,
for example, on this one, I've just got
500 uh gigabytes on the actual Mac Mini
itself, knowing that I can put in
additional drives into the enclosure.
And yes, mission critical stuff is still
running on the actual Mac Mini drive
itself. All the apps and software and
stuff are are are installed on that.
However, you know, I can have all my
data uh installed on the external drives
in the enclosure. And of course, we've
also got the possibility then of having
those in a RAID configuration to either
give us more speed or more security or
however we want to to do that. And also
allows us to maybe swap out for larger
drives at some point in the future if we
need to uh need to do that. So for me,
those are the biggest two features. It's
the uh the ability to have the
additional monitors and also the
additional uh capacity in there. There
are obviously uh some additional uh
sockets on here. So, we've got the uh SD
card reader there, the micro and regular
SD card reader. Um, now for me, that's
not a thing. I don't really use those,
but I know many people do. So, uh,
having that conveniently on the top
there that you can just pop in your
cards, I'm sure, will be helpful for
some people. And then we've also got the
additional USB sockets on the on the
front there. Uh, now obviously on the
back of the um Mac Mini, we've got three
Thunderbolts, but one of those is taken
up by uh connecting to the dock itself.
So, we're kind of losing one of those.
Uh, but we're gaining uh these three
USBA. Now, that brings me on to one of
the things that I wish was slightly
different about this. And I've got to
say, it's not just a case really. I'm
finding this with many manufacturers of
docks and hubs and so on that there does
seem to still be a an emphasis on USBA
with a lot of manufacturers when these
days so many of the peripherals that
we're getting and adding into our setups
um are using USBC. So it would have been
great to see uh more USBC and fewer of
the USBA. It seems like maybe just one
USBA and the the others USBC. Uh
similarly I would say there perhaps is
the opportunity to just add more as
well. I mean the power supply that I
mentioned uh it has is a 30 watt power
supply if it was possible uh to maybe
have you know additional um USBC in here
with a bigger power supply. Uh, so you
know, rather than these being hor
vertically orientated like here, imagine
if there were like, I don't know, six or
eight USBC's in a sort of vertical
arrangement like that, but then just
have a much bigger power supply. Uh,
that would be uh really great, but I
guess we can't have everything all at
once. Now, just to say how we're using
this in my setup. Now, normally I am
using this Mac Mini Pro in my uh for my
recordings, but I've just switched over
to my uh my laptop at the moment. But
the point is I've actually got six
monitors connected here. Now, what this
allows me to do then is connect three of
those kind of natively. Um, and then the
others are being powered by an external
dock that is using the uh display link
software. Uh, it's better if you can to
have the, you know, use the allowance
that we've got first before we use
display link. Obviously, any amount of
monitors that you're driving uh on the
computer is taking up processing power.
Um, but if they're going through display
link, it's basically another layer of uh
processor required on top of that just
because it's going through the the
software. So uh three monitors connected
using this is uh lightening that load in
in some ways as well. Obviously then
there is the uh the storage issue as
well. Um but in this sort of studio
setup I have got just one or two
additional USB things connected. So even
with the additional connectivity that
this gives, it's still not enough. So I
do have a secondary um USB hub uh that
is or Thunderbolt hub I should say uh
that is allowing me to connect other
things like my road cer and various
cameras and and stuff like that. So this
is basically just giving me that
expansion of the uh the storage and some
additional connectivity there and the
monitors and then for you know all the
other things and then uh using some
additional docks and hubs for that as
well. But all in all uh a really great
addition and a really great way to as I
say just expand out uh the uh the
connectivity that you've got on your Mac
Mini. Now I've left a link down in the
description to all of this and the the
links and so on. Uh, what you'll find
over here is a video that YouTube thinks
you may want to watch.