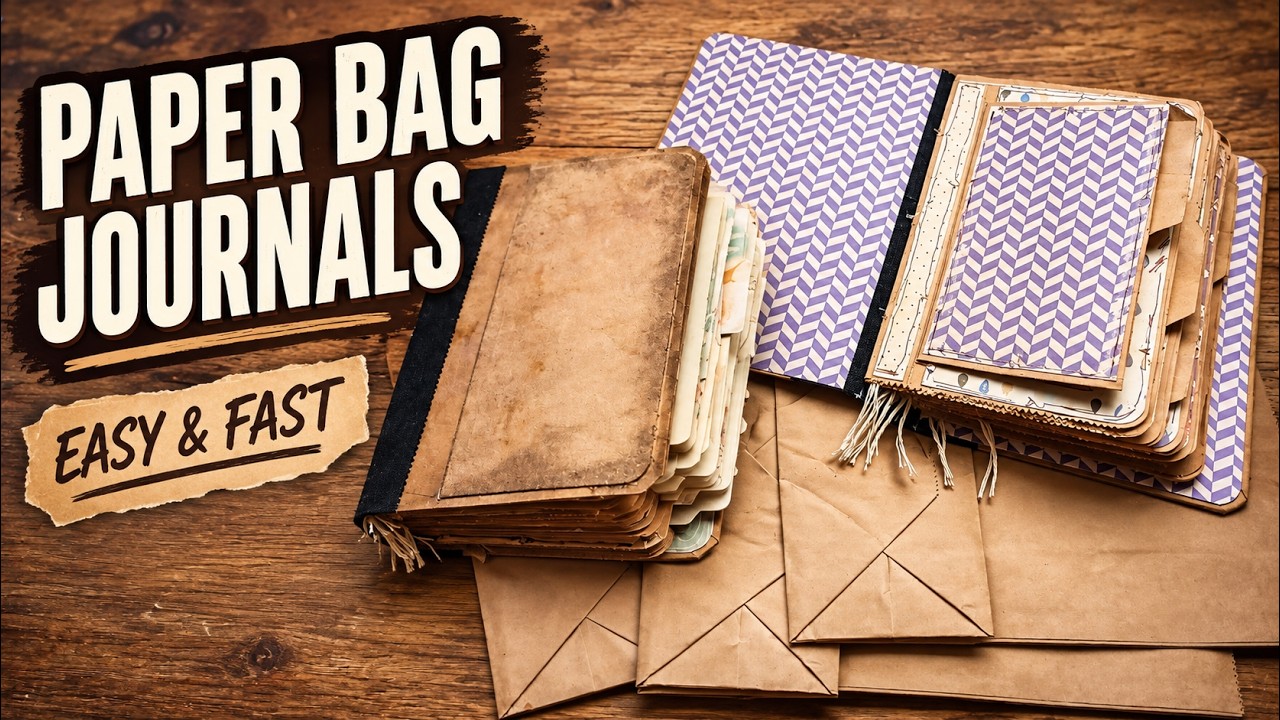
Turn Paper Bags Into Beautiful Little Journals | Easy No-Special-Tools Tutorial
Watch on YouTubeVideo summary
This video tutorial demonstrates how to transform simple, sturdy paper bags into charming and spacious mini journals without requiring any special tools. The creator utilizes five of these bags for the internal pages and one larger bag for the cover, praising their thickness and strength as ideal materials for journaling. To assemble the book, she uses normal thread for sewing and reinforces the spine with self-adhesive fabric tape, which provides a durable bond while remaining thin and soft. Additionally, she incorporates leftover craft envelopes and Amazon packaging materials to create pockets and decorative elements, emphasizing that this project is an excellent way to repurpose everyday items found at home or online.
The crafting process involves cutting the bottom of each paper bag to create tabs at various positions—top, middle, and bottom—which add a unique, wavy texture to the pages when flipped through. The creator flattens the bags using a bone folder and cuts off excess glued sections to form pockets, often leaving the edges slightly uneven for an interesting aesthetic. She then covers these prepared pages with decorative 6x6 inch papers, ensuring the cutouts are about a quarter-inch smaller than the page size to create a beautiful frame effect. Any leftover scraps from this process are used to reinforce the flaps and add extra pockets, maximizing the utility of every piece of material.
To finish the journal, the creator rounds all sharp corners using a corner punch for a softer look and distresses the cover with watered-down ink to achieve a vintage appearance. She attaches label holders to the front cover before gluing down the final decorative layers, ensuring they cover any adhesive residue. For the binding, she marks precise sewing lines on each of the five signatures and uses an oval guide to poke three holes in the center, allowing her to sew them together with simple three-point stitching starting from the inside. The finished product is a delightful, interactive journal filled with pockets for inserts, proving that one can create a beautiful and functional book using only basic supplies like scissors, glue, thread, and paper bags.
Read the full video transcript
[music]
Would you believe that these cute little
journals are made from paperbacks?
Easy way and surprisingly
spacious for all kind of inserts and
pockets
made from these
simple box. If you would like to create
it, come to join me today
for creating this cute little
uh journal. I'm going to be using paper
bags. These paper bags I have found on
Amazon and I do use them daily for our
lunches for you know work lunch. So it
was great that I had had them at home
when I wanted to try that first that
pocket idea and then I added that rest
of the back. So these bags are wonderful
because they are quite strong and nice
thickness. So they do work well even for
those journal pages. I will put link
down below for those who want to have a
look. link will be for uh UK Amazon for
British Amazon, but you can copy the
name and place it in your Amazon and I
do believe it will find probably exactly
same ones. So, I'm going to be using
these paperbacks, five for journal
pages, one for journal cover. for cover
thickness. Uh I'm going to be using this
leftover from craft envelope and luckily
it came also from Amazon. [laughter]
I do shop mostly on Amazon and I do love
their packaging because they are very
useful. So I'm going to be using this to
create journal cover.
Then, uh, I'm going to be sewing my
pages with just normal thread. And, uh,
I'm going to be reinforcing my spine,
this one, with this
fabric [snorts] tape. This is fabric
tape, self adhesive tape, medical tape,
also found on Amazon. And I really like
to use this tape because it sticks
immediately. It reinforc beautifully
spine of my books and it doesn't have a
huge thickness. It's nice and soft and
it's already made for me. So that's what
I did used here and it does have this
beautiful edge. You know,
for decorating pages of my journal, I'm
going to be using 6x6
papers. When I was digging in my shed of
later project and later
um craft supplies, I have found so many
uh 6x6 paper parts. So this I'm going to
be using today for this journal.
So all pockets and pages I have made
quite similar way. I grabbed my scissors
and I have cut uh that paper back here
on the bottom. So as you can see that
paper back is folded this way. So I kept
it folded and here where I can see fully
the bottom of the back. I started to cut
about
I will say 1/8 of inch from the edge of
my back. And here I have created top
like this.
Very easy way. Nothing too complicated.
And because I wanted to have these
tabs
always on different spot.
Where is it? Oh, where was that? That
next one. And here. So, you have bottom,
middle, and top.
This first one
I grabbed. I flip it over and
follow my cutting.
like this.
So I do have one on the top, one on the
bottom, and that the middle one.
Well, I took my pencil
and I kind of made marks here and here.
I try to make it on each side of this
top
kind of equally.
And
I have cut it along those marks. And if
you need, you can always grab your
readym made envelope with already
pre-cuted top and follow that
here.
I do have cuted my paper box and I do
have different
uh different position of taps. Now from
those leftovers these parts I'm going to
use them for pages. And what I did
before, I took my scissors and I just
cuted these
little leftovers from here
and from here.
And I think I left these. Yeah,
definitely left these because there is
enough of of the paper. I'm going to cut
off this one.
Then I have open it each back like this.
I just flatt it down and there wasn't uh
like way where I decided which way I
will flatt it down. I just flatt it down
some way. And I took my bone folder. And
the way when you do use a letter opener,
just slide in that fold and kind of rip
that back apart.
And on that opposite side
and then fold it on half.
That was all the base I did with each of
my box
like this.
And some of these bags,
they do have this gluing part. Like some
of these parts, of course, all of my
bags, they do have this gluing part here
where the back is, you know, glued
together. I'm not sure where is it. It
is. Oh, it is here. It's glued together.
So, some of these pages, they will have
this one. [snorts]
And I use that
to glue here on this one,
my extra pockets.
That's why I can do this. Tada.
I do have that pocket glued on this
extra part of my back. So, I'm going to
prepare
all that uh rest of these papers exactly
same way. I'm just going to open it some
way, no matter which way. And I'm not
going to cut this one straight because I
actually like these uh ups and downs. I
think they do up
interesting look into my pages. When you
flip through and you see these downs
and waves and
tabs, it does add a little extra to
those pages. They are a little bit more
interesting and fun. So that's why I
left it the way
which is looking right now. And I just,
you know, rip those.
Okay, I'm going to Yeah,
rip those paper backs
here
and
here here. And fold it on half.
And here I do have my extra piece here.
That will be interesting.
Okay, I'm going to glue that paper back.
This one here [laughter]
something new.
I'm going to continue with all of these
bags.
I do have all pages cuted. Now, I'm
going to grab my corner punch. And
because I don't like these sharp corners
on my pages, I'm going to use
that corner punch to cap
all the corners
to make them softer
and better for me. Like this. Here on
the bottom, I do have same corners. So
this way I'm going to cut it
on every single one of these papers.
So I do have all corners rounded with my
paper punch. Uh I'm going to separate
pieces which do have this this part
where the paper back was glued together.
And these will be like my first papers
in the signatureish. Signature will be
two pages only. So it's minimal
signature because it's very small
journal. So I will have I should have
Yeah, I do have five of them. This one
it's on different place. Look at that.
It will be even more interesting. And I
will have
papers which will go inside.
here and here.
So each of them each of these papers I'm
going to cover with these beautiful
decorative papers and I will do it
exactly same way. So I think it will be
much better if I will show you what I
did here
on each of these papers. So this one
it's like this first one. So here, as
you can see, my paper is ending here.
And I do have strip of green paper
here on this little spot. And then that
rest,
this one, I do have different paper.
This is holding on this. And I just
glued my
pocket
in the middle and cuted these sides. I
will show you that in the process.
One more thing before I will start to
cut decorative papers. Uh what I did
also on these pockets, I left only that
bottom top. Going to show you.
I do have only that bottom top and this
top side. I cut it straight.
So you can uh take a ruler if you need
straight edge and draw
a line there and then cut it with your
scissors. That's what I did because I do
have uh issues with controlling straight
lines. I need the straight lines and
rounded corners. I'm not sure why,
[snorts] but it's what I am. So I draw
straight lines and then I have cuted
that top side uh along those lines
nice and straight and it did make me
happy. And then I cuted of course this
behind that as well
right there.
And this one I have reinforced
with a glue just to make sure it will be
not
flying everywhere.
And I can use this one to reinforce that
top as well. So any kind of offcut could
be useful.
Yeah. Yeah.
when it comes about matting my pages and
creating an extra pocket like I do here
like this one is made like an extra
pocket. I just glued that matting paper
that decorative paper on three sides and
from this side I do have a pocket.
So when comes on matting and uh placing
decorative papers
uh I'm always
making the cuts one quarter of inch
smaller than is the size of the paper.
So like here
this side of my pages it's always same
actually it's five and one quarter and
this decorative paper and paper here
that will be this one they are 5 in long
five
so always one4 of inch inch shorter. And
also this one
to that um to that dividing spot. This
is
two and 3/4. And my matting paper or
extra decorative paper. I do have here I
do have slightly bigger than 2 and 1/2.
I do have two and five eight. So when it
will be placed totally to that fold I
will have beautiful frame around these
edges. And here with this matting paper
I will take same exactly same paper
punch which I used for corners.
And I will punch these two sides. So
when I will glue it down I will follow
the shape of my page. So this one will
be here.
This one will be here
like this.
Now on these pockets I will do same.
I did cut it one4 of inch smaller paper
on this side and on this side as well.
So when it will be glued down, it will
create beautiful decorative frame all
around.
And before I will glue it down, I will
also decorate this and this. For that,
I'm going to be mostly using offcuts
from my 6x6 papers. I will always have
some kind of offcuts because my pages
here needs only those 5 in paper. So I
will always have an inch of cut from
each of these papers so that I can use
here in these folds.
And I'm going to literally just eyeball
it there
because it is mostly for reinforcing
that side of that paper back.
So one here
And one there
and I do have a reinforced paper back. I
need to let it dry, of course, not
unglue it.
Now, when I [clears throat] glued these
pockets on that little flap,
I made it this way just to make sure I
will don't put too much glue all over of
that little flap.
Glue that down.
So, I do have it glued. Now, I can cut
off this and this side.
Yep. Come on.
And I did use another decorative paper
and glue that from the bottom.
So then I had interactive little page
with funny opening. This is really
brilliant idea. I love this pocket so
much. It's easy to do because it's
already made on that on that paperback.
And then every other papers
I have cut it in the size I need. Even
if there was this one.
So let's say I will use this paper maybe
here.
So I do have it in the size of my page.
I'm going to cut those two side corners
same like it's on my paper here
and here. So I do have this one. But
then there is
that little you know little top.
So what I did I always place those
decorative papers
this side the way I would like to see
them.
then draw
this entry
and then use my scissors
and cut along
my drawing. So I knew
that there will be a little gap
between decorative paper and edge of my
uh of my
between decorative paper and edge of
that brown tape uh tape brown paper. I
think I'm going to place it this way so
you will actually see
like this.
Now when I will glue it down,
when I will glue it down, I will put the
glue on this side, this side, and this
side. And with that, I will create
another pocket.
Like this.
And with this gluing I have created
pocket from this uh from this side. Not
going to put there anything yet. I need
to let it dry properly. So the glue will
sit. I can also used sewing machine and
do all kind of sewing. I can do also all
kind of stamping. This journal I have
created for Instagram real and it was
kind of like easy peasy I will be lazy
journal. I did do that doodling all all
around and I also used my uh sanding
tool, my nail uh sanding what is it tool
[laughter]
and I did sanded edges of my papers
because I do love how beautiful it looks
like worn paper,
old paper. So, I did use my
nail polish tool or sanding tool
on all edges of my decor,
pardon me, decorative papers
like this. And then on that
I have used my pen.
You do have here um
fontine pens. Is it that way? Like uh
ink pens. This one has brown ink. Really
beautiful ink. And with that I did my
doodling.
Not [snorts] totally
straight line more that doodling.
Enjoy it and feel free. Nothing too
serious. Just enjoy to follow the edges
of the decorative paper.
Not sure if you can see that. And here
is a little bit of
sneak peek of my doodling.
And again, I did make this drawing on
every single one of these pieces on all
pages. You can use your sewing machine.
You don't have to do this. Uh if you
don't have decorative papers like this,
you can use book pages or you don't have
to use any covering papers at all. You
can use only uh papers from those paper
bags and that will be totally okay. You
will have beautiful pocket
like this one. I need to unglue it.
Beautiful pocket like this. And then
brown papers for writing. That's totally
okay. So I do have prepared my five
signatures and I also prepared pieces
for covers. I do have here
for each cover I do have two large
pieces
and now I'm going to tell you
measurements. So my papers for
signatures
they are
if I will take that largest part
five and 14 by
3 and half that's measurement that
largest measurement of my signature
papers and the papers for covers I do
have two large pieces they are
five and half
by 3 and 5/8
two of them. Then two smaller pieces
which will create decorative element
like this kind of like
frame on the top. So these smaller
pieces
they are 5 and 14
by
2 and 3/4. That's these two pieces. And
then I do have two pieces which I will
glue inside
once the cover is done. And they will
create those end papers likeish or cover
from inside. And the size of these
papers is 5 and half by
3 and half. They are just slightly
smaller
than these large pieces. Just really
very slightly smaller than these large
pieces. They they should cover most of
that paper. So I do have this prepared
for front and back cover.
And to create that cover, I'm going to
take one more paperback,
I'm going to open it here on the bottom
and then
find where is it glued? It's glued here
in this spot. So, I'm going to unglue it
right there.
So I do have nice beautiful piece of
paper and I think I'm going to use the
same like before that folding as my
guide for how big spine I want to keep
because if I will place my signatures
together and place them here in this
spot,
it will be just exactly ly spot for my
signatures. So, I'm going to keep this
folding as my navigation for where I
will place those large pieces
of the
craft card here and here. And this space
is [snorts]
1 and one4 of inch in the width.
I'm going to take glue
and glue my
papers. Oh, first actually I forgot.
Look at me. First I'm going to create
that uh double layered cover.
So I can place it right here. And as you
can see this piece
it's smaller. So it does create
beautiful
frame around and once it will be covered
with this paper it will be really
beautiful decoration. I'm going to do
this I'm going to do same with this
second piece.
Now I'm going to put the glue on this uh
this side of my card stock where there
is that double layer of that card stock.
And I'm going to flip it over and place
it along this fold. And I'm going to
keep on this side here about
1 inch of paper.
Flip it over and press everything
nicely.
Now I'm going to flip it back.
And I'm going to take that second paper
and on this reinforced I on on this side
where I do have the double layer. I'm
going to put the glue and same like
before I'm going to flip it over and
place it here.
And I will try to match the high of my
papers.
I can take this one
as navigation. So slide it to that card
stock here. And then I can see how
[snorts] high I should go with this
paper. Flip it over. Also I need to
point that uh I used corner punch which
I used on my papers uh pages here. I
used same corner punch to punch these
round corners here and here. And
>> [snorts]
>> uh also on these papers and I pointing
them outside, not inside, not to the
spine, but outside for beginners.
I do have glued my card stock inside.
I'm going to cut that paper back around.
I'm going to keep that one inch all
around.
And now I can glue my paper
to the card stock. So first I'm going to
uh glue corners
and I'm going to fold it this way
around the corner and press it nicely
all around.
And same I'm going to do on all uh other
corners. All those three other corners.
And now [clears throat] that rest of the
papers [snorts]
now because this is a paperback only I
need I knew I need to reinforce it to
make sure that it will hold beautifully
my signatures. So I have used this
fabric tape and I started [snorts] about
here about in the 3/4 of that high.
And because my tape wouldn't cover fully
all uh all spine including sides of my
cover. I decided to use it slightly
uh over the edge of front cover and then
down
and wrap it around.
[snorts]
And here on this side, it's great
navigation to follow those cards I used
as decorative element.
And I'm going to keep it open for now.
And I'm going to use another strip
and [snorts] cover
that second part.
And again here I'm going to follow
line here just to keep
nice straight lines
like this
and fold [clears throat] it down.
>> [snorts]
>> I can glue straight away also inside
papers.
one here
and one here also before I will glue it
down. If you would like to use some
label holders
maybe like this one where you will use
brats do it before you will put those
inside papers so then those inside
papers can cover the brats of that label
holder. I'm gonna use that label holder.
So before I will use that, I'm going to
also distress my cover. Give it slightly
vintage look.
I'm going to be using
Wut stain distress ink from Ranger.
And just add
the color to my paper back.
And here I'm going to spray it with
water a little bit.
And I'm going to let it dry properly.
And I'm going to do same on that other
side of my cover.
I do have my cover prepared. And now I
can place the label holder
on the cover. So probably somewhere
here.
Yeah,
like this
one hole.
[snorts]
And just to make sure I am on the
straight line, I'm going to be using my
ruler and make a position.
Yeah, I think this way
it will be straight.
Place the branch
and fix them here.
So now I do have my label holder
prepared
and I can glue inside
these decorative papers.
I do have my papers glued now. Uh I have
draw lines in that cover before to make
sure that I will sewn my signatures nice
and straight on the right spot. And I'm
going to do same here. It's good to
make yourself your work easier not to
struggle. And I don't mind that there
will be a little bit of lines because I
do draw and paint everything all around.
So with here will be just a little bit
of painting where I was sewing my
signatures. I actually don't mind that
much. I do take it as another decorative
element. So because I do have five
signatures, I'm going to be following
centimeters here. I mean cm ruler here.
And every half cm,
I'm going to make a little mark for
myself.
I do hope [clears throat]
I am making right spots. And same here.
I can't see that properly.
I think I need new glasses.
And now I'm going to follow these
draw lines. And then I'm going to poke
the holes in my signatures.
I do have my five lines drawn.
And for poking holes in my signatures,
I'm going to be using oval. And this my
kind of guide for poking holes in my
journals.
I'm going to be opening in the middle
positioning
my papers
the right way. So I need to make sure I
do have it put together nice way as they
do belong together. Then I will put my
poking guide here. I'm following this
line with the bottom of my signature.
And then I do have there are three holes
and I can
poke it through. I'm going to be doing
exactly same holes on all five
signatures
and same guide I can take for mapping
here.
where I should sewn my signatures. So,
I'm placing this
on my
cover. I think maybe it will be better
with with the signature itself actually
because it's smaller than the cover. And
I can see the holes here,
here,
and the last one. It's here.
And now I can
make a line here
and here. So I know where I should put
my needle.
And the rest of the work is quite easy.
I'm always starting
from the inside. Most of the time when I
am sewing my signatures in the journals,
I'm starting from the middle.
And
I'm making very easy three
point stitching here. I'm going to
actually
poke the hole from inside and hold my
finger here to know where I should go
with my needle. Somewhere here, I
believe.
Exactly.
Now here I'm going to follow this one
and poke it through.
When you do have a black fabric on your
spine,
it is not always easy to see
the dots, the holes.
So we should help ourself with anything
possible we have.
and make a knot.
And one more. And because I'm sewing
each of these signatures separately,
I'm going to
when I'm going to take another uh
another thread. This one it's short
already.
So I do have sewn first signature. And
this way I'm going to continue with
every single
next signature.
And this is my very simple,
beautiful journal with those funny
pockets. I really love them. reads are
awesome
with
cute little pages with so many pockets.
I need to create some tags. But I think
uh I'm going to actually try to decorate
this one and write something into this
journal or into these to use them for
some uh journaling, you know.
I really love these pockets. That was
cute inspiration. So this is my
mini journal made from paper box and
from one old 6x6
uh paper pad. Not even all papers have
been used. I still have plenty to use
for cards and inserts.
And each of these pages they do have
pocket. And here I do have this one.
Okay. The other side is wonderful.
And again open.
So that's mini journal. You can create
from paper bags. And as I said, you can
use either decorative papers or you
don't have to use any decorative papers
at all because that brown paper, it's
just perfect for writing. So if you do
like to write something in your journals
and I do hope you do like it, just try
this one because you will create really
beautiful, very cute little journal.
That's all my sharing for today. Thank
you so much for joining me today and
spending your time with me. I hope this
inspiration got your attention and you
will try to create this little journal
uh pockets
made from paper bags I saw on Instagram.
I will put link down below for that
video. Go to have a look. And that's all
for today. I will also place links for
those paperbacks.
Yeah, that's all for today. Thank you so
much. Have a wonderful day. Take care of
yourself and I will be back soon. Bye.