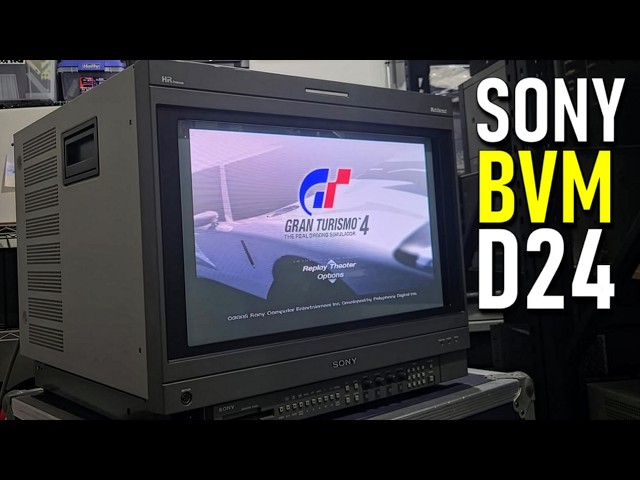
Video summary
The video features a detailed testing and configuration session of a rare Sony BVM-D24E1WA, an 8,000-line Trinitron CRT monitor that has been extensively restored. The presenter begins by showcasing the monitor's primary RGB input capabilities, noting that this specific unit is one of only 106 ever manufactured. To achieve a clean signal, he utilizes modern adapters to convert VGA and PC Engine outputs into the required format, emphasizing the importance of terminating each color line with a 75-ohm resistor while leaving the sync line unterminated. He also demonstrates how to resolve initial synchronization issues by entering a specific code in the extended menu to enable VCR mode, which clears unwanted screen stretching caused by incompatible sync signals.
Next, the presenter explores the monitor's versatility by installing additional modular input cards, specifically the 21D accessory card, to test various video formats including component and composite inputs. He successfully configures the system to display PlayStation 2 content in both 480i and 480p resolutions, adjusting settings like safe area indicators and screen rotation through the front-panel menu. While he manages to get composite video working on a secondary card, he encounters difficulties with S-video functionality on an older, unrebuilt card due to internal blooming and potential capacitor issues, though he notes that the signal eventually becomes usable after some troubleshooting. Throughout these tests, he highlights the monitor's ability to handle diverse resolutions and input types, underscoring its status as a highly desirable piece of equipment for enthusiasts.
The latter part of the video focuses on the critical maintenance aspects and operational precautions required for this high-end CRT. The presenter explains his decision not to rebuild two specific boards—the buffer board and the ISR board—because they contain non-volatile memory that stores convergence, purity, and serial number data; replacing capacitors or removing batteries on these boards would erase these settings. He also provides a stern warning about operating the monitor, explaining that the BVM series was prone to tube implosions if users pushed brightness and contrast levels too high, causing voltage overload. Consequently, he advises owners to run the display at 70-80% brightness in a dark environment to ensure longevity and safety, treating the unit with tenderness despite its robust build quality. The session concludes with an appreciation for the monitor's rarity and value, noting that prices have skyrocketed due to their scarcity, making them "unicorns" in the collector market.
Read the full video transcript
Today I wanted to do just kind of a
relaxing more chill episode. I'm in the
um vault storage area where I keep all
the CRTs that are in the queue and the
ones that are finished up and also the
ones that are very big that's hard for
me to transport out into the other shop
and uh also the more fragile ones. So,
we're going to go through uh the shop
today and or this vault and we're going
to do some testing on
this guy. This is
none other than the
BVM
D24 multiformat CRT.
And this one has been pretty much
entirely restored.
There's
a bunch of cards in here. They've all
been rebuilt aside from a just two that
contain data with um memory that I
didn't want to wipe. So, we have spare
boards that have been recapped of both
of those boards as backups.
Uh but right now, I'm using
RGB for this first test that's we have
running on the screen right now. Here it
is. It's the D24E1WA
and this one is a serial number 106. So
this is the 106th
one of these made. So it's an earlier
one. This is the main input card that
I'm using first for this test. So the
lineup here is green, blue, red, and
then I do have to have a 75 ohm
terminator on the output
of each color line there. And then
finally at the bottom is sync. And that
does not need termination. You don't
need to worry about terminating your
sync at all, but you do need to
terminate each color. And these are some
really nice Extron cables that I'm
using. And I'm able to use that because
of a couple cool modern devices. One is
a dongle
from Mike Chi. So the Extron cable goes
right there, goes to VGA. This dongle
allows me to go straight from that
into Sega 2 style adapter into this. Um,
it's from Insurrection Industries. I
can't remember what the device is
called, but it allows you to just plug
in the back of a PC Engine and get RGB
to the uh Sega 2 adapter. So, that's all
done like that. And then, if I want
audio, which you know, BVMs do not have
audio support for the most part, I can
do a 3.5 mm
stereo audio out of that. So, that's
what you're seeing on the screen right
now is 240p through RGB.
And I have AirZon on here, which is not
a great one. It will scroll some, but it
looks it does pop nicely if I can get
the uh timing to line up like that on
the camera.
So, that's the first one. Now, I did
have to put the CRT in VCR mode when I
first powered it on to get this to work.
And that's a pretty easy process.
You just have to um well, what you'll do
is you'll send in a sync that the BVMD
series does not like. And what it'll do
is it'll make this big wonky uh stretch
at the top of your screen. And then to
fix it, you just need to go into the
extended menu, which is under the main
menu for setup.
And when you get into that extended
menu, you need to input four ones. most
of the time. That's the default
password. Then hit enter. It'll get you
to this extended menu. And in here,
right at the bottom, is a VCR mode. If
you turn that on and hit enter, it'll
save it as being on. And then you won't
have that sync issue. It clears it right
up. Um, at least on this console, and a
few others may have this problem. Uh, so
that's how you fix that. And uh all in
all, I mean, this is like one of those
highly desirable CRTs, right? So, next
up, I want to try out another format. Uh
but I need to see what the configuration
is on the input cards. So, I'm going to
set the camera up and just like
nonchalantly walk through that. We'll
see um what configuration we have. Cuz
what I'm using now is I'm testing this
secondary
analog digital input card, which is a
21D,
which is marked right down here. This is
an accessory card that does a bunch of
uh different inputs and allows you to
have additional inputs into the TV into
the TV into the monitor. And uh right
what I have set up here is component
video. Now I have to put terminators on
the back of the outputs for this uh but
it's the same green blue red setup right
there for uh PlayStation 2 test. And
then I'm using here's what I'm using.
I'm using these HOSA 75 ohm adapters RCA
to BNC. Now this is one I'm just trying
out uh for the first time but it's
higher quality. It's supposed to be 75
ohm, which you want if you want to check
those out, too. I'll put a link in the
description of the video um on that
part. So, now we've got that. The
PlayStation 2 is actually running on the
main menu, and I've been testing, and I
set it up manually to be in component
mode down there on my little KV9.
So, what I have to do is come down here
to the front of the monitor and first
off,
uh, let's press. So, right now I'm on
input two. That's a safe area. I don't
know why that's on.
Okay, so somehow the safe area indicator
got turned on.
Crazy. Let's see.
So, we should be able to do input config
safe area display. So, to take that off,
we just have to hit enter here and turn
that off right there.
And so, this is channel one input. Yeah.
See? Hit enter. Okay.
So, I'm going to go over here and I'm
going to hit input three. It should
turn. We don't want to do that then.
Oh, here. Okay. So, here's
um
well, here's black and white.
This is
input five. It says 480i.
It's so weird that it automatically.
So, again, input configuration. Oh, this
is PAL. So, it thinks it's PAL.
We could go component
And that should turn it to There we go.
Back to color. Great. So, it was just
set up for PAL.
And slot number five, input 456.
Uh, internal sync is what we want.
Screen mode. Sure. 16 by9. Safe area, we
want off.
And I keep forgetting. Okay.
Enter. Okay. So, this should all be
good. where in this input is now on uh
so let's back out of the menu.
Okay, so we're in 48060i
which is uh interlaced.
So that's input five above input two
should still be running. Yes, back into
air zon and 480i. So, let's go switch
back over here
and let's close up
the PlayStation because I have Gran
Turismo in here. Man, that that rotation
is driving me crazy. So,
first thing I'm I'm I'm going to rotate
the screen a little bit. Let's see if I
can get that to
go. setup
alignment
rotation.
Yeah, it's real easy to adjust this
stuff in this menu. So, we're going to
adjust that up and flatten that.
That looks better. Just that easy. Um,
it's not been obviously calibrated yet,
but we don't have to have it calibrated
to test it all the way out. So, let's go
now
and go back to the main menu on this
game.
And I think that's how we can change the
input resolution to higher resolutions.
All right, let's first try 480p.
Okay.
Well,
what's it doing?
Interesting. It's not want to stay in
480p.
All right. Well, there it is. It's
switching over to 480p. So, it's just
something where
I'm just an idiot, so I'll edit out a
lot of that.
But you can see we got an alignment
issue.
So, I'm going to go in here and go to
alignment.
I'm going to reduce that horizontal size
a little bit.
Well, it'll be fine.
Okay, so there you go. We do have it
actually working. I doubt I can beat
anybody with like a 2001 Ford Kia on
this game, but uh my issue there was
just not knowing how the PlayStation 2
would set up for 480p. Look at that
stupid car I picked. There's no way this
is going to be any good.
Full throttle. Which Which button's
throttle,
let's go, Kia. All right. So, yeah. Uh,
it's a little dark. Let me see. Here's
what I'm going to do. I'm going to pause
it. I'm going to turn the lights out.
Another thing I hate to do is use really
any time of on these screens. So, I try
to turn down the color, not stress the
tube out too much, and the brightness.
This is more of a
contrast issue, I think. Yeah.
Very slowly.
Cool.
Oh, yeah.
I mean, I don't think I'm going to catch
up to those cars with this Kia.
So, component m video 480p
and I imagine 1080i will work also.
I'll test a few more consoles here just
so we can get a good idea of what it
looks like.
All right. So, if I stop right here,
just because I feel like I I'm seeing
like
it's very touchy, right?
But if I turn it on, like that's the
settings that are built in. I just don't
like to run it that high, at least not
on the uh brightness.
So, other things you can do, um,
let me turn the lights back on.
So, a lot of these settings, well, these
two main things right here, chroma and
phase, you don't really have any impact.
They they don't work on RGB because
you're bypassing any filtration. But
when you're using component, you can use
these
to like fine-tune color or get rid of
color altogether.
It's a color filtration system.
that goes over that. Now, this monitor
should be able to do composite video.
So, let me uh set up that real quick.
All right, the next session of testing
is about to begin. And I want to test
some lower end video. We're going to
test analog
NTSC composite.
And we're going to do that with an
additional 21D. Now, this 21D has been
fully rebuilt and
um so we're going to test it and test
composite video, which according to the
connection um guide for this card should
be just a terminator here and then a BNC
here. And hopefully it will
automatically show composite video. And
then I have another card right here.
Now, this one's not been rebuilt and
I've honestly never tested it. It was in
my um donations bin or parts bin from
another BVM or something. But this is a
24N
and it does component video, but it also
do uh Svideo. Now, it separates it out
to Y and C.
So, I don't remember. I think it's Y and
then C. So, we'll have to adapt into
that. And I can do that using this
adapter.
which allows me to go
from Y and C
to Y and C there through B and C and
RCA. So I can plug this in and then I
have a nice Svideo input
uh where I can test Svideo on the Super
Famcom.
Now to get these
engaged with the monitor, it's powered
off. It's in standby mode right now,
actually. So, I'm going to just slide
these in. They go in these card slots,
and they slide in.
There are slots.
If you get it in there correctly, it'll
slide in the slot like that. And then
you have to push it in, and it'll click
like that.
And you can turn these screws a little
bit.
So, it's
anchored down a bit. I might need to
push this one in a little bit more.
We're going to do that one. Then, we're
going to take this one out, which again,
you just unscrew and screw in. I don't
know that that's tight enough. We'll
push this a little more. And uh I'm
going to get this all set up. I'll get
the monitor turned back on here in a
second. I'm going to install this card,
too. And then I'll install the cabling.
And we'll see uh how it works and how to
set it up through the front of the menus
in the monitor. Now I'm going to first
off
send in. Let's hope this fine thing
still works. Yes. Okay. So, right now
it's in Turbo Graphics mode and it's in
RGB mode through the main card. The
other cards have been installed. You
don't really have to do anything. It's
auto sensing on the monitor, but they
will need to be programmed as to what
inputs going into them. Uh first off,
I'm just going to send in maybe
something with a darker background.
Oops.
Let's go legendary
axe one because I know that a lot of
that is a dark background and that'll be
easier on the camera. Well, should be.
There we go. Okay. So, what I'm going to
do now is I'm going to get into the
menus and I'm going to try to change a
different input. Like I think input
number one was SDI. My goal here first
off is to program
the input
uh for the Svideo maybe because that
one's plugged in. I'll show you that in
a second. So, let's go to setup input.
Well, let's go to an input that's not in
use. So, we'll leave that one. This one
says it's SDI. So, let's let's change
this. No one's using SDI anymore.
Let's go configuration. Yeah, we can do
that. No, we want to do composite.
Oh, YC. Why is it not on there
slot number five?
Okay.
Can't change that one.
So, that says we can go composite
right there.
Internal sync. Let's go down here and do
4x3 normal.
Okay. So, what hopefully I should be
able to plug this in to the back of the
uh monitor now and we can get
video to it. All right. Well, I've been
able to get composite video on our
screen. And check out that muddy
composite video on a 1000 line BVM tube.
Um, it still looks awesome. Scan lines
and everything like I don't know. Uh,
anyway, that's comb filtered and four
line separation filters. It's got a
bunch of crazy filters built into that
uh to these monitors. Anyway, let me
show you how I got it running. I do have
it coming from the super uh Famcom down
there over into the same card that I
tested earlier, the 21D.
Uh I I couldn't get these other two
cards to function at all. I think
there's something wrong with both of
them, and that's not unusual. I'll see
if there's a way I can figure out how to
get them working. Uh I initially tried
to move the slots around on here, but
then it just kept causing more issues.
So, uh, let me I'll show you how the
programming works in here because, uh,
you notice this has input this has a
one, a two, a three, and then finally
down here, the one I got to work for
composite was input four. And you can
actually use four, five, or six for
composite video. The only problem is
you're obviously going to have to unplug
your component video. If you're trying
to use it um for component video, you'll
have to unplug it and uh send in the
composite video that way. But I still
got the main card here connected with
the RGB and sync. And actually, that's
still running. So, let's just make sure
what input are we on right now.
We're on input one.
So, input two. There we go. So, input
two is RGB, input one composite,
and
yeah, you can see that's really muddy.
Let's go down here. Check out my
favorite test screen in our muddy
format.
Sorry about that. Yep. Okay. So,
composite video check, component video
check, and uh I don't unfortunately that
card, the 21D is not listed as being
able to do S-video. You may be able to
do Svideo connected to the main monitor,
but we'd have to have a working 24N, I
know for sure, to have an option card
that does Svideo. And that one's not not
working. So, unfortunately, I don't
think I'm going to get an Svideo test
done today. Um, if I do find a way, I'll
I'll be sure to let you know.
I moved the NTSC decoder over to slot
number four. And now it's showing up in
the status as being there. So slot
number four is
the one right there. This is slot four
cuz you've got one, two, three, four,
five, six.
And then I need to see what it says if I
if it'll let me configure that now on an
input. So
cool. Look, it's showing up 24in. So
maybe
we can get this.
Let's go to input 8. I'm putting input
eight. I pushed eight on the bottom.
Let's go to setup
input configuration.
Um,
oh look, YC.
Okay.
And then
slot.
No. Come on. Change to NTSC.
Okay.
Slot number four.
One, two, three,
four, five, six.
I'm not sure if this going to work.
Let's see. I've got it plugged up.
Yeah. See, something's not right on this
configuration. Why is it trying to do it
like that?
Why PBPR like that?
Okay.
Wow. So that's weird.
Internal sync, right?
composite YC
H. Let's turn that off again. Let's see.
Okay,
input 8. I finally got it to change to
YC. But see, it's still saying inputs
number one, two, and three. It shouldn't
say that
because it's not separated out like
three different things.
It's internal sync
picture off
feels like something's just not right.
Let's go back here and see. I'm going to
try input.
All right, let's go back to one, two,
three. Now, if I turn that on, it looks
nuts cuz something's not right. Let's go
back here. It says input one, two, and
three. What if I switch these?
Does that work or look even worse if I
switch those two?
No, that's not right.
All right. So, there, there, there.
Yeah. I'm not entirely sure why
it's not
it's not looking that good, is it? Hey,
it looks a little better. But, you know,
that could be the from the crappy power
supply I have there.
But
I have a really low-end power supply
that may be showing through some
information. But we actually did get
it to show up on here.
Let's see what happens if I go back to
like input two and I turn on RGB. Oh, of
course. Right. Pops out the back.
Okay, RGB looks good. Fine. RGB looks
fine and normal.
Right.
We get out of here. So, input one will
be composite video.
Input two is this.
Right. Yeah, this is set up as
composite. That's fine. Okay. One, two
is RGB.
And then when we try eight down here
looks better, right? See, we're getting
cleared up. Just looks like donkey dud
duds. I don't know that. Uh
maybe because of
a number of things.
So there's not like a different Oh,
there's a zero. Let's try zero.
I just think it's just a dirty signal.
Let's see. Yeah, I think the Svideo is
fine. It's just maybe the card itself
needs to be rebuilt. It's got a bunch of
blooming and stuff going on in it, but
it's starting to work now.
Okay,
let's I'm going to test that other input
card in the same slot and get rid of
this one because I really do think that
it works. It's just not
not clean
because everything's functioning on it.
So, there's two things going on. It's
bad power and then it could just be.
Yeah, it's got weird blooming and nasty
going on on the outsides. All
right, but hey, at least it's like
working. So, Svideo did work on the BVM
through the BKM 24n accessory card, but
the card appears to need to be recapped.
There's a lot of surface mount
capacitors on it and it's not part of
the deal with the owner. This is
actually one of my cards. So, if if the
owner wants it, I told him he could, you
know, buy it later on if he decides he
wants to add Svideo. I'll recap it and
he can get it from me. Uh, but that's
the interesting thing about this monitor
and BVMs in in general. Uh, they do have
modular cards on them and so you do need
certain cards to get inputs to work.
Now, thankfully, there are options to
help out um with aftermarket cards that
have been built and kind of replacement
cards for these BKM cards. Not every
single one of them, but a good portion
of them. Uh anyway, that's going to end
the testing session for today. I am
going to take some minutes here at the
end of this video to discuss more on
this Sony BVM with you. So, if you just
wanted to watch the testing session,
that's it. Thank you for coming. Uh, but
if you want to know more about this BVM,
I'd like to talk to you candidly about
it. Uh, first off, there is a reason
that I did not rebuild every single
board on the main BVM and I'll go
through that here. Now, on the 24in D
BVM, there are two boards that contain
memory. Uh those are the buff board BUFF
that sits between the power supply and
the deflection card and then there is
the ISR board which is all the way at
the other end. It contains all the data
like the serial number, the hours, all
that's logged in that ISR board, most of
the settings etc. Now, the buff board is
only on the 24 in and it may be on the
32in BVMD series. I am not sure, but
it's for sure on the 24 in. It's not on
the 20 or the 14 or the 9. So, it's only
on the 24 and bigger. And that actually
is a board that has added controls and
uh settings for convergence mostly and
some purity stuff.
And all that is kept on the battery. If
you remove the battery or you recap it,
generally it's going to throw all the
settings off and whatever was done to
set up the BVM will be thrown off and
you could have a bunch of convergence
and purity issues. If the board fails,
you'll notice a bunch of weird splotches
shown up on the board on the screen. So
you can try changing the battery,
recapping the board, and then adjusting
the settings in the buff board settings.
Now, the BVM does have settings for each
board. So when you go in the maintenance
mode, you can get into each individual
board and make the settings adjustments
for that board basically menu down into
that board. That's the great thing about
the BVMs. Now, um, those two boards were
not built or not rebuilt again because
of that memory. So, we had two spare
cards that are coming with the BVM that
were part of an old salvaged BVM with a
blownup CRT. And so, the buff board from
that one and the other um ISR boards are
both sent, but everything else was
rebuilt in here. And that's uh the
restoration process. I will include a
link in the description for this video
of the capacitor list. And this is going
to go through and show you all the
capacitors that were basically replaced
in this thing. And um this can also be
found at the back of the service manual
for the BK or the BVM D series monitor
which is well documented online. And um
I hate to get too long-winded here, but
I'm going to continue to talk more about
this BVM for a few more minutes. So the
D series uh as we saw does a wide range
of resolutions and a wide range of
inputs. And since it's also widescreen
and then it has a CRT with a super high
line count. Trinitrons really didn't get
much higher line count than this. Um
this one's at a th00and lines. This is
the same tube that's used in the FW900,
which is also highly touted as um one of
the best CRTs that Sony ever made. Uh
that was actually available more along
the lines to consumers. These BVMs were
not. They were originally upwards of 80,
90, $100,000 with a full loadout of
cards and accessories to go with them.
They were very expensive, especially the
time when this one would have been
bought. So, it's not like people would
have had this where they may have spent
$3 to $4,000 for a home version of a CRT
monitor if they were doing some
something with the FW900.
So,
there's a big difference there. Uh, a
lot of hardware, a lot of things can go
wrong. The good thing is is it's modular
based. So, it's easy to service the
cards by pulling them out and putting in
through tests and
servicing them and then reinstalling
them and testing them after each one of
those sessions is done. That's what was
done to this one. And I wanted to say
finally something about like
availability of this monitor. One of the
reasons I really did this weird testing
session today was I thought
it's getting harder and harder just to
even see these D24s
anymore. Um,
they're becoming real unicorns out there
and like the price on them has gotten
really
incredible. I mean, I don't know what
even the real price of this monitor
technically is. It's
a lot of them have just been gobbled up
already at this point by people who want
them. And then
like if you go on eBay, I think that the
last couple I saw were listed
$7,000, $8,000, $9,000 for this monitor,
which I think is a little crazy just for
a CRT. Um, but you know, people do go
crazy over certain stuff, and I
understand its value as the fact that
it's rare. Um, and this also goes back
to like one other thing about the test
session video today. You might be like,
why didn't you just like rip it apart
and show all these, not rip the monitor
apart, but just like throw all these
crazy video uh demonstrations at it and
do even more. And I hate putting time on
these tubes um any more than I
necessarily have to when I work on them.
uh especially like the BVM ones. If it's
just like a PVM or something that's not
quite as rare as this, like a TV or
something that's being serviced, I do
not mind running it a little longer,
running tests through it, doing things
to show more gameplay footage on videos.
But as far as like a DBVM, I'm not going
to go and run up the hours counters.
Now, I do want to get a little outage on
the new capacitors and test them some,
but I'm also going in and I'm manually
turning down. You notice what I was
doing a lot of times. I was turning down
the brightness and contrast on this
monitor. You're meant to, you know, you
need to use this BVM, these two bigger
ones, the 24 in and the 32 in. If you
ever have one of these, they have to be
used very, you know, tenderly. I hate to
say this, but you've got basically the
monitor has more power and more voltage
that it can output than the tube can
handle. And Sony had a big problem with
these when they came out originally with
tubes imploding because they would
become overloaded when people would turn
the brightness up and the contrast up
way too high. A white screen would pop
on and it's supposed to turn an overload
circuit on that should just turn the
monitor off and should go into the
blanking standby. and it's not even
supposed to hurt the monitor, but none
of that really worked. And it winds up
sending current occasionally through the
tube. And you can literally explode the
CRT just by blooming it too much with
way too much voltage and pushing the uh
brightness and contrast all the way up.
I mean, a lot of times if you do that,
it's supposed to kick off. I've seen
that happen with other ones that have
been uh in the shop before where you
turn the brightness and contrast and
it's supposed to turn the thing off as a
safe safety protection. But anyway,
never run these things super bright. You
can run smaller monitors brighter and
more contrast. And even though the
monitor has the ability to do it, don't
do it. They're meant to be run at like
70 to 80% brightness levels and they're
meant to be used in a fully dark
environment. So, if you want to use
these properly, you need to set yourself
up with a nice dark room where you can
control the ambient light. And you need
to use it in an environment where using
it lower levels of dark, you know, lower
settings on brightness and contrast
won't bother you if you want to really
have this thing last as long as
possible. All right, guys. That's like a
super long video. Um, look, YouTube's
made a lot of weird changes this month.
So, if you did va view this and actually
got to this point, please remember to
hit the like button. I have no idea what
the true count for like views and
interaction with this video anymore. So,
if you did like watch this thing and
made it all the way to this point in the
very end, please do click the like
button and I don't know, why don't you
put D24 D24 in the comments if you want
to really help out if you liked it a
lot. That way, I'll know like the people
are actually watching this. Um, if I
missed anything about the D24, please
feel free to add something in the
comments. Um, this is a lot of stuff
that's knowledge. It's just coming from
my head and like my personal experience
and there's very often times where I
don't have I mean I never have a script.
So something I could be forgetting is
very possible. And so anyway, that's the
D24
and I appreciate you watching and your
viewership today. I'll see you guys next
time with some more retro content.