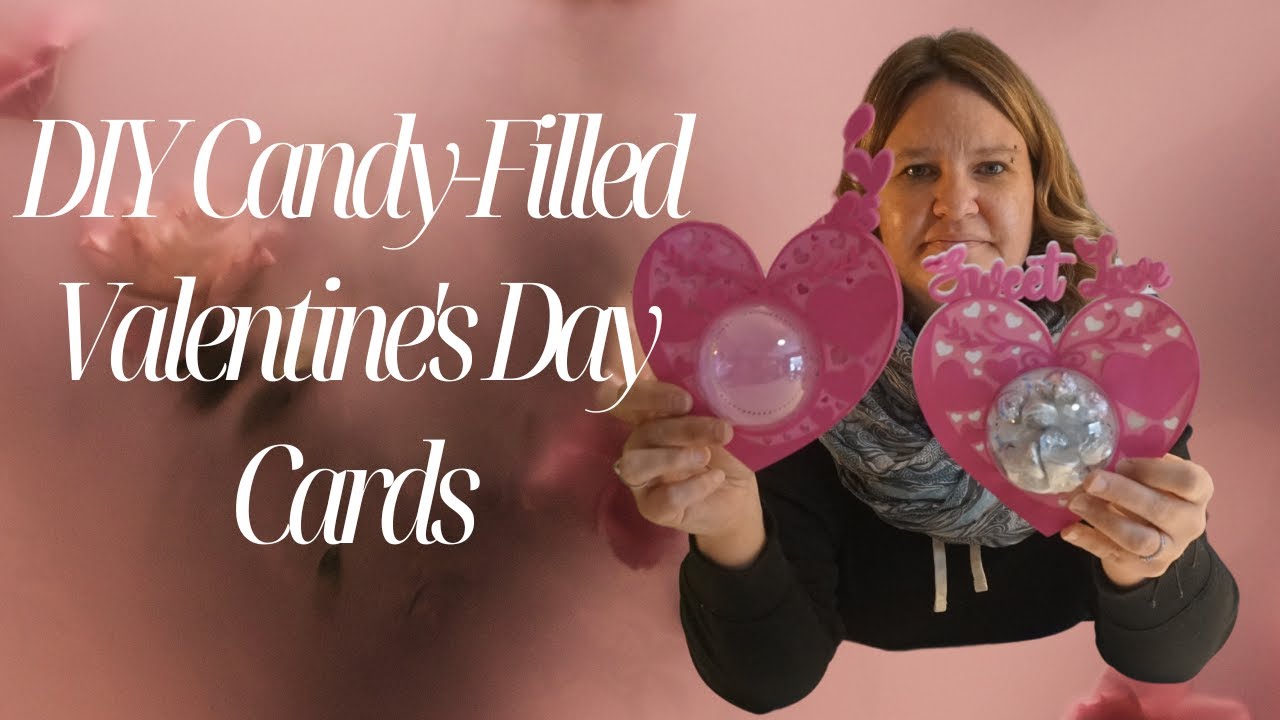
Sweet Surprise: Easy & Affordable DIY Candy-Filled Valentine's Day Cards
Watch on YouTubeVideo summary
In this engaging DIY tutorial, Jen demonstrates how to create adorable, candy-filled Valentine's Day cards using simple materials like cardstock paper, plastic ornaments, and sweet treats. The project is designed to be incredibly easy and affordable, costing under fifty cents per unit and taking less than five minutes to assemble once the pieces are cut out. By utilizing a Cricut machine with a specific "Valentine Candy Holder Bundle" from Creative Fabrica, creators can access pre-sized SVG files that eliminate the need for resizing or complex adjustments. This bundle offers commercial licensing and unlimited downloads in various formats like PDF, PNG, and SVG, making it accessible whether you have a subscription or purchase individual items.
The crafting process involves cutting three distinct layers of colored cardstock from the digital design, which can be customized with any color palette ranging from traditional pinks to whites or purples. These cutouts are then assembled inside half of a plastic Christmas ornament that has been repurposed as a container for candy. The assembly begins by stuffing the chosen candies into the bottom section and securing it in place using a glue pen, which allows for precise application along the edges without creating large air bubbles. Subsequent layers are glued on top one by one, ensuring that text remains readable and that the final plastic cover fits snugly to hold everything together securely.
Jen highlights several practical tips throughout the video, such as selecting heavy 100 lb cardstock for a more durable finish and using glue dots or spacers if additional adhesive is needed during assembly. The finished product features a hidden compartment where recipients can push open the top layer to reveal their treats inside, adding an element of surprise that makes these cards perfect for children or classmates exchanging Valentine's gifts. Because the design allows for easy customization with names and different messages like "Sweet Love" or "Happy Valentine's," it serves as both a thoughtful handmade gift and a fun activity that encourages creativity while keeping costs remarkably low.
Read the full video transcript
hi guys my name is Jen from I create
crafts and today's video I'm going to
show you this very very easy how to
create these little Bobble candy holders
it looks like this when it's filled up
with candy it's three pieces of card
stock paper and then a Christmas Bobble
it is super simple here's the back
here's the front here's one that I fil
did not fill with any candy to show you
guys what it would look like this took
me under 5 minutes to create and
probably about 50 cents to create one so
that was super simple um so let's get
started I'm going to show you step by
step how to make this takes but a couple
of minutes and a few
[Music]
items all right Crafters this has to be
the easiest easiest craft that I'm going
to show you how to do for Valentine's
Day basically you take these you use
three different colors of pink paper or
whatever color you'd like and you throw
it through your Cricut Machine it is
that simple I'm going to show you really
quick this is where I purchased it this
is called the Valentine candy holder
bundle you get all of these images and
you get the commercial license uh
unlimited downloads whatever you need uh
it comes in uh X SVG PDF PNG anything
it's super simple to do I will leave
this down in the description below if
you want to get this particular one and
then I'm going to show you one more
thing so I purchased these guys uh they
are like plastic fillable Christmas
ornaments um but you use half of it and
you fill it with candy basically when
you're doing this so this part here you
fill with candy so basically all you
need is paper uh your Cricut
Machine these um ornaments some candy
and some glue and that's about all that
you need so I'm going to get rid of that
and show you this really quick so all I
did was upload this from creative
Fabrica so for the creative Fabrica um
if you guys know my channel you know me
I like to buy things on a yearly basis
just because it saves a little bit of
money so I have the yearly subscription
for Creative Fabrica so this was
completely free I can't tell you how
much it was because it was free on my
end I download so many things that I uh
just you know it all adds up so I get
the yearly subscription for this and I
think monthly it's like $4 a month or
something so worth it anyways I will
leave all that in the description down
below um all I did was upload these and
put them in they are already pre-sized
for the size of my ornament you always
want to check it your ornament might be
different size than mine um but I'm just
using half of the ornament andk go right
here there are three pieces to each of
these as you can see on the side here's
the first one here and you have the
second layer and then the third layer so
it depends what color you want to use
you don't have to use all pink you can
use like a white color if you want kind
of mix it up a little bit I created this
one I absolutely love it so the next one
I wanted to try out was this one the
sweet love one so I'm actually going to
delete these I just wanted to show you
really quick uh what they look like so
again I didn't have to resize this I
didn't have to attach anything this is
all that I have to do all I got to do is
go to make it I don't care to save my
project and then it will show you all
the different layers here so here's the
darker pink color here is the lighter
pink color again you can go in here and
do white you can do whatever color you
want but I'm just going to see if I have
these three pink colors or maybe I'll uh
switch it up a little bit and put a
white one in here but that's basically
all that you have to do you don't have
to mirror you don't have to do anything
to it so I'm going to which setting I
use for this because I'm using card
stock you want to use something with a
little bit more pressure to it so what I
normally use is is this one right here
the heavy card stock 100 lb uh all you
got to do is go into browse materials
search for card stock and you look for
this one this is the one that I normally
use for when I use card stock so I'm
going to go ahead and cut this out on
these three different colors and then
I'm going to head to my table and I'll
show you how to assemble
this okay so I have all my papers cut
out I'm going to show you what they look
like so there's three of them and I
chose these this darker pink a lighter
pink and then a white and as you can see
there's a little cut out here so I'm
going to show you that in a second but
I'm going to show you what it looks like
first of all so I did this without candy
to show you what this looks like so
there are three layers on here but I
wanted to try something with a lighter
color in the back so this is what the
back looks like so when you're whoever
you give it to wants to get the candy
out all they got to do is push this in
and then all the candy will be in here
this is super super easy to put together
I'm going to show you really quick I
just have this I love this thing this is
a scotch glue pen so one one side has
this tip here and then the other side
has like a
glue bottom here so I'm just going to
use the tip really quick and I'm going
to show you so I got this from the
dollar store so this is $125 for this
whole bag of candy we're going to see
how much we can put in there and then
here is the Bobble there is two pieces
to this it's pretty much an ornament but
I'm just using half the piece right now
so you just want that so pretty much
you'll want to work backwards so I'm
going to put this
and this away the first thing you want
to do is your candy part so you want to
line it up here and kind of figure out
where you want to put it so I'm going to
take my bag of candy and I'm going to
see how much can fit in here kind of
want to stuff it so we're going to see
maybe I can get a couple of
these so I still have maybe two more
that I can use this for so that's kind
of good that was going to go a long way
so what you're going to want to do is
carefully stuff this in here and then
take your glue
like I said it's got the top part on
here and then I'm just going to put this
around the
edge that's why I like it that it has
the tip on it because you can get right
where you need but it's got a big air
bubble in it oh man so we're just going
to put this around the tip here I'm
going push that candy in and I want to
get that candy in
there go around the
edge and you can use like I think you
can use maybe hot glue with this even
but I probably wouldn't cuz it's going
on paper and you just want it to stick
on here so I'm just putting enough on
here and then what you want to do is my
easiest thought would be just to pick up
the paper and kind of go that way and
then just hold it on
there for a little bit that it
sticks but that's where that
little dot comes in handy on the back so
I'm going to let this sit for a minute
it but I'm not going to touch it so then
you're going to want to take your next
layer and make sure it is the right way
where you can read the letters and then
I'm just actually going to take the back
of this part and
then start gluing the back here cuz if
you glue the front you're not going to
know
where the little hearts are on the piece
here so I'm just going to go in and glue
a little bit of this you know if you
have glue dots or spacers on here that
you want to use you can definitely do
that um but I'm just using a little bit
of glue here basically just want it to
stick together so while the other part
is drying I'm just going to go ahead and
put this one on here as well and it's
just layering that's all you got to do
with this which is pretty
fun so you want to put that on there
kind of match up the
top here we
go and the reason I did the Bobble first
is because the second layer is a little
bit tighter so it's going to help secure
that little Bobble there so we're going
to put this on and then I'm going to do
the same thing with the last one but I
think this would be really cute it
doesn't take very long it's really
inexpensive and it is fun to put
together so we're just going to put this
last layer on
here and I love that you see all the
layers on here so depending on what
colors you want to use
use like I said this one has the white
background my other one that I did has a
pink background so you could have fun
going nuts with this you could do purple
you could do pink whatever colors you
desire but I'm just pushing down all
around this plastic part so that the
plastic adheres there so now I should be
able to show you that's what it looks
like and you flip it over and there
again you have the hole that if they
want to break it open so that's what it
looks like so this is the other one that
I did
just the same process glued it all
together but they say different things
this one says Happy Valentine's this one
says sweet love so it has a couple
different uh files you can use but this
is super cool if you need to go back and
use some more glue you can definitely do
that just get the little spacers in
between um but overall this was very fun
it was very inexpensive you can use any
color card stock you want your Cricut
Machine pretty much does everything for
you you just have to put this together
which took me just a couple of minutes
so basically all you need is three items
you need the paper you need the candy
and you need a glue stick and of course
you need a Cricut Machine but that's
about it so this is very inexpensive
like I said if you wanted to give these
out for you know your kids for
Valentine's Day for them to hand out
that would be really cool you could even
customize it you can have them put their
name on here like to and from but
overall very fun to make I hope you like
this video tutorial uh check out my
other video tutorials I'm going to have
a whole bunch more Valentine items thank
you for watching and have a great day
everyone