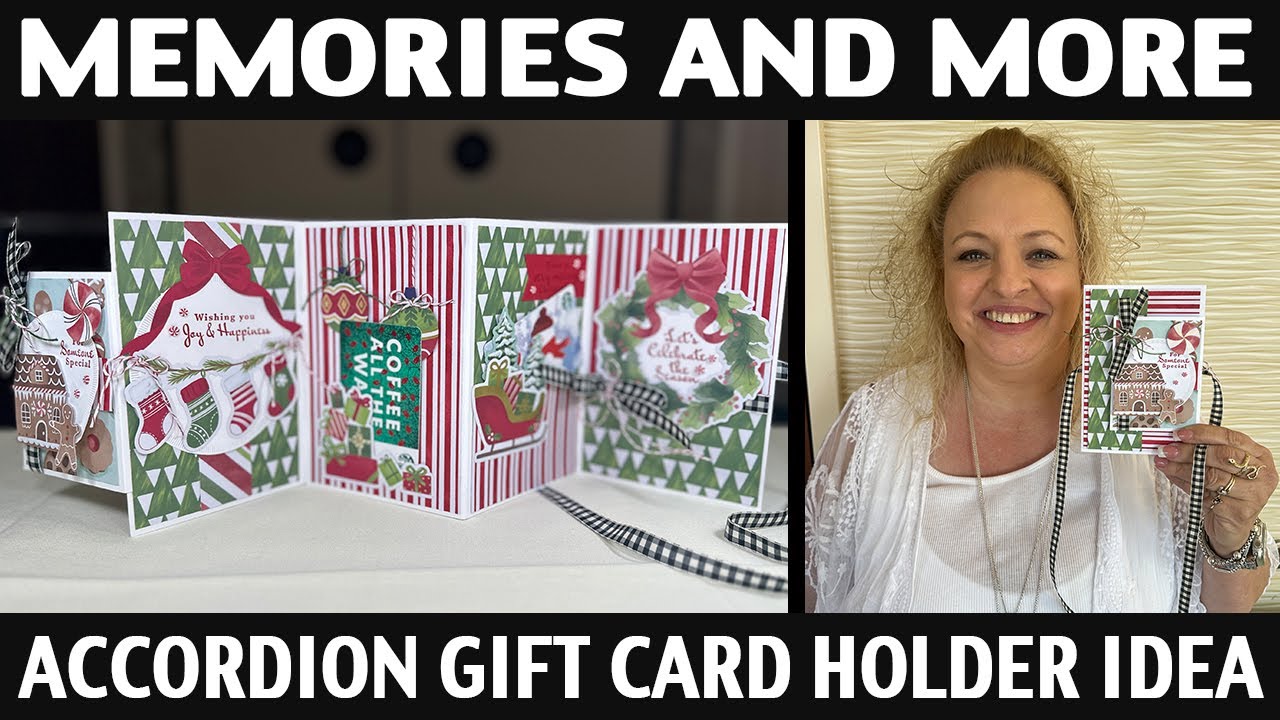
Stamping Jill - Memories & More Accordion Double Gift Card Holder Idea
Watch on YouTubeVideo summary
Amy Colmes, a Stampin' Up! demonstrator celebrating her 30-year milestone in the hobby, presents a creative tutorial on constructing a double gift card holder using the "Memories & More" cards and the "A Little Bit Festive" paper pack. This versatile project is designed to accommodate holiday gifting needs, particularly for children who have moved away, by allowing users to insert two gift cards simultaneously or simply close the book to use it as a standard greeting card without any inserts. The construction begins by creasing three large and one small "Memories & More" card, which are then adhered together using Seal-Tac Plus to form the base of the book structure, with the smaller card placed on the inside to create an initial flap for added functionality.
To enhance the festive theme, Amy incorporates laser-cut die images from the paper pack, red and white twine, and stamps from the "Sentimental Wishes" set to create a charming holiday scene. She demonstrates how to arrange various cut-out elements like trees, stockings, and ornaments onto the pages, emphasizing the importance of grouping similar colors before assembly to streamline the process. A key feature of this design is its flexibility; while it is intended as a double holder, the creator notes that if one chooses not to use gift cards, the interior can be left empty or decorated with small pockets, effectively transforming the item into a decorative keepsake or a simple card with a hidden compartment for extra embellishments.
The finishing touches involve attaching ribbons and twine in a free-flowing manner rather than gluing them down completely, which allows the book to open fully while still maintaining its structural integrity when closed. Amy shares practical tips on managing excess ribbon by saving scraps for future projects and suggests using adhesive strategically at the top and bottom of the back cover to secure the closure without creating bulk inside the book. She concludes by highlighting the value of the "A Little Bit Festive" paper pack, noting that it provides numerous pieces for a low cost, enabling crafters to create various tags, cards, and decorative items while celebrating the joy of stamping as a therapeutic and creative outlet.
Read the full video transcript
[Music]
hello everybody my name is Amy Colmes
and I am a stampin Up demonstrator
located in SEI Valley California and
this month I am celebrating my 30 years
as a stampin' up
demonstrator so um when I first started
my kids were very small and my focus on
my business was a little bit different
than it is now they're grown and out of
the house so um I enjoy stamping still I
love it it's like my therapy and um
thank you Joe for having me and I see
lots of faces in the audience so it's
great to be here um this is the project
I'm going to um show you how to create
today and I've used memories and more
cards along with um the pack called a
little bit festive and this opens like
this and then it
opens my piece is taped down okay the
ribbon has to come out and it opens like
this and it is a double gift card holder
so my kids are grown and I usually do
gift cards now for Christmas two of them
do not live local to me so I'll um put
some gift cards in these and but the
thing that's really nice about it is if
you take the gift cards out it just
looks like a giant card and you don't
have to put gift cards in it so I
thought that was really really cool so I
want to show you how to create this
entire project and um the products I'm
going to use are the little bit festive
papers and the laser cut um images if
you haven't seen this in the catalog you
need to um get it you get three pieces
of 12 by 12 paper and here is the back
side and then you get three sheets of
like laser cut dice so I put them in
here I hope the glare is not too bad but
I'll put them over there on display for
you and then all you do is punch all of
these images out and that's what we're
going to use on our project
today I also paired this with um the red
and white twine the coveted
peppermints the um the natural tone
twine and my favorite stamp set in the
mini catalog called sentimental
wishes and
some memories and more
cards okay so we're going to go ahead I
have everything cut so what I'm going to
show you is basicly just the assembly
and I'm going to start with three of the
large memories and more cards and then
one of the small cards okay so I'm going
to just crease these and so um I'm going
to go ahead and start like this and then
I want to take my first the small card
and I want to put it here so it's
actually on the
inside so my um adhesive of choice is
Seal plus because it is
wonderful and then I just eyeball it put
that down so this is going to create
that first
flap okay then I'm going to open this
and I'm going to open a second card and
I'm put it right next to it and then
this one
is going to go right here so I'm going
to put my adhesive
here and then
here and now I have created my book okay
just going to go like that and then I
have all my pieces cut so I can just go
ahead and assemble this is one of the
laser cut card fronts and I just cut it
down to
4x3 I'll put this on top
okay then I love this black and vanilla
ribbon and have used it immensely and I
don't really measure ribbon I just cut
it and I figure too much is okay because
if you don't have enough you can't tie
your bow so so just tie your bow
here I think I had too much coffee cuz
my hands are
shaking and with a sharp pair of snips
you can trim off your edges then I want
to take a really long piece I don't
measure just put
it and I want this piece to go
underneath here and I want it to be free
flowing so that I don't um you know I
don't want to glue it down with my dye
so I put the adhesive about an inch and
a half apart and then just go ahead and
slide that in right there and then your
Ribbon can go back and forth okay I'm
going to stamp with for someone special
with a real red ink pad and then I'm
going to tape down my house and make
sure it's straight and then my little
ginger man is going to go right here now
you could see I'm sure you saw when I
stamped I got that halo effect on my
piece right here so that would be where
I would put my
embellishments so just open those up
okay so then just grab they come in
three sizes so they're super awesome and
then you can put that there okay this
piece is going to stay long it's a
little cumbersome um you can I'm not
going to tie all the pieces because it
would take me way too long to do this
but I took about um 12 in
of let me just show you one and then
okay take about 12 inches of your any
kind of your linen thread your um any of
the twines or whatever and then I just
pull this up and I tie it underneath tie
a knot and the bow and that's how I got
that piece then I'm going to open it up
and it's very very simple all my pieces
are cut either 3x4 or
4x6 and then my strips are either 1 in
or 2 in wide so the assembly goes very
fast and what I would recommend when
you're using the laser cut images is
grouping after you punch them out group
them together into the colors because
some of them are Blues some of them are
greens and you can kind of figure out
what you would like to do with
um the pieces so this this book I kind
of took all the um red and greens and
put them together other and then this
goes here my tree piece love all these
papers and then this one I what I wanted
to do on this one was when it was closed
I didn't want you to be able to see the
cup so just make sure that that is
tucked under and I always stick stuff on
my fingers like this it's easier to put
it on a bunch at a time okay and then I
have that super easy and then open your
book and now we want to cover up this
part so I use used this here and then
this piece was a strip off of one of the
laser cut pieces put that there then I'm
going to
stamp put this here from our Spotlight
on nature dyes those are awesome if you
don't have those you want those and then
the stockings here stamping up makes it
easy because everything is so greatly
color coordinated and um everything
works together so well and then you just
build your scene as how you um want it
and then I did tie a few little bows so
you would glue dot those on and I'll do
that afterwards just so we don't stay
here all day and then I have this stripe
I wanted it to be all cohesive so when
it was open it all the colors went
together so I just had to work um on
that a little bit with the different you
know colors and stuff that were in the
um the pack so I'm going to put my
ornaments up here on this piece I used
my glue and I only wanted to put the
glue here and then right here so that my
gift card fits in because if you if you
seal it then you can't put the gift card
in but the one thing that I liked about
this was if you did not want to put the
gift card in you don't have to and it
just looks like presents but here you
can see you can just just fit in your
gift card and then these little bows get
stuck on there later and then this one
is also a gift card holder and then here
I want to just make my pocket here add
my trees so I punched out the two trees
and when I put them on I just want to
put the adhesive right here on the
bottom otherwise I would seal my little
pocket shut
so you can build little scenes with the
pieces also and then my
sleigh is going to go right here and I
want to make sure to cover up this part
of the tree like if you put it there it
it kind of looks yuck so you want to
just move it down a little bit like that
and then my sentiment is going to go
here and then I just trim this off and
embellish it with the um the peppermints
and then we're going to go
here take your
Ribbon put it
underneath and then just place this on
top I have a jar that I keep next to my
stamping area so all of these um longer
pieces of ribbon that are left over I
don't throw them away I keep them for
you know the addition onto another
project so I just trim those off so I
don't really worry about having um
excess ribbon and then I just manipulate
the bow to where I get it how I like it
and then I really liked the wreath
there's quite a few of them in here are
in the packet and so put your adhesive
on the back and then I just added um
from stylish shapes I just added a
circle and then take your let's
celebrate the season stick it on the
inside here take this down and then I
pop this up now I did not use any
dimensionals on the inside of the book
because it made it too
bulky okay this is kept as a pocket for
here okay then on the back what I do is
I shut the book I fold this ribbon over
and I did not if you noticed I put the
adhesive at the top and the bottom not
on the sides and then you can tie your
piece shut and there's your double gift
card holder you can do it also if you
want to make a smaller one you can do it
with the note cards and envelopes as
these pieces and then the front can
again be the small piece from the
memories and War so that is it the
little bit festive and you want to grab
it because um it you get so many pieces
um for very little cost and you can
really create a lot of different
projects tags and cards and all kinds of
things like that so um I hope you
enjoyed my presentation thank you Joe
for having me
[Music]