Video summary
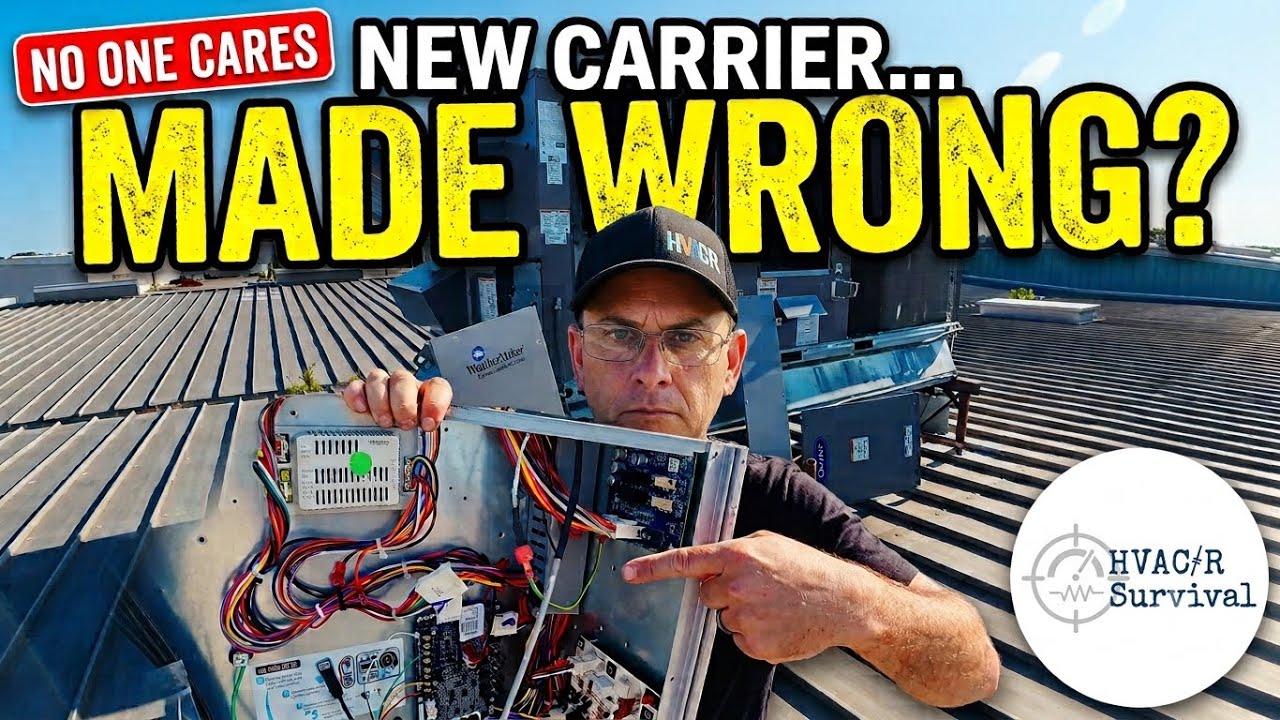
The video features an HVAC technician performing a detailed startup and inspection of a new 480-volt Carrier package unit installed in a paint booth, using this project to highlight widespread quality control issues found in equipment manufactured elsewhere. The narrator emphasizes that despite factory markings indicating checked connections, many components arrived loose or improperly secured, leading him to tighten every screw, fuse, and wire connection personally before operation. He critiques the manufacturing practices for cutting corners, such as placing safety thermostats directly behind filters where maintenance access could damage wiring, leaving sharp metal edges exposed near electrical wires that risk short circuits, and installing capillary tubes too close to pipes which would cause leaks upon vibration. The technician argues these flaws are not isolated incidents but reflect a broader industry trend among various manufacturers who prioritize cost savings over durability and safety.
During the startup process, the narrator meticulously checks for common installation errors, including ensuring light bulbs on pressure switches point upward to allow proper refrigerant expansion rather than being installed lazily upside down, which he views as another example of poor workmanship. He inspects electrical components like ROMX connectors and lugs, often finding them loose or improperly torqued, and takes time to re-route wires away from moving fan blades and vibrating pipes using tape or custom brackets when necessary. A significant portion of the video is dedicated to addressing dangerous sharp edges on heater bands that could cut through insulation if not carefully managed with additional protection like grommets or bending nearby metal parts out of the way, demonstrating how small oversights during installation can lead to catastrophic failures later in the unit's life cycle.
The core technical focus shifts to balancing airflow and static pressure within the paint booth environment to ensure efficient dehumidification without sucking dust into the clean room. Using a digital manometer and voltage charts from an HVAC app, he calculates the required fan speed settings based on measured DC voltages at specific inlet pressures, aiming for optimal performance around 7.6 volts which corresponds to approximately 8,750 CFM of airflow. He explains that while some professionals might simply set fans without verification, his method involves precise adjustments and double-checking calculations to guarantee the system operates within safe parameters before leaving the job site. Throughout this process, he also configures the complex Seaman controller for humidity and temperature monitoring despite its difficult interface, noting that a USB accessory could simplify setup but ultimately relying on manual configuration due to budget constraints or availability issues.
Ultimately, the video serves as both an instructional guide for new technicians and a critique of current industry standards regarding equipment reliability and installer responsibility. The narrator concludes by asserting that while fixing these preventable mistakes may seem tedious or unnecessary at first glance, they are essential steps to avoid costly repairs, refrigerant leaks, and safety hazards down the road. He encourages viewers who feel their own training was inadequate to adopt similar rigorous inspection habits rather than trusting factory defaults blindly, especially when dealing with units made in regions where labor costs drive manufacturers to compromise on quality. By methodically addressing every loose connection, misaligned component, and potential vibration point, he demonstrates that true professionalism lies in anticipating problems before they occur rather than reacting to them after expensive damage has already happened.
Read the full video transcript
This video is brought to you in part by
True Tech Tools. Quality tools,
essential support.
[music]
What's going on, guys? Today we're doing
a start up on some package units. So,
what we got here is a 480 volt system.
It's got the new blue motors on them.
It's got the Seaman's controller, which
is a pain in the butt. And we're just
going to go through some of the things
that I normally would do. This is kind
of basic for those who've been doing it
forever. However, this is how I do it.
If you're new to the field and you want
to learn how to do things a little bit
better. You know, these are some of the
things I do. They might help improve
you. It's entirely up to you. Do what
you want. If you're already here
watching, then that's the first step to
trying to make yourself better cuz
you're trying to learn from wherever you
can find it at. Um, if you're like me,
the schooling that I took was not
adequate. And generally, there's none
that is because you're going to have to
learn things on your own. So, here's
some basic stuff that I do. So, kind of
getting started. I already went through
a few of these things. We still got a
few more things to do yet. So, the first
thing I did went ahead and killed the
voltage to the unit and I checked my
connections. This one right here was
loose. These here I got a little bit of
a quarter of a turn. This one here I got
like two turns out of. You would think
the factory comes through with their
blue marker and they would have checked
it. Don't trust them. This crap's made
in Mexico. Not saying Mexico is a bad
place, but there's obviously a reason
why they're doing it cheaper. I'm not
saying Americans do everything right
because they don't. A lot of them have a
bad attitude. That is the way it is. Um,
no holds bar. If you don't like it, shut
the video off. I don't really care. This
is the fact. This is what I see. We had
a million problems. In the last three
videos, you watched me work on those
three chillers over there. All made in
Mexico. Now, high dollar unit. And like
I said, we've had no problems with those
things. Stuff that was easily
preventable. Am I hammering away at
Carrier? Yeah. And the thing is, it's
not just Carrier. It's Train. It's
Dyken. It's all the other manufacturers.
They're all cutting corners. And the
reason why is because we have a work
issue. People just don't care about
their work, whether they do a good job
or not. So, that's not to be condemning,
but it's just to point out the facts of
what I keep running into. So, for here,
for starters, look what we did here.
They ran this uh safety control, which
is a thermostat, right in front of the
thermos, right in front of the filter
here. What kind of common sense was
that? Here's the other wire. So, every
time somebody has to pull the filter
out, it's going to run right into the
wire. Sure, you can pull it out, but you
know what? Maintenance guys are going to
come up here. They're not going to pay
attention to that. They could have
easily drilled a hole through here. Came
down and around and over. Same thing
with this. If you pull on it, it goes
right to here. They could have easily
drilled a hole, went right through
there. What's it matter? Cuz I mean,
they got a big old gap here anyway.
What's it matter if whether they have a
little hole, little grommet in it, and
move it on? I'm going to have to fix
that because the factory didn't do their
job. So, anyhow, we've got the seams
controller here, which I have to pull up
the control panel uh manual because it's
a pain in the butt. Went through and
checked all of my screws here. Make sure
they're all tight. Only two of the fuses
are used, but tightened all those. Went
through and tightened up our connections
here. Some of those I could get a turn
or two out of. Make sure that all of our
wires are tight. If they look crookedy
and stuff, chop them off. Get a nice
clean strip, get it underneath there.
Next thing I started going through here
is looking at my capillary tubes, making
sure that nothing is rubbing up against
pipes. A lot of these were right up
against pipes. That's going to rub
through, cause a leak, then you lose
your refrigerant. Next thing I do, I
grab my bulbs. See if they turn. If they
turn, they're not tight. Next thing to
check is is did they put the bulbs so
that the bulb is pointing up? No. Lazy.
Didn't do it. This bulb should be up on
the top. That way the refrigerant has to
expand and come out. That's common
practice. Will it make a huge
difference? Maybe not. But it definitely
is letting the liquid come straight
down. That's just cutting corners, not
doing the job right. Once again, why are
they cheaper in Mexico? So, we've got
here on quite a few in the past. I did a
video on it. It was a brand new unit.
These wires here were right up against
the sharp edge of the metal. These ones
here are fairly okay. The um everything
in here was fairly decent. One of the
other things I do is I go through and I
check all my caps. Make sure they're
tight. Make sure the caps are even on.
half time there might be missing caps.
So, the refrigerant caps got those on on
these uh lines here. You can only do so
much on these. They got them so tight in
there. You can't really separate them
much, but if you can separate them a
little bit, it might be better or either
clamp them completely together. Coming
over here, the compressors, they had
these [clears throat] sharp edges from
the heater. I've seen these short out a
million times.
They uh had this sharp ba belly band
thing laying right across the wire. The
wires laying across it. Had all these
zip ties here. They were all loose. None
of them were tightened. Um what scares
me about these welds, these welds look
pretty good at first, but when you stare
at them, I think they just painted it on
and didn't pull anything in there. I
think I have a bad feeling that the
brazing alloy wasn't pulled into the
pocket at all. Uh went through here.
This pipe right here was up against
that. Went ahead and bended it in a
little bit so it's not going to vibrate
right up against it. Be careful. These
cheap press out pieces of metal. They
will cut you. I sliced my hand a couple
times on the recent ones. Next thing I'm
going to do is I'm going to go through
and I'm going to tighten up all the set
screws on the fans. Make sure they're
tight. And then I'm going to look at
those wires up there too cuz those wires
have a tendency to fall down. They'll
get caught in the fan. Chop them off.
That happened in one of my other videos
from a year ago. That was a disaster.
And then once again, checking these
wires, making sure these wires aren't
laying across the pipes so that they can
rub through. This here was actually
tucked underneath this piece of metal
here. You can see where the water was
trailing. So, it actually is showing
that it was following it. I don't like
them even laying on top of that right
there cuz it can vibrate into the edge
of that head of the bolt. So, clamp them
together, pull them away from it. you
know, if you got to put a wire tie
around this bundle here and then maybe
do a wire tie to wire tie to hold them
away from it, the better you're going to
be. Going through and double checking
the fins, making sure the fins aren't
all smashed to hell, which these don't
have hail guard on it. They'll probably
regret that. I don't know why they did
this, but they used the old trap and it
should have probably been upgraded to
something a little bit bigger. These are
25 tons. Now, this is on a paint booth
for a toolbox company. They don't need
heat. So, they're cooling everything in
the tool uh the uh paint booth. So, gas
is here. This gas is never going to be
run. Not going to be used. We got to
adjust the fans and the economizer.
We're going to bring in about 15% air so
we keep everything in a positive. You
don't want to suck dust into a paint
booth. Like I said, I've got my iPad. I
shot the manual to it. You can pull up
some of the stuff here off of the uh QR
code there. All right. So, that's where
we're at. Not the most exciting thing in
the world, but you know, it's the simple
things like this that end up preventing
a lot of money down the road being lost
for stupid things that could have been
caught. That's what today's video is
about. Might sound like a
Once again, don't like it, don't watch
it. I don't really care. That's just
where we're at.
[snorts]
That was really difficult, wasn't it?
[sighs]
All right. So, we got that fixed. Not a
huge deal, is it? Maybe not. Maybe it
is. We just had uh another new unit had
the bulb snap right off because it
wasn't installed right. This is probably
what happened.
Okay. No sharp edges.
Yeah, we could put a thing in there, but
honestly, it would have been damaged
quicker by doing what they were freaking
doing originally than anything else.
Shouldn't even have to do this.
There we go. Wasn't that hard? My god,
it was hard. So, we got that one fixed.
We got this wire ran down through up and
over here.
It's not in the way of the ignition,
which it won't matter anyway cuz we're
not going to use it. Everything grounded
and back together again. Double checking
all your wires. The power is off like I
showed earlier. Transformer tap. It's
something you want to check when you're
on 208 230 volt. If it's 208, 213,
usually 208. I like 25, 26 volts, 27
volts. I don't like 23 22 because when
you put a load on it, it tends to uh dip
down, possibly could cut things out.
I like going around and just pulling the
wires, tugging on them, making sure, do
they pull off? Anything like that. Don't
trust that paint marker.
So, I have that ground wire. I forgot to
check that. Let's do that real quick.
That's pretty tight. Maybe I did check
it. I don't remember. Okay. And then we
already checked rotation. And I also did
voltage check. So, the voltage is
swinging up and down because they have
such load down there. Uh 492, 93, and
94. That's all under that 2%. So, we're
good. Uh HVAC school app got an app for
calculating that. You don't even have to
figure it out. Just enter the numbers.
It'll go down to decimal points if you
want. It wasn't worth writing down
decimal points because it, like I said,
it was going 493.5, 492, you know, it
was it was we averaged it. Got our
panels back on. Just one screw in each
of them. Got to get this power back on.
There we go. Welcome. [snorts] Welcome
to the big show. Okay, I don't have my
wire ties up here. And honestly, tape
sometimes works better
than does wire ties cuz tape don't
usually break after it gets a little bit
old. So, that'll hold that there. Keeps
that all away from that bundle.
That one there is kind of a difficult
one. There's only so much you can do
with that. At least nothing's laying on
the actual pipes. [snorts]
So, we should be good. Now, we're going
to start on this seams controller, which
is you can buy a USB stick thing for it.
Make it a lot easier. This is a
abomination.
You got to take this loose to loosen it
up. Otherwise, what's going to end up
happening, they don't tuck this in there
like I just did. This is going to yank
out if you try to just lift it up
because theoretically, it's supposed to
lift up like that and pull out. But it
was pinned in here pretty tight because
this here was clamped in after it was
already put in place. So, maybe loosen
that up a little bit. But eventually
once I loosened this one up, got the
middle one out, then I was able to do
it. Off to the side here, you can see
that we've got the seaman sensor right
there. That sensor is going to ma
monitor humidity and temperature both.
So we're going true uh enthropy. And
right now we're completely closed. This
is your bypass damper. So if you over
pressurize the building, it's going to
actually blow this open. Most of the
time this is going to be closed. But
right now you can tell it's [snorts] uh
building's in a negative. Here's the
configure spot. You've got all your
manual. It's maybe in the paper. Half
the time ours gets lost and we never
find it again. uh input output
configurations. And so you look at this
number here, six or it might say seven
or it could say eight and all that other
stuff. You find that in your chart here
and then you look at it and you
configure it for what you have. Your
unit may have a return air sensor. It
may have just a mix sensor and a outdoor
sensor. It may be a temperature only,
might be humidity and temperature both.
So not worth really showing you. You got
to go through it. Honestly, it's easy
enough to do it this way if you do a
bunch of them. If you don't, the Wi-Fi
thing would make it a lot easier, which
I really wish I would have bought by
now, but unfortunately, I haven't. But
go through there and set that thing up.
So, we're over here at the other one
now. Same thing as before.
Discharge line right there up against
the metal. So, we got to bump that over.
Yeah, that one's kind of loose.
Oil levels look good.
Wires are all up in there. Everything's
still loose like you see over there and
there. Give this a little bump.
There we go. Just enough to keep it away
from it.
Wires look like they're all hooked up.
You know, they're just right up against
that. That way [clears throat] it can
short out. So, these short out all the
time like this. So, uh, we've already
adjusted the damper on this one,
and so we're going to shut this one
down. That way, it doesn't, uh, blow
anything while we're trying to work on
it. One of the things I noticed, like
low voltage here, or uh, whatever you
want to call it, it's just like,
I don't know, it don't look good. At
least you can say they're consistent.
Not in a good way. Wires are in the way.
Bulbs are upside down.
Crap's just half hanging on. Good job,
boys. Really impressed. Okay, got them
drilled. Brush out some of these
shavings here.
Run your finger along it. See if it cuts
your finger. If it don't, then it's safe
enough for the wire. If you got some
ROMX connectors, it's definitely better
than the way they had it, cuz I
guarantee it was going to get screwed up
uh getting pulled out with the filters
every couple months if even if even if
even that often. All right, I had to go
grab my five foot ladder there to kind
of get me up here to take some of these
screws out. We just got that wire
switched over and through there.
Look at that. See that screws in the
middle? I I took out two here to lift
this up and those just pop up. So, now
we'll go and get these here done. Also,
I said something on one of my other
videos, but I end up not putting it in
it cuz I wanted to see what snap mount
would do. If any other guys out there
that watch me actually make YouTube
videos and stuff and are thinking about
getting Snap Mount Snap Mount, uh, I
bought it 3 months ago. They only carry
a like 30-day warranty. Um, so don't
waste your money on that junk. They
broke. You know, it's nice cuz you can
like unhook and it just hooks right back
to your shirt like that. But this here's
a Chinese version and it's not as not as
good far as stability, but it hasn't
broke. And snap mount did nothing for
me. So, just something to hang out there
for you guys to to hear. Just a public
service announcement.
So, I left him a real wonderful review
on Amazon. Total waste of money. I love
these head looks so nice. How about we
just kind of get a little nice little
loopy doop here. There you go. Little
loopy doop. Another little loopy doop.
There you go. So, just twanging it all
over the Mexican border here. It's just
like they just string this crap. No
care, no thought, no nothing. Just throw
it in there. Good enough.
We go. They got a little indentation
there for it to go in.
That way it makes it a little more brain
dead. They still put it in upside down.
Whatever.
That was so difficult.
And you know, anybody that was doing an
inspection would have seen that the stem
came out of the bottom, not the top.
Those are tight.
Now, on when I get on the really big
lugs and stuff, I'll get my torque
wrench out. And most of these blocks
have torque settings on them that will
tell you what they are supposed to be
at. And you can do that with a uh socket
style Allen wrench. Yes. Power's off.
That blocking very secure, is it?
Those are all pretty tight. These are
really important here.
And that one wasn't all that expressive.
That's all your connections right there.
What I like about these, they fold up.
Gives you a little bit of leverage.
You don't want to get stupid and snap
them, but you can. That's why you do it
with by hand and not by by the gun. Make
sure power's coming into the top, not
the bottom. That was the last mistake. I
was at a uh new chicken place that was
coming in Linux unit they requested.
Electricians wired it wrong. It's like,
dude, that's not going to pass if you're
going to get inspected.
Oh, that's nice. See, somebody just
completely forgot about that one. I
ain't with the 480 volt side of
things. Um, that's existing. Obviously,
it's dirty box. These are the connectors
I like for those pass through type deals
for when the wires go through. We don't
stock them unfortunately. And why can't
you use a Romax connector? Tighten these
up. Tighten up some of these. They made
that really convenient, didn't they?
What What was that thought process?
These are already kind of tight. Those
are just floppying around.
That's almost impressive.
Yeah, we'll just bring these over with
some tape.
Honestly, this probably isn't going to
vibrate much if it's down here on the uh
oil. Most likely won't get that hot. All
right,
good enough to get it running. See if we
can get onto this. See if it's tight or
not.
Not too impressive.
Can't reach the other ones very easily.
You got to remember if one of those
blades come off, it's going to go flying
right through that coil. And then there
goes the refrigerant. There goes the
coil and there goes their cooling down
for their paint booth. At least this one
has copen scroll compressors, the
original. So that France crap.
Wind is blowing down. Look at that. Get
right by it. And up here
also going that direction. You have your
negative side of the blower, your
positive side of the blower. So,
anything backing up on it, this is truly
across the blower itself. You're not
measuring the coil. You're not measuring
the filters. You're literally doing just
the blower. And on low, we're at 0.95.
Usually five is the highest you want.
And we're on low now. So, when we're on
high, we were well over around two. So,
it's like, yeah, it's not really good.
This one probably's running high cuz it
ran the most of all of them. This one's
not horrible.
Yeah, right.
It just went up. It's fluctuating. We
must be must be surging. Yeah, we're
like
08 9
to one. Y1 in and out. On. Y 2 in, off.
So, we're on low again. So, if we crank
it to W2 or Y2, then she going to go
high. She going high. And they were
wanting us to slow these down because
they're five tons bigger than what they
were, but that's because we're bringing
in outside air. Yeah, loving it. It's a
little bit higher. 0.9 to one on low.
Let's kick this talamazoo up to one.
2.
Here we go.
Give it the old Y
2.
Eat, baby. Eat. We're already at 48°
or discharge temperature. Yeah,
that's 2.5 2.3. This is the way I've
seen a lot of the so-called professional
balancers do it. They're literally
drilling their doors. You might be able
to go down here, but that one over there
was a little more difficult to tell
which one was which. I think I don't
know. These things are way up in the air
because of the uh curb adapter, but I
can see that's not really where it
should be at. We're mainly in the
negative side here. So on the incoming
side of the unit, we're at 1.4 in. We're
at positive.74 on the outgoing.
If we can get find out what's going on,
which I would suspect is probably
plugged filters down below cuz they have
prefilters for the paint booth. And I
bet you they're plugged full of crud.
Even though we're bringing in, you know,
moderate, you know, in 2 and 1/2 in 2 in
of uh damper being open there, it's kind
of hard to tell. I had to give it a 6V
signal which is not 15% according to the
voltage chart but there really ain't
nothing else that much open that really
gives you a real indication that it's
truly like 60. So 1.4 maximum external
static pressure 1.4. Obviously we don't
want that but you're going to have that
also though when you're moving some
massive air. But well we're waiting for
the guy that sold it to get back with
us. Let's check our compressor. Pulling
3.3 on that or I'm pulling 13.3
area on that one.
13.4.
I was thinking about drilling a hole
down here in bottom. See if it makes a
difference.
I stand corrected. Look at that. Whether
you're going one in and one out or
whatever, you got one point one. Flip
this sucker the other direction if it's
coming up that way. Still 1.1 doesn't
make a bit of difference. Switch this
one around if you want. There you go.
180. 1.1. It don't matter. That's the
whole point of the port. So on this one
here, we have a 65 on the positive and a
48 on the negative.
Yeah, I I got to find out which way is
acceptable or not. Honestly, all we were
checking is the fans static pressure
used for efficiency drops. So, yeah,
made a mistake. I'm an idiot. So,
anyhow, best way an idiot can redeem
himself is to, you know, check and see,
uh, before he leaves the job. So, uh,
now we're doing a lot better. 1.1
at the highest. So,
yeah. Let's see if we can do the same
thing over here on this other one.
What's kind of crazy is that's not
insulated.
I don't know how they got away with
that. Okay, this one has duck uh duck
board inside of it, which we're pushing
through it,
hooking and going. So, my guess would be
that is the supply.
Okay, so like I said, I'm an idiot. I'll
leave this in there just so you guys
know that I don't lie to you cuz you
know, that's the worst I did. I guess uh
whatever. So like I mentioned earlier,
took a picture of that chart, pressure
chart. So if we go to 1.0
and we check the DC voltage we've got
here, which we come down to here, and
this is going to tell us our supposedly
our CFM. Okay, we are at 7.5 volts.
7.5 volts. You're about 8,700
CFM at 1.0. We're at a 1.1. So, the
voltage goes up to keep that same thing
with a higher static. Uh 15 ton or 25
ton.
So, 25 * Let's go 350 cuz we're trying
to go low. 8750. [clears throat]
8750.
We're about dead balls on the money
right there, bro. 7.5. I'm going to say
we're going to hold it right in there.
And that's probably why we're getting
away with 47° leaving air temperature.
So yeah, it's uh
just one of them things. I guess you
could technically move it just a touch
touch more. There's 7.6
7.7.
So at 7.7
technically, you know, obviously you
increase the speed, you're going to
increase your static pressure. So yeah,
we're just going to have to double check
that now. We increased that speed and
we're still at 1.05.
So 1.05 1 in static 1.1 1 08. We're
fluctuating. So we may not have had to
adjust that speed at all. Two would be
7.8.
So if you split the difference be about
7.6.
We could go 7.6 six. And that would put
us right in at that bare bone 350
CFM, which is going to dehumidify really
good.
7.6. So, let's take it back down just a
touch.
7.64.
7.63.
I'm going to leave it there. It's close
enough.
Go
1.1
in 7.6 volts DC
8750
CM.
There we go. We're splitting hairs here.
But yeah, that's that's where we're at.
At least I checked it. Most people
wouldn't check it. I'll be honest with
you. Set it and hope for the best. All
right, before you guys catch me on this,
you probably already did. I didn't
realize. See, I'm kind of
I mean, I'm almost 6 foot and I can't
see up there. So, yeah, that's probably
throwing off my return static a little
bit, but
it uh we're going to leave it go.
Everything's looking fine. So, um
checked out some of the obvious stuff
that we always do, you know, check amp
draws, did our voltage uh unbalanced,
stuff like that. Those are some of the
things I did, too. I didn't show
everything, but those are just some of
the more common ones or more the thing
that's a little bit different. So,
anyhow, there's other things that I did
far as, you know, checking the charge,
making sure that stuff's right. I mean,
you can check that or not check it. I
mean, theoretically, it should be right,
but then so should everything else
that's been checked on here and found it
wasn't necessarily tight or in the right
particular Yeah. position. So, all
right. This is a simple one. Like I
said, guys, thanks for watching. We'll
catch you on the next one later.