My Unfinished Projects Have Their Own Shed! | Junk Journal Catch-Up & Upcycling shopping bag
Watch on YouTubeVideo summary
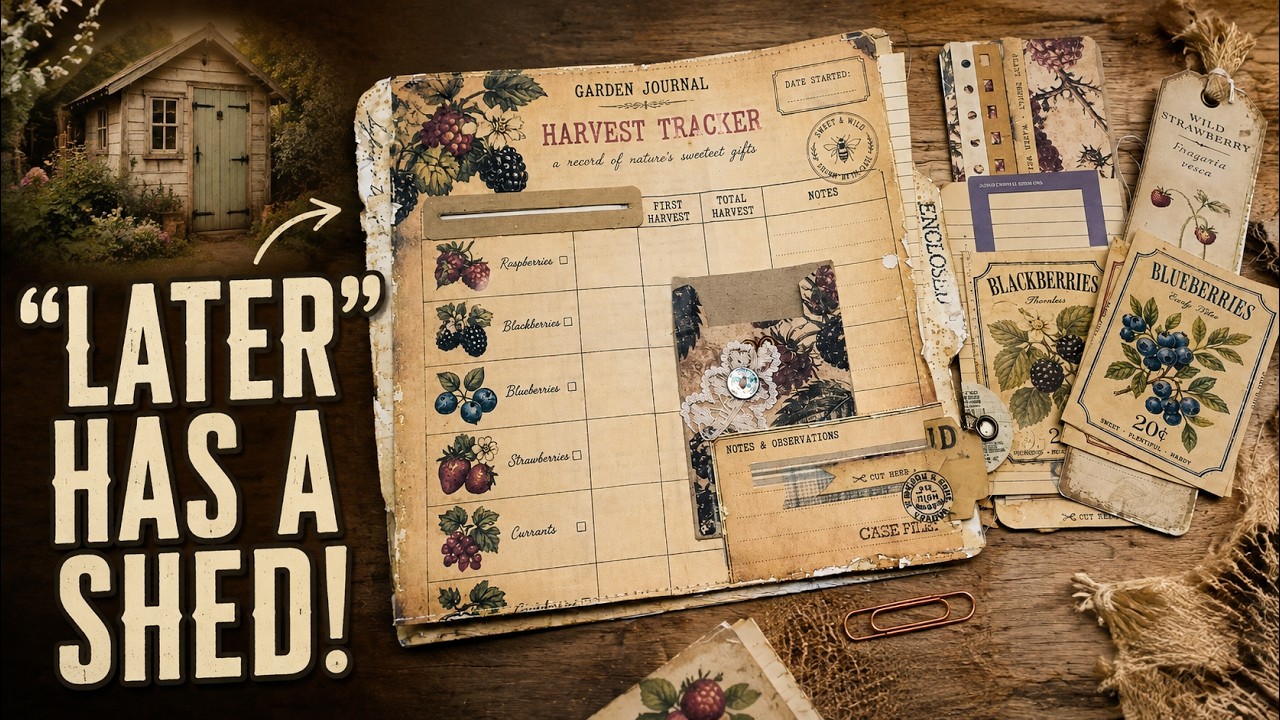
Eva from Bohemian Crafting welcomes viewers to her newly organized "shed of later," a dedicated space for unfinished projects that has replaced her previous craft room storage. This shed is currently filled with boxes previously held in her main room, which she has been sorting through to decide what stays and what moves to this new holding area. The organization process was inspired by a generous gift of potatoes, raspberries, and blackberries from her neighbors, leading Eva to create a digital journal collection themed around nature and gratitude. She shares that some projects, like an initial attempt at a photo album for her neighbors, did not work out as planned and have consequently found their home in this shed, while others are still being refined with the help of her supportive Patreon community.
In addition to sorting boxes, Eva demonstrates how she upcycles old storage containers to better suit her creative needs, specifically transforming a clear plastic organizer into a piece that resembles vintage museum cabinets. She achieves this dramatic, aged look by first cleaning the surface, applying black acrylic paint as a base, and then layering alcohol inks followed by Prima Marketing wax, which she praises for its durability even after six years of use. She also repurposes broken pieces from an old journal poking tool into a new decorative ruler holder using hot glue and paint, showcasing her philosophy of finding beauty in discarded items. Furthermore, she introduces a new British Isles themed collection inspired by her life in the UK, featuring Union Jack colors and iconic imagery like red phone boxes, which is available as a freebie for her patrons alongside other digital kits.
The video concludes with Eva working on a mixed-media journal page using a sturdy shopping bag as a primary material. She cuts strips from the bag to create pockets and decorative elements, integrating them with coffee-dyed envelopes, graph paper, and old printed documents to build a layered layout. Her process involves adding texture through embossing folders, acetate sheets for windows, fussy-cut flowers, and metal eyelets for reinforcement and decoration. She emphasizes sustainability by ensuring no part of the shopping bag or other scraps is wasted, even using leftover printer test prints as embellishments. As she finishes her first page in this new "Bramble Book" project, she encourages viewers to embrace their own unfinished projects and enjoy the creative journey, whether they are organizing their spaces or simply appreciating their craft supplies.
Read the full video transcript
Welcome to my garden shed of later,
guys. This is my shed I had to uh put
together lately for all my I will later
do them projects. As you can see, it's
filled with boxes which were previously
in my craft room. And because lately I
kind of had a hard time to walk through
this shed happen.
Hello and welcome everybody. Welcome
back to my channel. It's Eva from
Bohemian Crafting here again. I'm coming
to share with you today my new digital
kit. also my new digital kit as a
freebie for all of you. It's already
listed on my Patreon and also some
projects which I made in the past few
days along of building my crafting shed
or storing shed. Uh I'm going to be
talking a little bit and bulk you
through to this collection and it was
very much inspired by a really beautiful
generous gift from my neighbors who came
to visit us and they bring what they did
plant actually uh they did plant uh
potatoes, raspberries and blackberries
and they bring
baskets with all these goodies to us and
it was such a lovely gift and that gave
me inspiration to create a digital
collection which I will use uh for
creating photo album for them for my
beautiful neighbors. I already tried
that photo album. It end up also in my
shed because it didn't go well. I had to
change it. So, it's in those unfinished
projects which are now in my shed of
later. I've been chatting about this one
with my amazing patreons and uh if you
do like beautiful crafty humor go to
have a look on my patreon site that post
it uh public post and I think you will
enjoy all comments there uh everything
what we wrote to each other it was very
cheerful and I can't express enough how
much I am grateful for my patreons they
amazing bunch of people very uh kind
loving and very funny and I love them so
much. So these papers you can see which
I am flipping through they are from my
new collection Bramble book and as I
said it's inspired by the gift I
received from my neighbors and also by
the
bush of uh blackberries I do have in my
garden.
And very next to my shed, I do have
these beautiful
blackberries. Look at them. It's not
many, but I do have Don't eat it. That's
mine.
Chase like them, too. Look at them.
Past two weeks I've been sorting boxes
and box which will go to my later shed
and which will stay in my room. I do
have uh loads of things to sort it out
already but there are still few little
boxes and few bucks which I need to
finish. And because it was uh time of
reorganizing
and making my room
supportive for my creativity, I've been
also decorating and remaking
some some of my uh storage boxes like is
this clear one. I found it on Teemo and
I really like the size. So I decided to
change it into look of museum those
vitin cabinets or draws. Uh I decided to
also fill it the boxes with cardboard
box like uh the floor. I did used old
one and I cut it on pieces which will
fit into those little drawers. First I
wrapped them in black paper
uh as I wanted to have their you know
that dramatic look and then I glued over
that black paper on one side brown paper
and I did distress it with my nail file.
So I received this beautiful look and
then I went to uh change color on those
handles of that box and on kind of like
mantels
or edges of these boxes. I have used
black acrylic paint uh alcohol ink
brownie and black and also wonderful
Prima Marketing wax that was gift from
my amazing gift uh amazing friend Eevee.
That was amazing gift really. It's 6
years old and it still works. So to be
able to color all these plastic pieces,
I had to wipe off any kind of residue
from, you know, when they make these
these organizers. Then first I used
black acrylic paint and once it was dry,
I used over it those alcohol inks. It
gives beautiful base for that wax. And
as I said, this wax is 6 years or maybe
even more. Uh definitely six years old
and it still works. Really guys, these
waxes are amazing. They do make
wonderful job on any kind of surfaces.
You just need to make sure that you will
uh make that surface clean from any kind
of oily stuff. I love this bronze color.
So, I did use it also on that clear
plastic box and uh I did color it also
these little bridges on the side and I
really love the result.
And this is my plastic organizer which
will fit into my room much better way
than uh if it will be just clean or
clear plastic one. I really love this
effect of that uh you know that wax on
that black painting. It really gives
beautiful vintage wipe and I do love
this ruler I had for many many years. I
found that second one and uh if you did
saw my video in the past I think it's
already two years when I have made this
uh poking tool for journals
uh you will recognize that it it is much
smaller. It got broken few times
actually uh from that original poking
tool. I do have this inside only
including that tape which you can
probably see under my painting.
This is from that original also these
sides are but I had to cut them down a
little bit. This and this it's from that
cutting these sides shorter
and this and this it's from cutting
these sides shorter. They were too much
long and it was kind of wiggly all that
uh all that
credle. I just cut it smaller. I also
added cardboard box here and here to
kind of make it thicker and look a
little bit better. I uh added a lot of
hot glue as you can see. Um but painted
it actually looks quite well with the
painting over it. I need to paint it
here few times more. And then I added
that ruler. I did used hot glue also
for editing that ruler just to make sure
it will hold. So there is plenty of hot
glue underneath here and over the edge
of my uh credle because you know these
don't have don't have any any holes for
screws. And uh I really like these
rulers. I never use them as a ruler. I
always use them as a decoration. So now
I do have this one and this one. And I
love how it looks with all those bits
and pieces. Uh if you do like
organizers, I will put link down below
for this one. And I do have also
another one which I actually like very
very much. I think it's perfect
organizer for open projects for projects
for journals we are working on and we do
have separate maybe washi tapes,
stickers, stamps. This little box has
um little organizer here. Then pocket
here
and then another pocket underneath.
Deeper pocket.
And I do have there my British papers
which I did share a little on my
Instagram with these. I did share these
papers uh with my patreons and I already
also made a little organizer.
this little organizer which does have it
amazing
sliding effect and magnetic pockets
here. All of these are magnetic then you
can slide it back.
Okay. Yeah. If you don't get stuck and
close it with this elastic band. So that
I made with this uh British
British papers or along the British
Isles uh papers or I mean that's the
name of my collection. I really love
this collection. This is inspired by my
life here in UK by everything I love
about UK about England, Scotland all all
United Kingdom you know. So these colors
are colors of the United Kingdom flag. I
do have that flak everywhere. Actually
in this collection there are loads of
Yeah, I do have here upside down. Look
at that. I didn't notice just now.
Whoops. So I do have there so many
images with
flax and then so many images of the
things I really love about UK about
England. I think um
that so many things which happened here
lately are making me to create even more
something with uh English theme because
England deserves the attention, you
know, the good attention. So, I do have
this British inspired collection also on
my Etsy. My patreons already have it and
I'm planning to create journal from that
and of course you know iconic uh post
box and telephone boots and few images
like this and and as a gift I do have
for you seven designs for a garden
journal.
There are some background papers, some
ledge papers,
and some ts and labels. I just they do
have edges. I just forgot to change my
settings on my printer. So, it did
printed without, you know, from the
without border actually. So, the images
they do have nice edges. They do have
white space around. I just my printer.
It's crazy. So, these these will be like
a freebie. All the links will be down
below. My patreons already has all of
these collections. So if you are my
Patreon, go to have a look. This is for
all of my patreons that berries and the
British Isles along the British Isles
are for Patreons with tear with
digitals. And for today uh I decided I
will start to create my pages or start
to choose what I will use for my pages.
And uh one of the things uh I would like
to use is this shopping bag. Actually,
it's nice and strong.
This is the cooling bag and
I don't mind this shiny side because I
do believe I will cover it with some
kind of decorative paper. I do like that
thickness. So, one of the papers in my
journals in my journal will be creating
from these
And the measurement how I should cut
this uh shopping bag I will take from
another find which I uh got through to
my cleaning room or organizing room. I
found this stack of envelopes and papers
and envelopes and index cards which are
prepared for journal. And uh I really
like this one. Look at this. They are uh
tea dyed, coffee dyed, and they are
already with sewing effect these
envelopes. So I was thinking one of
those um something something pages,
pockets. I'm not sure. Uh will be these
envelopes actually. And these index
cards. Yes, of course. And probably
these postcards because I prepared them
for something and then they I then then
place them in those piles. So now it's
later now I'm going to use them. So
measurement uh of my journal will be
actually this and these sewn and u teedy
envelopes. They are DL envelopes and
that will be measurement for creating
pages from book pages from normal paper
for my journal and from this shopping
bag. So this will be my measurement.
I'm going to tell you this is 8 and 1/2
by 4 and 1/4 or 4 and 38 4 and 3/8 of
inch
and it is 11 by 22 yeah 11 by 22 cm
that's the size of my envelope and that
will be the size I will try to get from
this paper back.
I'm going to speed up that process of
making my pages from this shopping bag
just because if we will watch it in
normal speed, we will all fell in sleep.
So uh what I did I took my envelope and
I made marks on that shopping bag and
then I have cuted strips from that
shopping bag in the size of the height
of that envelope. Then I took my
guillotine, not my guillotine, Tim Holtz
guillotine.
Brilliant stuff. By the way, if you are
looking for some uh stable and really
very good quality guillotine, I do
recommend Tim Holtz stuff because he
always has wonderful quality of
supplies. So, I took my guillotine and I
have cuted those strips on four and half
inches
uh pieces from each folded side. And
then those pieces between those strips
between those
ends I guess uh I have scored on my
scoring board in the size 4 and 3/4 9
and half I believe and that rest I have
just folded down. I will use it as an
pocket in the process of creating these
uh journal pages because I wanted to
have these journal pages uh a little bit
decorative and somehow interesting. I
also added tabs on the sides. Uh I made
three styles of tops. Uh top t top uh
bottom tap and middle tap. So in in that
journal it should be spread nicely and
they should fit really well to you know
to do to do beautiful side effect on my
journal. That was all what I did with
this paperback. And then I started to
mix these
uh shopping back pages with those
envelopes and graph papers and postmarks
which I found through to my cleaning
process.
I do have prepared pages for my journal.
Uh I have added here this
graph paper. I do have here those uh
sewn around envelopes.
Those pages from box and I also added uh
papers I have printed long time ago. I
think it was keto diet I think. So yeah,
calories some recipes. So I did print it
out this one very long time ago. So I do
have some of these pages um left. I
think I did print that out twice and I'm
going to be using them here. Just don't
want to read it off. You know, they do
have that beautiful old color already
yellowed.
And here it's that rest from my shopping
bag.
Then another envelope. And then is end
of that graph paper. And I did mix all
these envelopes, papers, also postcards
in some little bunches. And I will work
through and embellish them, put them
together in some signatures.
And I'm thinking to do maybe this first
one
right now, decorate it somehow.
So for this first opening, uh I decided
to use first my embossing folder, I have
found this one on Amazon. It does have
uh window arc and it is from uh
crafter's companion and I never used
that. I just received that a few days
ago. So I'm going to be using that and I
will see how that will go. Where I
should open it? probably here.
Woohoo. Looks good.
And it will fit here just exactly. So,
I'm going to
use that embossing folder right there.
You will see
it does look cute.
So now
I'm going to cut the window.
So I'm going to cut between
these sides and cut slightly here. Keep
just this one
uh intact with the sides here. I'm going
to cut. So uh the sides of the window
will be able to open. And I'm going to
also cut
separate window slots
and then I will replace it with acetate
sheet. So first I'm going to cut
straight lines
between this
Going to flip it over. Place
double-sided tape.
And now I'm going to cut those windows
in between.
So I do have cuted window and I do have
opening. Now I'm going to grab one uh
acetate sheet. This is from some old uh
photo album. So, I saved these acetate
pieces because they do have beautiful
texture. So, I'm going to use it here
and I'm just going to glue it over that
window.
So, I do have acetate in those windows
window frames.
And I'm thinking to put another acetate
here as well
to that window because then from this
side uh I would like to have
a pocket actually.
So now I'm going to put one piece of
acetate here over over that old window.
So I do have
piece of acetate here as well. Now, I do
have uh paper on these sides here. I
made it slightly longer, but I don't
have to cover all the way. Uh I'm going
to be using this paper from my
collection. And I will just place it
over it. I will use my sewing machine
and sew it here and on the bottom. And
of course that lef over I will just cut
off and probably use on other side
because this could be really nice in
there. So before I will glue it down I
did facic cut it out this corner flower
including all those leaves because it
looks really beautiful here at the
front. I will and it actually sits
exactly on that spot which is perfect.
So, I'm going to be using this one here.
And here I will need it slightly longer.
So, I did glue piece of paper
underneath. And what I did fussy cut it
out from the bottom of this
uh sheet. I'm going to actually glue
here kind of extend this side.
from before. I had uh decorated one coin
envelope with this uh blueberries,
blackberries paper and I decided to use
it as a pocket on this page. And uh I
also wanted to add there some decorative
element and I do love look of metal
piece.
So I decided to add there uh an eyelet
and I end up with two eyelets as a
decoration.
I will add there later and button. Very
next step was little stamping all around
with grungy stamp with that texture and
few writings. These were I believe
sample stamps. And then I just assembled
some decorations and inserts.
So I do have a little ribbon here. And
here I added lace and bhuton. Just very
simple decorations. This is also like a
pocket.
And now I'm going to decorate this front
uh with this one. But because it's just,
you know, fragile paper.
Well, it's strong, but this is very
thin. I'm going to reinforce it with uh
resin.
So, I do have resin over the fruit and I
can now glue it right here.
So, this is a kind of like reinforcing
thing from old uh envelope which came
probably from Amazon. I think I'm going
to use it right here and I'm going to
create one extra pocket.
Just going to simply glue this piece.
Which way? this way or
this way?
Well, I like more this color, so I'm
going to glue it that way. So, now I can
glue it right there.
I'm going to cut off
this slot
here inside.
Well, it would be definitely better if I
will remember. I do have this stuff and
I found this stuff before I glued and
sewn this paper down. So I will be able
to make these things, these changes
easy way. But right now I will just
slide in my cutting mat, get up my knife
and cut the window here where there is
that slot
right there.
And I do have my pocket. Look at that. I
can see through.
So I can put some long tack from this
side.
So for the pocket here, I have this
piece of not sure what was that before.
Uh but I did use this decorative paper
in the background. Then I use this strip
from uh printer paper. It's from that um
what is what is the word
never ending?
I don't remember exact name of that
paper but I will try to find out and
link it down below. And it fits here
just exactly so I can decorate it with
something.
And I'm thinking to use some of these
beautiful images
of the
uh
seed pockets fronts. So I'm going to cut
it
and use something.
And because I have printed out these
designs on very light paper, that was my
kind of like testing print and I don't
like to waste my paper. So, I'm going to
of course use it. Uh, I back that paper,
that print with old file folder
in this beautiful brown color. And now I
can cut out all images. I'm going to
also keep
what is around these um seat pockets
because there is some writing and uh I
added there just because it can make
beautiful a little embellishment on my
journal pages. So even these side uh
strips, these can be used like maybe
washi tapes, maybe a little decoration
behind the picture.
So I can use this as an accordion piece
and have it glued here
or I can use separate image and just do
some layout
as an embellishment here. So, I'm going
to use this as my embellishment on that.
And I'm going to use one of these
strips to place them here
because every kind of bits and pieces
from those printables should be used.
There is plenty of things we are wasting
in our planet.
So let's not to add there even more.
Even those small bits and pieces we will
save. It's good, you know. It's at least
something. This one I'm going to glue
here on the bottom.
And I'm going to add there some
embellishment.
This will add
thickness and texture.
Once it's dry, I'm going to cut these
sides.
And this
I can make it either like pocket
or maybe like some opening here. Why
not?
And for that opening part, I'm going to
take this large um index card because I
think it will hold really nicely
my decorative piece. I'm going to fold
that index card
the wave where it will make
beautiful base for that seat pocket
design.
I think this one will be just exactly.
Show yourself.
Yeah, this will be good enough.
Use double-sided tape and use it just
for gluing it down on my
tuck or insert.
Now I'm going to cut those corners here
and here.
And before I will glue it here,
I'm going to sewn in
this on the top. And I'm going to make
it like a pocket from the top. So I will
sew it on these three sides
like this. Now a little bit more
embellishments. I think it will be
really good. So, I'm going to add there
some washi tape and probably some easy
stamping from some of these stamps I do
have on on my little carousel. So, I
have added washi tapes, some stamping
and that um circle from washi tapes
actually, which is perfect decoration.
So, now I'm going to add their whoops
also
um eyelet
Just poke the hole
and fix an eyelet. These are 9 mm
eyelets or grooms because they do have
that underneath circle this washer or
what is it from other side. So these are
gmets from a tops.
I really like it with that metal on
there. So now I can glue it to my little
T.
So as I said, uh it will be glued
with this double-sided tape.
First I will cut off this.
And now I can
glue my little
extra
here.
And before I will add my little tuck,
not not so little, long
tuck with a little opening uh to my
pocket here. I have found in those
boxes. I still need to sort out this
frame. This is from my green collection
but I don't remember exact name of that
collection. If I will find it I will
link it down below. Uh this frame which
is kind of prepared to be used and this
is made from
uh my son's uh school book. Actually I
saved book they had for learning Germany
and from book pages of that book or from
pages from that book I have made uh some
envelopes long time ago. I also I do
believe this is coffee dyed with that um
tone which is had it has. So, I do
believe this is coffee dyed and I made
it with that. Oh, yeah. With those pages
from that book. Oh my god. So, I'm going
to use that here. And I will create some
extra opening.
I don't know what is going on, guys.
Just somehow
can't talk. So, I'm going to glue
that envelope inside.
Going to add a little bit of a glue
here.
And have you seen new
uh Tim Holtz video about Halloween
ideology?
I need to watch that. I haven't seen it
yet. I have to watch that because there
is always so much inspiration in these
videos. Those makers are awesome.
They are very talented and amazing
really with all sharing all these ideas.
So, I need to watch that video. I'm
going to be inspired a little bit. You
know, maybe it will help me to sort out
more of my scraps. Oh, come on. Sit
there. Okay. Like that. Okay.
Okay. Yep.
I do have that. Now this frame, I'm
going to put that frame right here. Glue
here, here, and here.
And that way I will have kind of like
entry from this side. Will be like
little pocket.
And I'm going to be using double-sided
tape to glue it down. And make sure I
will don't put more
of double-sided tape than I need.
just you know flipping the way it will
sit actually I'm thinking this way so it
will have beautiful
frame around
here
and place it right there
like that.
Okay,
now I can
place my tag here
and I can either leave it underneath or
maybe I can fit here.
Oh, just exactly. Look at that.
Oh, I didn't plan that. But I really
like that that I can fit exactly. Um, if
I will have some long paper clip, I can
clip it here. I will have to have a look
if I do have some longer one.
Oh, like is this one? Look at that.
Oh, quite big paper clip. I'm going to
place it right there. Look at this.
Okay, I can hold it this way. Something
can be placed also here in this pocket.
So, I have added one little paper. I do
have here for ages. It's from some old
documents. And then this is sticker.
It's like frame sticker. I added in this
pocket. And then I do have that window.
And I found these. I have made these.
Oh my god. I think eight years ago maybe
maybe even longer.
Seven seven years ago I will say
probably like something like that. I
also shared these designs with my
patreons long long time ago. I hope I
will still find them in my computer. Uh
these are scans of uh those small little
cards. You can find that they were like
I think with cigarettes or with matches
and you can collect these uh little
images in like album of these images in
collect collectible book or not sure how
did the right name of that but I did
resize that those images and scan them
and resize them to make them like cutie
insert for my journals And I have
prepared them like uh on a sticker. I do
have here double-sided tapes on all of
them. So they can be used as a sticker.
I'm gonna place it in that window right
there. Tada. Tada.
There can be place anything, you know.
But right now I do have that this one.
So I do have my little book done. This
I'm going to keep for writing space. And
that is my first page of my future
bramble book. I do have loads of papers
to work with.
I do have also my cute organizer to
store all these little scraps, bits and
pieces. Also for those
who like to have some organizers,
I will put link down below for this one
as well because I think these organizers
are just amazing. I do hope you did
enjoy the video, short video, short walk
through how I made this one. So that's
all my sharing for today. Thank you so
much for joining me and spending your
time with me. I hope that you will have
a beautiful time. Even if you are
preparing yourself for creating or you
are just enjoying your uh craft room by
sitting there and uh looking at your
stuff, it's still good, you know. or if
you are in the stage where you will
probably need that later shed. Well,
welcome to the club, guys. It's Yeah,
it's happening to many of us as I
noticed on my Patreon. Those comments
from ladies were amazing. They made me
laugh so much because it was a it was
just amazing to read it. go to have a
look that post is public so you can read
what uh we are sharing there and it's
it's mostly so funny. So that's all my
sharing for today. If you're planning to
have some later shed let me know.
Hopefully
you will enjoy it same as I do. And
that's all for today. Don't forget to
download your freebies with garden
collection. I hope you will like it. If
you do like my berries collection,
bramble book collection, link will be
down below as well. I wish you all a
beautiful day. Take care of yourself and
I will be back soon. Bye.