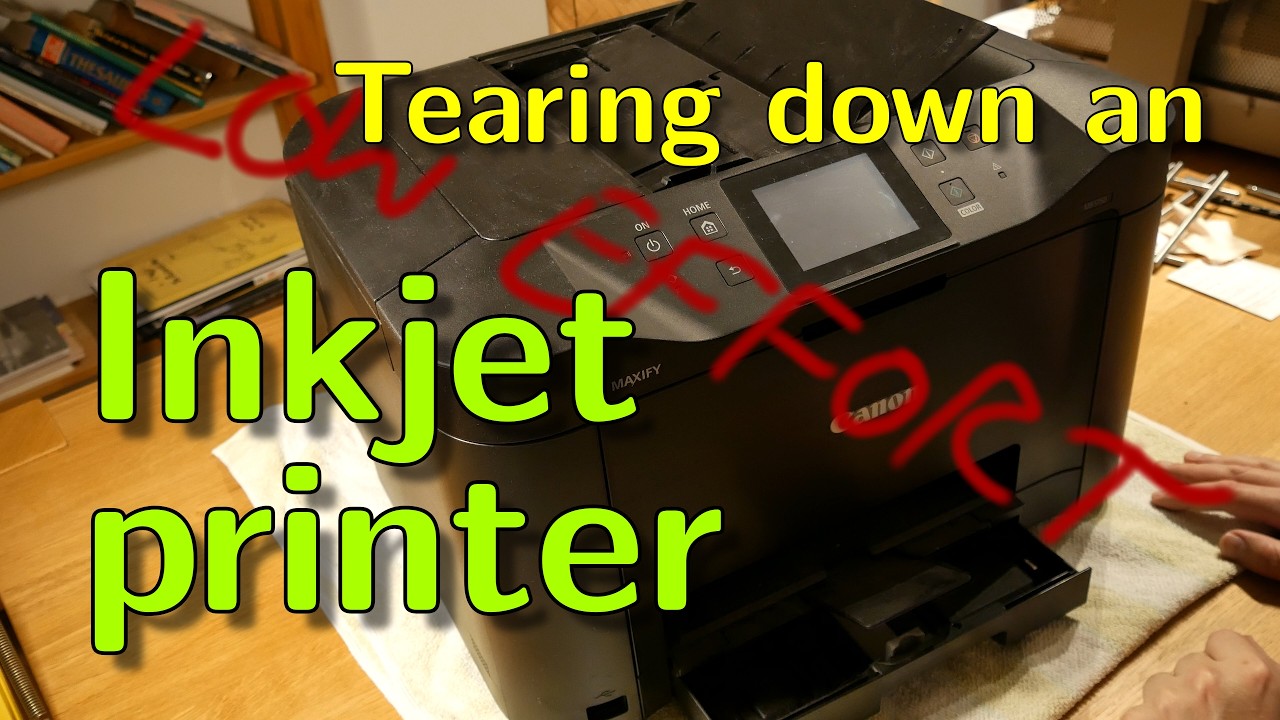
Low effort: dismantling a Canon Maxify MB5150 inkjet printer into very small pieces
Watch on YouTubeVideo summary
The video documents the complete disassembly of a Canon Maxify MB5150 inkjet printer that was discarded due to severe reliability issues, specifically frequent paper jams caused by dried ink and excessive leakage onto surrounding surfaces. Although the scanner component functioned adequately, the printing mechanism failed so consistently after only three pages with new cartridges that it could not be donated or repaired; instead, it was replaced by a more dependable Brother laser printer. The teardown reveals that the device's construction is dominated by cheap plastic gears, clips, and actuators rather than robust metal components, relying heavily on assembly methods like heat stakes and numerous difficult-to-access screws hidden under plastic covers which often led to broken parts during removal.
Inside the chassis, a complex array of electronic and mechanical systems was uncovered, including multiple motors reused for different functions, optical encoders, LEDs, a loudspeaker, ribbon cables with labeled IDs, and a Wi-Fi module housed in a metal can. The main controller board features an R9A06 GO2 microcontroller alongside Ethernet and USB capabilities, while salvageable chips such as Windbond 25Q serial flash memory were identified for reuse. A significant portion of the internal design is dedicated to managing waste ink through peristaltic pumps, vacuum hoses, absorbent foam pads, and lubricated sponges; however, these containment systems failed in this specific unit, causing ink to overflow through vent holes or cracks into the base of the chassis and drip onto furniture below.
The mechanical analysis highlights several cost-cutting measures and design flaws that contributed to the printer's fragility and eventual failure as e-waste. The print head movement is driven by a small motor with an optical encoder strip rather than a stepper motor, while duplex scanning relies on two scanner bars moving simultaneously over paper fed from both sides. Other notable observations include resistive touchscreens connected via high-density flex cables that are hard to repurpose, grounding brushes made from carbon tape for static control, and one-sided soldering techniques used for LEDs. The disassembly process yielded numerous small plastic fragments, broken clips, ink-stained components, and leaking cartridges destined for junk drawers or recycling, alongside a collection of functional items such as standard DC motors, springs, rubber rollers, hard plastic gears, an internal peristaltic pump mechanism, and a working power supply unit rated at 32 volts.
Read the full video transcript
Loweffort video time. This is my old
Canon printer. It is going to e-waste.
Before it goes, let's rip it apart and
see what there is that's interesting in
it.
So yeah, I got this thing at the
beginning of lockdown because I'd lost
access to my work printers and scanners
and I urgently needed one. It's a Maxify
MV5150
and I hate it and I want it out of my
life. It works fine as a scanner. It's
got a flatbed scanner and a reasonably
effective document feeder, but the
printing mechanism is extremely picky. I
just don't print enough for it to work
properly and it gets gummed up with ink.
And the second last time it did this, it
demanded a whole set of new ink
cartridges, which I got it and it
printed three pages. And then it
demanded another set of new ink
cartridges. And at the same time, it
peed quite a lot of ink all over my
shelving unit. So, I've replaced this
with a proper Brother Color laser
printer, and this is going away. I can't
send it because it's broken. And
frankly, I wouldn't wish it on anyone.
What I expect to find in here is some
motors and actuators and some bits of
glass and LEDs and a whole lot of cheap
plastic gears. So anyway, the good news
is that
there's no risk of breaking it cuz it's
already broken. That seems to want to
come loose. There doesn't seem to be a
screw this side. This thing is on my
dining room table as it's too big to fit
on my workbench, which is also why I
sound funny because I'm not using the
nice microphone. It feels extremely
plasticky. It was surprisingly cheap.
Only about like 150 Franks, something
like that.
And honestly, the build quality does
feel very much like it.
Okay, I'm missing something.
There's a feature I never spotted
before.
This piece comes up. It's so that I can
put really thick pieces of paper down
and the lid goes flat.
It doesn't feel great, but it's there.
I am a little bit nervous about tipping
it up in case it spills ink somewhere,
but I think I need to to see if there
are any screws.
There's a rubber foot with an arrow
pointing at it. The arrow usually means
there's a fixing screw underneath it.
So,
it lied. There is no fixing screw under
there.
And this bit just ripped off with force.
What is there?
A motor. Bit of a metal framework.
Another motor.
Yeah. Let's take the other side off.
I may have mentioned on this channel how
much I hate plastic clips. Well, this is
one reason why. Now, what have we got?
We've got a Wi-Fi module in its very
characteristic metal can
and a PCB
where most of the interesting stuff is
on the back. Gears.
Interesting gears. I'll have them. A
loudspeaker. That's an actual
loudspeaker.
It's not a pizza squeaker. Interesting.
This side has the motors that presumably
move all the moving bits.
And there's some signs of screws here.
So, I think we can get more of the shell
off.
It's fastened down good and hard over
here. So, there may be another screw in
there.
Yep, it comes off.
Revealing
Some more very flimsy stuff.
Right. That wasn't the right way to
remove this. That's broken some of these
plastic bits, but as I may have
mentioned before, I don't care. So, this
has revealed
the print head mechanism
and the ink cartridges.
And this is the eject slot for the
cartridges.
So, see, they are actually on camera.
Let's remove those.
And these there
uh that is dripping pure yellow
black.
Oops.
They will only eject if they're in this
position.
When the printer turns itself off, it
locks the print head over here,
which is not doing it now. But in order
to release it, you have to reach in
under here and twiddle a gear,
which I can't find.
Yeah, it's not great. It really wants
you to have the thing turned on so that
it will move the head to the right place
to remove each ink cartridge.
But when it gets sufficiently confused,
it won't turn on that much. And as a
result, it just gets itself wedged and
you can't do anything with it. It's a
really stupid piece of design.
Oh, now this has locked.
That's the gear. Now I can push this and
it will
slide this.
Okay, I'm going to find some bags to put
those cartridges in before they dribble
ink everywhere.
Sandwich bags. You can never go wrong
with sandwich bags.
That one has smeared some yellow around.
So, let's put the bag inside another
bag. I wonder if there's anything
interesting I can do with inkjet ink.
The stuff is terrifyingly expensive.
I don't know if it's still true, but for
a while, gram for gram, it was more
expensive than heroine.
And this is dribbling black.
Okay, what's next? Well,
I still want to get this top thing off.
And I would also rather like to remove
the this lid because it keeps falling on
me.
If the mechanism
it's this weird combination of
incredibly flimsy
and
Oh,
I didn't do anything there.
Uh,
that just came apart in my hand.
Right. You just push it sideways and it
uncips. That's That's brilliant. But
this one I can see it's got the ribbon
cables in it. So this will be a little
bit more complicated.
This is the ribbon cable.
You see it moving here when I tug on it.
There's some screws up the top. So let's
see if these do anything.
The lid has the page feeder in it. So
there's actually going to be quite a lot
of mechanics and some electronics in
here.
Also, I completely forgot, but all of
this is on the lid.
I do wonder, is the computer in here or
is the computer here?
Well, we're going to find out. That
screw didn't really seem to do much.
It's just a slidy mechanism
for the paper tray.
This is a
foldy down flap thing.
There are no screws on the inside of the
lid, but there are a lot of slots with
little arrows attached to them. So, what
happens if I stick a screwdriver in
there?
Nothing. My screwdriver isn't long
enough.
But these are probably where the various
disassembly clips are.
Yeah. When in doubt,
brute force. We've got some gears.
Rather nice gears, actually. A little
motor.
This is the paper feeder, I bet.
And the ribbon cables go on under there.
And I bet they go to the computer. So, I
think we need to rip the other side off.
It's solidly fastened down
here.
So, can we go in from this side?
That slot is molded. It doesn't actually
do anything. This is all one piece.
I can probably remove the this
mechanism.
I can see in the crack large pieces of
white plastic that I think is the bottom
of the control panel.
But the blaster thing still will not
come out.
Okay, I got some pokey thing. So, let's
try poking. Is there anything pokable in
here?
Doesn't feel like it. There's something.
No, I don't think that's helping.
Well,
this might give us an idea of what's
going on. Here's the bit that was
holding it down.
which is interesting. That spike is
nowhere near
the slot on the underside.
Ah, but here
is a clip. There is a slot just
underneath it. So,
right
now I know how that works.
I think I can do
that.
There we go.
Right. Well, that wasn't elegant,
but there is the control panel. One
ribbon cable has already ripped free.
That's okay. That's a friction fit. This
is a fold up clip.
And what have we got? We've got a big
chunky chip that looks like a
microcontroller
and some stuff that can be looked at
elsewhere.
So, here we finally have some screws.
There's a screw in there where it's not
accessible.
Or is it?
It is accessible.
The lighting in here is not great.
There's a reason why I usually do stuff
on the workbench.
Ah, just the one screw. Oh, there's
another one. this side, but I found it
and took it out.
Okay, another piece of miscellaneous
plastic. And this reveals
one of the hinge mechanisms, which is
intriguing. This one seems to have
fallen off its mount completely. Got the
ribbon cable with, yes,
zigzag strain relief.
and glue.
And on this side, we've got the ribbon
cable to this board
and the ribbon cable to
don't know where that's going. It's
going in here behind all this slot.
This bit comes off.
Ah, I know what that other ribbon cable
was. So, this thing has duplex scanning.
And this is the scanner and light bar
for the top of the paper. And there's
another one underneath for the bottom of
the paper. So, it can scan both sides
simultaneously as the thing goes past.
So, oh,
random piece of plastic falling off.
Always nice to see
that holds that
minuscule piece of plastic on that
presumably did something important.
So, what holds this
black piece of plastic onto the white
thing?
Don't see any more screws. Is it
clipped?
Yes, there's a clip in here.
Like so. Another one here.
There. There we go.
And it still doesn't come apart.
It looks like it's fastened down from
this side somewhere.
Okay,
that's removed the scanner bar. Oops,
that was a spring. There's another
spring. Have those. Uh, I couldn't find
the clips to actually properly remove
the scanner bar, so I just broke them.
But we do at least have the scanner bar.
Sadly, I bet there's nothing whatsoever
I can do with this.
which is a shame as it's a very high
resolution one-dimensional camera.
And underneath the scanner bar is
revealed lots of little broken pieces of
white plastic.
this
thing
which pushes the paper down against the
the platin
which is
that piece of glass. Another piece of
broken plastic.
There's some holes here but only this
one had a screw in it and I've taken
that out.
Ah, but there's holes here for screws.
And has that achieved anything?
Apparently not.
What is this thing held together with?
Ah,
one more screw here.
There we go. So, that piece of plastic
comes out. It's got
a bunch of weird springy things.
These look like switches, some rubber
strips, the fold out bit for the paper
tray, and the slide in and out thing for
the paper width.
And what do we have in here? We have
some rather short cables.
Ah,
the earthing wire. Suppose one advantage
of making everything out of cheap
plastic is it doesn't need earthing.
There we go. It is now unplugged.
What have we got? We have some optical
sensors. There's one there. That was the
weird springy thing on the piece of
plastic I threw away. And there's one
here.
This piece of plastic blocks a
presumably infrared LED and the sensor.
So, these are certainly worth salvaging.
Yeah, two neat little boards, each with
the sensor mechanism on them. Are they
identical? No, not quite.
In terms of this thing, the the metal
rods are definitely worth having.
and all the gears.
Yeah, let's put that aside for later.
Now we've got the lid. We should now be
able to remove
all these ribbon cables.
Some of them are glued down. And
one more wire.
This wire
was connected to the motor
board here.
So presumably it's too high current for
a ribbon cable. And it's got a big
chunky ferite bead here.
Can I
There we go.
the earth wire.
All right. And now that bit comes loose.
There's some more springs and gary stuff
there. So, let's just set that aside.
And
I won't set it aside there cuz that's
getting in the way.
Okay. Now, I can get at the screws here.
So, maybe take the top lid off.
And I think that was a plastic clip
before I broke it. Right. What have we
got here? It's a piece of plastic with
two nice slabs of glass
that if I can figure out how to get off,
I will get off. They are taped down. The
simplest thing to do is lever them, but
that tends not to work very well with
glass.
Okay, set aside for
later. And what have we got in here?
Well, this is the scanner bar. When
you're doing flatbed scanning, this
thing, it's a bad bad noise. This thing
moves up and down. When you're doing
paper feeder scanning, this thing moves
up to this side. And it is the other
scanner bar that
this one
matches. So they go like that. The paper
goes through the middle and it scans
both sides simultaneously.
And this just sits on a greased
bar which is plastic. It's a lot of
plastic in this thing.
Over here we've got
the thing.
Ah,
this works the eject button for the ink
cartridges.
And I think this bit was integral to it.
And now it may not work anymore.
Oh, no. That's worked. See, that's now
locked cuz that thing has fallen down.
So, if I rotate this,
now it presses.
Okay, that's cool. Now I know how that
works.
What's this? This is a
switch.
I don't think that piece of plastic I
just threw away is the thing that pushes
the switch. Oh, it's the lid closed
switch for this bit. Uh bit pushes
through here and toggles this thing.
Okay.
Well,
I'm having that.
I wonder how did they put this thing
together?
Is it done by hand?
Some of this seems too fiddly for a
machine, but it's such a low value item.
This the wire here is actually cleverly
knotted around a little Tpost in such a
way that you can tighten the knot by
just pushing the loop over and pulling.
But you can't actually loosen the knot
very easily.
So that then connects to the main board.
Let me adjust the camera.
In here is a very small electric motor
which very slowly winds the bar up and
down. This is what actually moves this.
Now, I do remember noticing that the bar
moves very slowly. Takes forever to do a
flatbed scan. And the fact that this
motor is so absurdly small is probably a
contributing factor.
Okay, let's break the belt unit.
This is the power end
which I'm aware that you can see nothing
of.
Here we go. And it just lifts out. Tiny
motor. Oh, that's very cool. an optical
encoder.
I don't see any markings on the encoder
wheel, so it could be infrared or it
could just be too fine to see. Anyway,
that is cool and worth having.
Meanwhile, at this side, now there's no
tension on the belt. This just lifts off
and we have
another camera sensor bar. Again,
I doubt very much there's anything I can
do with it, which is a shame.
And this this is the first piece of
metal in the structure of this thing.
Okay, this top unit feels like it wants
to come off. I'm going to get a lot of
ribbon cables out of this thing.
I bet none of them are useful sizes for
anything.
thing is slowly drifting on the table.
So, let me just move everything to be a
little bit more centered. There we go.
Here there's a
Oh, it's the tensioner wheel for the
belt. It's a
It's just a little pulley. No teeth on a
spring.
That's cool. So, what we got left? Well,
this thing is going to be a pain because
of the huge ferite core.
So, where's the bottom of this wire?
There's the big earth wire, and there's
the blue black wire that drove the motor
board.
And there's a PCB in here
that I bet
is the power controller board for the
motors.
And this is wound around a sort of maze
thing that I'm having to do by feel.
It's more of these weird tea bar things.
There we go. Problem solved. And here's
the end of the blue wire.
So, here we go. This will pull through.
Oh, no. It's still fastened down this
side.
Okay, so this corner pillar is firmly
attached to the top piece by some
mechanism I can't quite figure out.
It's a clip.
Okay,
easy enough.
Now, does the top come off? It does not.
Oh, here's the gear train. This was the
thing that made the
eject button work. So, this thing pushed
that vertical piece up and down. So,
this will wind round until it hits the
little blank spot in this cog and then
freewheel.
Can't imagine what use that will be, but
it's going to go into the junk drawers.
Big clip here
and here.
And ah,
I missed a ribbon cable
and the earth wire.
There's one final strain relief.
There are no more strain reliefs. Okay,
so now we have the top piece which is
almost completely uninteresting except
for this button here
which presumably has a spring in it.
There it is. Spring.
Meanwhile, over here we have the tangle
of wires,
ribbon cable,
motor cable around a little tea bar.
I'll be bothered with that.
And it still won't come through because
of this stupid ferite core.
Okay. And it won't pull through the
other way because of this ferite core.
So, this thing must have been assembled
by putting the wire in place and then
tying the cores together.
Well, I'm going to put this aside
and chop the thing out later.
Apart from anything else, that piece of
plastic needs to be broken into smaller
pieces. My big box of plastic here
is quite full. But now we have a really
good look at how this slot works. Here's
the print head.
Here's a lot of tangled pieces of ribbon
cable
which are
getting in the way.
So, let's remove them.
I can see a dump sponge.
So, when the head gets cleaned, I think
that's a dump sponge. It's wet.
When the head gets cleaned, ink is
dumped onto this and I can see spilt ink
everywhere. So, when I said that it peed
ink all over my shelves, this thing will
have filled up and then the ink will
have overflowed and just dribbled out
the bottom.
I don't know what this is,
but I recognize that clunking noise.
This thing used to make that a lot.
Meanwhile, over here we have
Huh.
That's a bottle.
Oh, this is the dump sponge.
Oh, gross.
That's That's disgusting.
So, how does it get the ink from here to
here?
this pipe.
This is a Tpiece and the cap of this
thing. And this is hollow.
And down here,
I can see that it's plugged into
something that has a lot of ink in it.
So, it must somehow suck the ink out of
this thing. Yes. And this is actually
quite wet inside.
The print head here is the magic thing
that makes all the printing happening or
in my case doesn't make all the printing
happen.
Complicated gearing stuff that does
I don't know.
Here's the belt that moves the print
head.
This
is a piece of transparent plastics
strung across. I don't think it should
show up on camera.
I wonder if that's an optical encoder to
let it know how far along it's moved.
Okay, let's take this thing apart.
I think I'm doing this in the wrong
order. There's a plastic clip over the
top of that screw
that just Oh, okay. Now that's fallen
out.
Well, that's interesting. these copper
pads here, poker pin connectors.
So, this is clearly replaceable. And
this is in fact the print head. Here you
can see the actual head mechanism, which
is absurdly tiny. There's one big one,
which is presumably black [music] and
white, and lots of little ones that are
presumably the colors. I can actually
see that they are slightly different
color. And I bet that all I have to do
is replace this and then reassemble it
and this printer will be as good as new.
So that's nice. Okay, that's probably
full of ink.
So this is just the thing that moves the
print head along
and it's made out of dense plastic.
Again, almost no metal. There's a metal
bar here which doesn't seem involved
with the print mechanism and this big
chassis here. And that's essentially it
as far as I can tell. [music]
I mean, there's likely a way. Oh, that's
unclipped. And that's unclipped. Okay,
that fell off. Oh, look. I found some
ink.
I think I got that from here.
Great.
Ah, now it comes off. This rail
unscrews
and this bit comes off.
And I bet this thing,
well, it's fallen off the bar, but it is
of course still attached to the belt, so
that's not helping. Now, here is the
motor that moves the belt.
Therefore, this side should have the
tensioner.
And there's a screw.
There's another screw.
Given the build quality of this thing,
having two screws here, this tensioner
must be really important.
Uh, it hasn't actually come free at all.
And all the screws have fallen out and
now somewhere in the base of this thing.
Those two screws, there are slots here.
So, this is how you adjust the
tensioner. And then over here, I should
just be able to flip the belt off.
I said just
flip the belt off.
Ah. Uh, can you make out the gray part?
This is indeed a optical encoder strip.
So, if I unhook it this side,
that comes out,
which reveals
this is where the belt is clamped onto
the head.
Not clamped anymore.
And
the mechanism down here is the thing
that will read the
coder strip. This is never going to work
again.
But now at least we've got the PCB board
with the nice pogo pin things that I am
certainly keeping.
had a bit of [music] a break and have
washed my hands, but let's take a look
at some of the electronics.
Now, this thing I thought was a power
driver board. I don't think it is. I
think this is just a distribution thing
that connects this ribbon cable to
lots of other things. It's also got a
battery on it
which suggests that the main board which
is this has possibly been alive and
suffering while I've been vivisecting
this thing.
Oh well, the all these
plugs out.
I will not be short of those little
connectors.
Yes, there is in fact nothing on the
other side. This is just a distribution
board for this ribbon cable and a holder
for this button cell.
Yeah, all the connections are actually
labeled.
Doesn't say what they do, but they all
have IDs.
Okay. Well, the main board is now
disconnected,
although I actually won't disassemble
that at this point.
Let's go after some of this.
More
wires looped around
plastic things.
This does not seem to be very firmly
attached. I have to say
there is a single screw here.
And I need to disconnect all of these
many wires
and more of these plastic clips.
And this big ribbon cable that went to
the print head goes through this metal
piece here
through this little plastic clip
and then through the metal
here.
Well, that seems to have broken
mysteriously.
There we go.
So, this bit comes free. And that's a
useless chunk of plastic.
Here is the big ribbon cable.
Move that out of the way. And what do we
have here?
Quite a lot of
plastic machinery and springs.
This bit moves.
So, this is the paper tray. This is
where the paper goes in.
And the print head moved back and forth
this way.
Ah, but the print head was underneath.
So, the paper must have come out here.
So, this is the paper feed mechanism,
which suggests that this big round thing
here holds a roller. So the paper comes
in underneath comes round inside here
out through here over the print head or
rather under the print head
and I'm trying to remember where it came
out. I think it was up here actually. So
that does make sense.
So there's a couple of screws here. So
let's take this thing off and see what
happens.
And we've got [snorts]
couple of springs. And no, that's quite
a lot of springs actually.
And some plastic flappy stuff.
Underneath we've got these
which are also connected via springs.
I think this is the mechanism that held
the paper down
under the print head.
I seem to have found some more ink.
Now, I do see that there are some screws
in here.
Nope, that does not want to come off.
Yeah, I think a lot of this is screwed
on to this metal stiffening plate. Okay.
So, yes. Let's take a look at the
system board. Got lots of these ribbon
cables.
Ribbon cables. Many ribbon cables. Many
other connectors. Don't care what
they're plugged into.
I'm not making notes.
There's a chunky wire.
That's probably Oh, that's the speaker
wire.
speaker is in here and is of course
a great speaker noise. I appear to have
completely ripped this side of the
speaker off. Well, that's annoying.
That's actually a proper speaker.
Great.
So, I'm expecting that this thing will
have
most of the electronics. I still don't
know whether the computer is in here.
or in the screen.
Getting a look at the back of this board
will reveal a lot of stuff. If I can
figure out how to get the thing off.
There's a hole there, but there's a
screw. There's a screw.
Okay. What's holding this blasted thing
in? Well, there's ribbon cables and
there's plastic clips.
There's a screw here.
black against black plastic. And the
lighting here in my living room is not
the best.
And because of the camera on this
tripod, I don't actually have very good
view of this thing.
More wires.
Oh, I can feel a big chip on the back.
Come on.
Unplugged.
And
I bet that's the computer. What does it
say? It's a R9A06
GO2.
So, I did go and look it up. All I can
tell is it's a Renaissance part. It's
part of their product line of
telecommunications chips and processors.
This one does not appear in their
product list. It could well be a custom
part for a mass-produced device, which
this is. I'm going to hazard a guess
that it's a microcontroller of some
kind, probably a dual core arm with lots
of IO because here we've got the modem,
which is very, very simple. So, this
contains no electronics other than a
level shifter. So, all the guts will be
in here. We've got Ethernet. We've got
USB.
Uh, we also have I forgot about that.
The
Wi-Fi chip.
So sadly, I think there's nothing really
I can do with this, which is a shame as
this will certainly be
a thoroughly respectable little computer
with tons of IO and
that looks like RAM.
There's some 8 pin chips.
Oh. Oh, this one is a
Windbond 25Q. That's a serial flash
chip.
I'll have that. Okay.
Most of that board is probably going to
just go away. [music]
We've got a
a
this metal can has cannon written on it.
WLAN module model K30365
and some information. Don't know what's
in here.
I'll go look that up later.
So, that's this metal thing
which will probably be well, I was going
to say an RF shield, but there's no
shield on the outside, so it's probably
just a stiffener.
for holding the rest of this thing up.
Also, slap the PCB on the side of
feels held in by something.
Okay, let's try something else.
Now, this this
is a ribbon cable
which goes to the USB socket, and
there's a little board in here for that.
There we go.
So, this is
a largely passive daughter board with a
socket on it. No, wait. It's a
completely passive daughterboard with a
socket on it that happens to screw
nicely into
this metal thing.
That's a perfectly serviceable little
USB daughterboard.
So, what's that exposed? Well, there's
this switch,
which I think was the case switch I
spotted earlier,
and there's some of the gear train here,
which is probably moving the paper
around.
So,
belt
encoder strip just looks gray to me.
There's a screw holding a metal thing
down.
Interesting.
It looks like it slides over.
Yes. I'm not sure how that works,
but I have spotted over here. Here are
the pipes for the the ink dump
and a plastic thing.
So, I'm actually interested to see how
the ink dump works.
It's probably going to be messy.
Aha.
Right. This sponge is for soaking up
ink.
And I think the bottom of this looks a
bit wet. So,
nothing colored.
It's lubricated with something. This is
just oil.
This uh that does have ink on it.
There's a weird little moving thing
here.
Yeah, I have no idea what that is.
Yeah, this foam is quite heavy. It's
impregnated with some kind of lubricant.
So, as it's a bit wet, I think I'm going
to put this back in. I think that what
we might have here is a mechanism for
lubricating some of the works. I wonder
is it supposed to keep the print head
wet? And this greasy stuff is supposed
to coat the print head and stop it from
drying out. That's plausible,
but I would like to remove this.
All feels very solid. Okay. There's a
screw here.
And there's a screw here.
Oh. Uh, it comes off.
And there is a quite a lot of ink on
this
in little rollers for moving the paper.
Yeah, the paper comes out under here.
Right. And now that's come off. This
thing
does feel looser.
Is it just clipped down?
No, there's a screw.
Right. This is the other stiffening
plate. Yes, it could be. So, you've got
one here
and one here.
And that could well be holding this bit
vertical.
There we go.
And
this is one of the ink dump hoses. And
it's connected to this.
Is that an air valve?
Inlet or outlet?
It is actually connected up here to this
plastic thing which looks suspiciously
like a pump.
Okay. Well, metal stiffeners are always
worth having.
So, now we can see more of the ink
stuff.
It connects up here to this thing,
but it doesn't. It connects to the Well,
that bit comes off. It actually connects
to this thing, which is not connected to
this.
When this moves over here, it pushes
this lever, which lifts a little thing
here. Oh, that's interesting. Underneath
all of this, there are these absorbent
pads and bits of broken plastic. They're
clearly expecting it to spill. And I can
see along here, is that grease
or is that
spilled ink?
Uh,
could be either yellow ink or yellow
grease. To be honest, this mechanism
is not connected to the rest of it. I
mean, it's not part of it. Ah, there's a
slider.
Wait a minute. Does this move over and
then slide?
Now, it's connected in here somewhere.
So, there's some mechanism that I need
to jimmy before it will come out.
This thing
is feels fairly loose. I think it's just
clipped on. And I think this is just the
guide that held all the wires. And
there's a barite ring there.
So, this may come out relatively
easily.
Wait a minute. There's a screw in there.
And
there's a screw down here.
I have to say, as horrible and as
plasticky as this thing is, the screws
are all
accessible,
it would be a miserable job, but you
could actually take this thing apart and
put it back together again.
This does require you to not break a lot
of the plastic clips that I have been
breaking.
And I'm not volunteering to do it
either.
There we go. And we have a plastic thing
with a felt pad and a metal thing
clipped to it.
You say plastic and metal. I mean metal.
and plastic
and that has revealed
not a lot.
Actually, it has revealed this. This is
another encoder wheel. So, there's a
plastic ring and a sensor.
And the plastic ring just looks like
it's got a gray piece on it. Means it's
probably too fine for me to see easily.
Now, even through the magnifying glass,
it's just gray.
So, it's either like infrared or really,
really fine. This is more exotic than I
was thinking.
And that's the speaker cable. And that
is the brokenoff piece of speaker. So,
it does look like this metal thing is
supposed to slide sideways and then all
these clips come undone,
but it won't.
It's held on with some springs.
So, let's unhook them.
There's one.
Oh, there isn't one on that side. Oh,
it's in here. I don't think I'm able to
get that one, but I can see here there
is a plastic clip
like so. Ah, I can't reach it. And
like so.
There we go.
Yes.
Paper comes along here underneath all
these little rollers
and this applies gentle pressure on the
paper and keeps it flat.
And this goes here and the print head
moves up and down here.
One piece of good news I found doing all
this is that the ink does appear to be
washable.
Okay, what have we got here?
That does not feel very
firmly put together.
Did I break something? I should
emphasize that if I did break something,
I don't care, but it would be nice to at
least find where
the real attachments are.
It's hinging on something down in there.
Yes, I can actually see the other screw
that's holding everything down. And it
is inaccessible in there. So presumably
something in here is supposed to come
out. I think all of this unit fits down
into the bottom of the case and comes
out in a piece. There's a screw here.
Oh,
and this has all come loose
kind of. This is the power supply.
There's another little plastic clip here
that I can't be having with
broken piece of plastic.
Right. The power supply is this brick
here which lives inside
this cage which is all part of this
piece of plastic. This is all one piece.
So I think
this slot might need to come out first.
Here's a screw.
So, I think I may have run out of
battery at an exciting moment,
but I believe that I have discovered how
the ink dump system works, which is it
just dribbles the ink into the bottom of
the case, which is lined with this foam
stuff to absorb it. So that once it
dumps enough ink, the ink just sort of
dribbles out the bottom of the case
onto, for example, the shelving unit
that I had my printer on. There's more
foam here.
More ink stains.
Yeah, down here it's all padded with
foam. There's another piece.
We are making progress
in I should clarify. utterly destroying
this piece of hardware.
More cables wound around plastic things.
No longer wound around plastic things.
Right. This is a motor complex.
There's a board in here that I think has
a switch on it, but we've got one big
motor here which
used to move the print head back and
forth.
The belts stretch from here to here.
A smaller motor here that may be the
print
roller.
and this thing which could be the ink
pump but there are screws and screws can
be removed. So let's do that and see
what happens.
That is still
really solid.
So those screws did not actually help.
So I'm slightly running out of stuff to
do.
So I can see that the metal back plane
is screwed onto something on this side
and it is still solidly wedged. There
are some clips.
Nope, that is still solid. Okay,
I don't think this clip is holding it
in, but let's Oh, interesting. This
metal thing moved. I wasn't expecting
that.
I was expecting things to be attached to
the metal thing and not the other way
round.
Well, we got a piece of metal with
grease on it.
Ah.
Okay, that was a little bit energetic,
but this has come free.
And what we've got is a tangle of wires
here that leads to
the motor.
Fairly thin wires.
I wonder what voltage this runs at.
doesn't say, but there's a 3W on it.
That might be 3 W and it's good and
heavy. There's a lot of inertia on that.
Okay, that motor is definitely worth
having. The metal bit possibly.
We've got
plastic thing for holding the
paper down with little rollers. And I
noticed that it's just connected
via thin bits of flexible plastic,
not very strong. Also, that just
catapulted a
hard plastic roller at me.
This is now exposed this thing in rather
more detail.
Yeah, I'm convinced that this is
supposed to slide.
Ah,
there's a latch down here.
There we go.
There's a rack and pinion in here. This
is powered.
Well, of course, something must pull it.
It also occurs to me that the shape of
these things here is clearly intended
to match the print head. So this comes
along like this.
Then it squirts ink down these things
which are hard and are possibly porous
plastic or ceramic.
And somehow
it then gets hoovered up by the vacuum
hoses.
Okay. But this has exposed this screw.
So, let's take that out.
And a screw here.
Fairly hefty screw
that's probably holding something in.
Okay. And this has exposed
this mysterious
thing.
which has got green liquid in it. Quite
a lot of hoses.
And the thing here that I don't know
what it does, it seems to be connected
to the pump. Well, the pump is
uncomplicatedly
screwed in.
I'm assuming it's a pump. For all I
know, it's a flux capacitor.
That would explain where the ink is
going if it's being sent back in time.
Oh,
wait.
Where's the other end of this? Also,
it's not a pump. Wait, it is a pump.
It's a It's one of those squishy
paristalsis pump. That's what they're
called.
And it looks like it's pumping from
this. Yeah, this is the other end of the
hose,
but this has got a plug in it. And the
other end is this thing. So, it's not
connected to anything else. Okay, I'm
confused.
Right in here, we've got
I think this cog
actually made the pump go around.
Ah, this is the motor that moves this
thing, this motor down here.
Yeah, they're very clearly reusing the
same motor for multiple things.
So, it's possible that this still is the
motor that makes the paper go [music]
round.
But one thing I haven't found is
anything like a solenoid. Normally on
systems that reuse the same motor, the
motor goes round. There's a solenoid
somewhere that pushes a gear train
basically changes gears. So, the motor
going round will move a different bit of
machinery.
Sometimes the motor will do different
things depending whether it's going
forwards or backwards, but I don't think
that's the case here.
Well, there's a cog.
I think that is a clutch
and that it does one thing. Yeah, I
don't know what that's doing. Ah, it's
still fastened in with something.
What's this thing doing?
This is I think fastened to the rail
that holds this whatever it is in.
So I might need to
somehow get this off. Well, here's a
spring that could be unhooked.
Yeah, you can see in here
possibly you can see in here there is
something that moves up and down. Oh, I
moved it too far and it latched.
And I see that some of these hoses are
connected to a thing here. So, I am
actually increasingly confused by all
the hoses in this. I It's got to be
something to do with the ink dump, but I
don't know what. You see this is like
completely disconnected from anything
else.
Okay. What's holding this onto the rail?
Inertia apparently. Okay. So,
what is this thing? Ah. Ah, this
explains a lot. More hoses, right? So,
the hoses that come in here actually go
underneath and connect [music]
to
these things.
And there are more hoses
that go over here and seem to do
nothing.
Simplify matters by breaking that.
Uh
and this
so
okay and this
is a optical sensor
which this thing runs along the rail
and
I think this protruding piece of plastic
cuts the beam here and let the computer
know when the print head is in the right
position over here.
So, this should just uncip.
He said it should just
uncip.
Right. This can make a box noise.
Uh, my box is full.
There we go. And this thing,
whatever it is, is still stuck. [snorts]
There we go.
Right. And that reveals that this is
just as mysterious
as it was before.
So, there's two of these discs. They're
covered with this transparent plastic.
There's one disc for for each hose.
So, I think it's a sump. The liquid gets
sucked through here. And this is a
little reservoir.
I just
can't imagine why.
That's a ratchety thing of some
description.
This goes on like this.
So this thing can move up and down and
that controls whether this moves freely
or rotates with the shaft
but this thing in turn
needs to get moved somehow.
So there is a there is in fact a big
complex lump of machinery here in a
sealed box.
Let's go over to this side and don't
think anything's changed over here.
This is the power wire.
This comes out of the power supply here,
gets looped around a ferite core, and
comes out here.
So, this is all worth having. If I can
get the power supply out. This actually
looks like a nice little modular power
supply that probably produces
five and 3.3 volts, maybe just five,
but that's definitely worth having.
Aha.
So this thing moved up and down like
this. And remember there was this piece.
So I bet this all interacted with the
clutch thing here somehow.
It is now much too complicated and
disassembled to figure out what.
But possibly
when the print head was moved over here
to the dump position, [music] that
pushed that lever in that changed the
gearing and clutch mechanism here that
made the pump or the motor do something
else.
And there's another thing that moves
here.
Well, that's hollow.
Hoping there might be a screw in there.
One thing I do see is there's a little
belt here
and a little pulley. There is a motor in
here. Okay, that's the motor that moves
the paper forwards and backwards. So,
these motors
are unrelated. I think this is all part
of the ink purging system.
Oh, that's the rack and pinion for the
rack and pinion
mechanism.
And that's interesting. There are two
little cogs here. This one spins freely.
This one's attached to the motor.
The track here has got this cutout so
that when the bit that spins the motor
reaches here, it will move freely. And
as a result, the head will stop moving.
Okay, I'm going to have to start taking
out some of these screws.
I've been slightly avoiding because
there might be ink in here.
Okay, that's just
holding this slot together,
but it's still solidly attached to the
base.
Broken plastic.
What's holding this?
Ah,
there's a screw right in there, which I
think is inaccessible.
May be possible to get a screwdriver in
underneath all this slot,
but I can't with the case in the way.
We no longer need this stuff. Ooh, ink
stains.
And this foam is actually glued down
with ink.
Right. I think I found my leak.
Oh, that's a labyrinth.
This is intended to fill up with ink.
I mean, it clearly didn't work. There's
no ink in any of this.
So, something just dumped the ink over
well, probably through a vent hole in
the bottom of the printer.
Yeah.
So, my belief is that the spent ink was
just dumped down here out of that
nozzle.
This went in like this and then it
trickled down through foam into the base
of the printer. And then there was all
of this foam padding to soak it up. But
something has gone wrong. In fact, I see
dried ink on the rail there.
Oh,
that just hinges open and always has.
Great.
So, this is the bit that I thought had
the print drum in it. Okay. Okay. Well,
that's exposed some more screws. So,
let's open these and see what's inside.
I'm going to guess
more plastic.
Oh, come on.
I undid the screws. You can at least
come apart.
It looks like this slides sideways
and pops out, but it's not popping.
the hinges here.
This is all one piece.
So, I can't open this up a bit more.
I can see that this white thing is
clipped. Oh, not very well. Okay, this
is the print roller. There is no actual
roller in the print roller. It's just a
curved piece of plastic
with some Oh, there are some gears.
Ah, here it is. This tiny little gear
here measures
here,
which turns this
and that
pushes the paper round and
Is that coming out again?
Yes. Okay.
And this is held together with more
plastic clips.
And there are the gears.
Well, I'll have the gears out of this.
The rest of it's just dead plastic. I
mean, the gears are dead plastic.
That
is a sensor switch to tell it if there
is paper in it.
Right now, one thing I can see
is that this plastic piece, this piece
is not attached to this plastic piece.
In fact, it feels like a different kind
of plastic. So, this is the print
mechanism that goes into the chassis.
So, if I remove the right screws, I
should be able to lift this out.
I said screws. This possibly is plastic
clips.
Oh, that has moved just enough.
Can I get this screwdriver in? Yes.
Will it turn the screw?
Yes.
just
and this bit comes loose. And what we
have is a nice little motor
with a worm gear,
a metal worm gear
that connects to this
and rotates
all of this
appallingly complicated
machinery,
whatever it does. Oh, and there's
another optical encoder on it.
Yes, clearly using simple linear motors
like this plus an optical encoder so
that you know what it's pointing at is
cheaper than using a stepper motor,
which is what they used to do.
So, I'm now relatively confident I've
got all the ink out. So, let's tip this
up and see what there is to see.
I see screws.
Wow, it's so light. I've taken so much
stuff out of it.
There are not very many screws.
In fact, you can see that this unit is a
different plastic to this.
Oh, also this is the paper tray.
Everything here that is. and just clips
in and out. I've left it clipped in
because it's an integral part of the
base and it won't sit nicely on the
turntable
unless it's there.
This is super
super awkward. There we go.
Piece of plastic stained with ink at one
end.
Okay. Quite a lot's going to fall out
when that thing removes. I just noticed
up here.
This looks like a clip.
And this is a different kind of plastic
again. So, is this actually a lid?
Almost looks like a battery compartment.
Oh,
it's the power supply.
It's very light.
Okay,
that was a find.
Right, that's the paper tray.
The paper tray is most of the bottom.
Okay, I'm going to put that back in
so that I can put it back onto the
turntable.
And has that actually got us anywhere
useful?
No.
Okay, that's interesting. This is gray.
It's covered in a slightly tacky rough
substance.
Yeah, it's more like sandpaper.
This will be presumably to grip the
[music] paper. Okay. Well, I seem to
have done something to make this side of
this g come up.
Do I just need to apply more brute
force?
Ah, here's a clip.
There we go.
And this lifts off. And this has got
some metal,
some gears,
and a piece of broken plastic.
Spring.
Always worth having springs. Okay, I can
see the motor in there on his little
board.
Very thin wires for a chunky motor.
Here's another gear actuator thing.
Pushing this in pushes this thing down
onto
a smooth piece of plastic here. Ah,
there's a notch there.
So, as it goes round,
it catches. When this thing isn't in
place, it moves freely.
This is the thing that picks the paper
up from the paper tray.
These rollers rotate and there's a gear
train in here that moves them and the
paper slides up this smooth piece of
plastic and into the works.
But what actually
holds this together?
Well,
this is a separate Oh,
separate piece of plastic. The rest of
it. Okay.
And I think these things
are what stop it sliding out.
So that can get removed entirely.
Excellent.
My box is full of plastic. This is part
of this.
So, what holds
the works
in
are these clips.
They are, you know,
I mean, you're not supposed to uncip
them like this, but
yeah, that's just breaking apart. rather
than unclipping. Now, at least I can see
a little better.
There's a screw in there. How did I not
spot that?
There is, in fact, not a whole lot of
stuff left.
So, the only thing that's holding this
in is this rod. And there is something
at this end that's holding it in place.
Oh, it's the belt.
Ah, it's hooked around the drive motor.
I think there might be too much tension
on it to cleanly unhook, but
there we go.
Right.
And now all of that lock comes out
subject to
the usual cables.
All free.
So that can go on the pile.
And what do we have left over here?
We've got
a wire
that's presumably going to that switch I
spotted earlier. A spring.
Some foam.
More foam. Various screws.
Gear systems.
Quite a lot of gear systems actually.
Okay, I'm still confused about this this
metal plate. There is a screw holding it
in [music] that is deep underneath
which is just completely inaccessible.
Unless this thing comes out and I don't
think it does.
No, I think it's molded in then I don't
understand how it got in and out
actually. Actually, that's moving
independently
of the base.
That is a separate unit. But what's
holding it in?
There's a screw down there. That'll be
That'll be it.
Ah, I should have seen that long ago.
And I bet there's another one over here
somewhere.
There you go. And that comes out. And
that reveals
the motor, which is quite a small motor.
And there's fite bead and the chunky,
well, not very chunky wire.
These are all two wire motors, which
means they're not brushless. They're
just perfectly ordinary, boring
DC motors
which will be useful.
So now I should just be able to take out
these screws.
And there is the motor
again. It feels nice and weighty.
You can get a fair bit of mass in the
rotor and socketed and a nice long wire.
This gear wheel is of course
stupid camera lost stuff again. Um,
doing stuff on the dining room table is
really not ergonomic.
So, I can't tell how much got lost, but
I did manage to get the paper roller out
from underneath,
which is this cool little thing.
If I put a bit of friction on the rubber
wheels, it rotates in this direction, it
pushes them around. If it goes this
direction,
it freewheels.
Don't know if it'll be useful, but it is
going to go into the junk drawer.
There we go.
And yeah, this cam rotates and it pushes
this thing up and down,
which will have something to do with
paper feeding.
There's a tiny spring on the other side
that is shedding lots of little pieces
of plastic.
And now I have access to this thing
which is another switch in a little
plastic holder.
Excellent. So that is now
disassembled apart from the door.
Is there anything there I care about?
Some gears, I think.
No, I actually just think that's a
roller
screw. Okay,
I'll call that done.
So, now let's just go through this waste
plastic cuz there's some other bits to
look at. There's a spring.
These tweezers are terrible. Let me get
my good ones.
Here we go. Some proper
needle nose ceramic tweezers. And there
we have a spring and
some broken plastic. There's a bit there
that
rotates. It's a cam,
but I can't be bothered with that.
This is part of the mechanism that held
one of the doors closed.
Nice little springy thing there. I'll
have that spring
and plastic. Here's the gear thingy.
I'll leave that intact.
Here's part of the print head. And I do
want that PCB. I also noticed
that there's a wire here which goes to a
couple of tiny glass lenses in there.
And I think that is the optical sensor
that reads the encoder strip. So as the
Which way round did it go?
probably like that. As it slides
backwards and forwards, this this is the
thing that actually keeps track of where
it is. And there's almost certainly
nothing I can do with that, but let's
take a look at it anyway.
Okay, so here we have the little sensor
on a daughterboard.
Here we have
breakout board, all passives. There's an
optical
switch there.
Interesting.
And this has got some
slidy things and some springs.
Going to be doing
well with springs after this.
There's a thing there that's screwed on.
I'm not sure what it is.
It's a piece of plastic.
There's a slider that moves up and down.
And there's a springy thing
that is a dead piece of plastic with a
levery thing.
and a spring
paper tray. Nothing of interest there.
It's all plastic.
There's a gear in there to
make the paper thing slide in and out,
but I don't think I can be bothered
disassembling it for that
power supply. I will not disassemble
because I want this to work.
Uh, I did find here it actually says 32
volts. So, given that all the wires are
one color except for the white one, I
wonder if this is 4 grounds and a 32 or
a 32 and 4 grounds.
Interesting. But yes, that will actually
be useful.
Here is
part of the paper feed mechanism
with an interesting little gear thing
and a metal bar.
Metal bars are always worth having.
They make Yeah, that wasn't very well
fastened in.
We go. Dead plastic.
And this has these little rubber things
on it.
Ideal for, you know, the works of 3D
printed machines.
Should I ever make one of them dead
plastic with some
ferite?
Might as well have them.
The other side of the print head.
Actually, the print head. And I have no
idea how these work.
So, let's unscrew it and take a look.
These are the PCBs that push against the
pogo pins of this.
So, this will go in like this and be
pushed together via springs.
So, given that I'm keeping the pogo
pins, it's probably worth keeping the
PCBs as well.
Well, is covered in ink. Who would have
thought
that looks like Phillips? I've got the
Philips head, but it doesn't feel like
Phillips.
This is Posy Drive.
Doesn't feel much like Posy Drive
either,
but it does actually go around. If you
use
the wrong head in the screwdriver,
it's very easy to mangle the screw
beyond repair. And then you're stuck
trying to take the screw out with
nothing to
get a grip. Okay, that is just plastic.
This has
ink on it. Lots of ink.
These tubes are where the ink actually
flows in.
I have no idea what a lot of this stuff
does, [snorts]
actually. Is it these tubes?
Yeah, these are heat stapled in
which is not great.
And then there's some glue.
Ah, there's goes the print head.
Right. And this is the internal plumbing
that connects the ink pipes to the print
head.
And then something mysterious happens
and it comes out here. Interesting. And
there's a chip there.
Most likely completely useless, but
we'll keep it in the junk drawer anyway
cuz it's cool.
The one place where I wish they had used
screws.
They have to use
heat stakes. Oh, that's interesting.
It's not soldered to anything. There's
just even more pogo pins.
Ah, right. This is the mechanism that
connects the print head to the
electronics in the cartridge.
This thing pushes against the breakup
board over there. Then these, this side
pushes on here
and this side pushes onto the print
head. And then there's stuff in the
print head.
Oh god.
Probably the the infamous chip that
stops you using the wrong kind of ink
cartridge. And possibly a heater to get
the ink moving.
And then there's this.
This is the complicated
hose pipe fluidics thing.
And there's a lot of gearing. If I turn
this, you can see all of this rotates.
And there's a lot of complexity in
there.
I think this might be a bad idea, but
I'm going to undo these screws anyway. I
want to see what's inside this thing.
There it is.
Too many screws buried deep inside where
I can't easily see them in this
environment.
Okay.
So, here we've got
the fluidic thing
and rotating this. It does feel spongy.
I think it's making very popping vacuumy
sounds. I think that's another
paristaltic pulp. Pulp pump. peristaltic
pump. Meanwhile, here we've got,
a big gear box,
and some optical encoders,
and a metal rod.
I can see lines on this one.
That's the piece of plastic with a lever
on it. And here.
Oh, that's beautiful. Look at that
gearbox.
Can I rotate the thing? Here we go.
I really hope that's in focus.
That's really nice.
I have no earthly use for any of it. So,
I'm just going to pull apart for the
cogs.
And that's
an optical encoder. That's actually I
can see a lens in there. That's a cut
above
the simple interrupter encoders. Do I
have one?
Not immediately obvious. No. This looks
more like this thing with the two
lenses.
I actually wonder is this a
just a simple LED and
transistor or is it an I squared C thing
with a microprocessor?
The wire here with a plastic clip.
No longer a plastic clip. That's the
switch.
Okay. And this thing, I want the rod. I
think this will just pop out.
Yes. I mean, it broke some plastic, but
it did pop out. And then we have a paper
handling rod with a encoder wheel here
that's probably now so bent it won't
work. A few gears and this weird rough
textured stuff.
Interesting.
And this
has got Oh, it's got stuff. Another rod.
Ah, there we go.
That's the interrupter of which I was
speaking.
So, you see it's just a bit of plastic
that goes in between
there.
In fact, there's two. There's another
one here. This one's not screwed in.
This is just clipped in,
which is interesting.
Two simple interruptors.
That one's got a plug on it. That one's
got a daughterboard.
And here we have
another little metal rod
which I think probably slides out from
this side. So what's holds this piece of
white plastic onto this piece of black
plastic?
I'm going to go with a nasty plastic
clip.
Is it supposed to go round?
No, it was just jammed on.
That's a dead piece of plastic.
It looks like this went in this way.
And then see there's a a slot here.
And then I think this thing was then
pushed down and clipped onto it or
possibly under it.
Again, I have to ask myself, how they
made all this?
How were all these little bits of
plastic assembled?
Well, if I break this clip,
that will then move further
and it doesn't actually help.
If I bend this
That bit flies out and it's made up of
several
rubber crusted rings.
Okay. So, I think that bit went in last.
Now, it looks like I should just be able
to push here and uncip this, but it's
not unclipping.
Yeah, that was not how you're supposed
to do it. But it does at least seem to
be coming apart.
Then this
slides up. Then all the gogs slide off
it and it falls to pieces. So that's
dead plastic.
That's a ratchet.
I can't be bothered taking those springs
off. Okay. And here's the the big
fluidic complex.
So that's a gear.
Well, that's a clutch.
Presumably, this thing gets rotated by a
motor and then something will push it
down and it dogs there. And then when
the cog rotates, it pushes the rest of
the thing around. And I can feel it sort
of
gummy,
which I think is the pump operating.
And there's actually quite a lot of bits
here. My guess is that these rubber
tubes just continue on inside the pump
and there are rollers that go around.
That's how paristatic paristaltic pumps
work.
And
I would hazard a guess that it's sucking
ink through here. Probably one hose per
print head
through these
things
and then out through here.
And I notice that of all the hoses,
half have a stripe and half don't,
which I'm going to take to mean
one head and the other head.
In fact, I can see that the hose with
the stripe on it goes to this head,
which I think is the color head.
This is weird. That's completely hard.
Okay, I'm not going to fiddle with this
for time, but I'm going to keep it. This
is too interesting to pull apart here.
I'm going to Good grief, look at my
hands. I am going to save that to play
with properly on the workbench.
Okay, what have we got here? We've got
a motor, some bits of metal, lots of
cogs, the
rack and pinion train for the print head
cleaner. Don't want that.
And we got this.
Right. Which has a
another motor complex, some rods, and a
gearbox.
This, I think,
is the thing that moves the paper. Maybe
I've kind of lost track of just how many
motors there are. This these brushes
are connected to this piece of foil
which is electrically connected to
this which if I remember correctly is
where I removed the grounding strap.
This is for grounding the paper and
removing any excess static charge. I
thought only laser printers needed to do
that.
So, in here, I'm bet there's another
stupidly complex gearbox.
And I shall remove the screws and
destroy it.
There we go. There's a gearbox for you.
I rotate this.
That's so weird.
So, the motor drives something up here.
Here we go.
And
if this thing slides,
this cog here drops down. So, the motor
now drives the whole mechanism.
this gear train.
All it's doing is it's moving the
rotation from here to here.
We then have a step up or step down for
this cog which is exposed here
which drives part of the paper mechanism
and this one which drives one of the
print rollers.
But these three cogs here are replacing
a belt.
Oh well.
And that's that.
And then we have these weird little
plastic axles.
They're quite nice actually.
I'll have them
that pushes on
to this metal rod.
Is there any friction?
Yes, there is
that grips firmly onto the metal rod.
Ah, right. It's keyed. That's how it
works. I was wondering about that.
Anyway, let's have that rod.
You realize that the only reason this
piece of plastic exists is to save money
on this much metal rod.
And then there's just the motor, which
is another worm gear. Wow, that's a
really nice worm gear. Actually, it's so
smooth that it'll actually work
backwards.
pushing this is spinning the motor.
I don't know if it's visible, but you
can see the encoder wheel here going
round.
I don't think I can keep that intact
because the gearbox is part of this
piece of plastic which I want to get
[music] rid of.
Oh well. And this lifts off.
And there's the motor with a nicely
lubricated worm gear and a encoder wheel
on the other side. That's worth having.
And here is the gearbox.
Super smooth.
It's all plastic, but it's beautifully
lubricated.
And the only other thing of any interest
is the grounding brush, which is just a
piece of tape
with the carbon brushes on it.
So that goes on the pile.
This is
part of the print roller.
Rubber rollers always useful.
More print roller.
Hard plastic rollers.
Always useful.
Ah, of course it's my old friend.
Plastic clips. And there's also this
hard piece of plastic here that has to
come out.
Like so
junk plastic.
And over here we have lots of foam, the
print cartridges
which are
leaking everywhere. Those
are just going away.
It's a shame. I I'd like to play with
the ink, but I bet that I never will,
and they're just too messy to keep
around.
We've got
a piece of metal with a motor attached
to it.
You know what? I'm keeping this. Now,
where did I put the belt? That seems
too big.
How about this belt? I think this is
more than one.
Yes.
And this end has a really hefty spring
on it, I have to say.
There we go.
Motor turns,
belt moves.
mainboard.
I would say yes, it's worth keeping by
someone other than me.
I will keep this aside just long enough
to nick the flash chip,
but then that will go into e-waste.
Junk plastic, but I'll have that spring.
I've got many many many many
flex cables.
Uh I've got this USB board which I will
keep.
These are the scanner modules.
There will be LED strips in these. Oh,
and a piece of glass.
Okay.
Keeping that if just for the glass.
Here is the other scanner module.
Yeah, realistically there's nothing I
can do with these, but you never know.
We've got big chunky pieces of plastic
dead.
Scanner bed.
real glass key until I can figure out a
way to get the glass off.
It's taped on.
I wonder is there enough of a gap? There
is a gap.
I may be able to bodgege up a hot wire
and I can draw the wire under the glass
and cut the rip the the tape that way or
just drench it with IPA.
Here's the lid.
There's some springs. There'll be some
gears in here.
That's actually a rather fun cam thing.
This has that very characteristic
solid but squeaky
plasticky feel.
The actual parts are reasonably rigid,
but the hinges and things feel kind of
dubious. Well, that looks like a plastic
clip.
Ah, more clips down here.
Looks more like Okay, that comes off and
is dead plastic. And that exposes
the gear train.
which is quite cool.
So, let me destroy it.
That's a plastic axle with a cog on each
end.
And then all this stuff just falls
apart.
That is now
dead.
Okay, that leaves one remaining piece
which is this.
This is
possibly the computer. Now, there's a
big chip here.
MB8 A4661.
I looked it up. No idea. This particular
part number only appears on these
things, so it might be a custom job for
Canon. The prefix looks like it can
correspond to a whole variety of chips.
It's probably a microcontroller
and maybe an LCD controller if this is
connected directly to the LCD.
Alternatively, possibly the LCD's got
its own controller. But let's
try and take this apart. It's the right
screwdriver.
In fact, the wrong screwdriver.
Okay.
Right. These ribbon cables are attached.
Are they the flip up kind? Yes, they
are.
And on the bottom we have
some switches.
And here is
these connect to the various buttons.
Nothing particularly interesting about
them.
Of course, there are clips. This thing
is made out of clips.
Revealing
nothing. Although this is a light pipe.
That's the power LED. And that comes
from this LED here.
This one
comes from this LED that's on this side
of the board. But they put a hole in the
PCB so the light will come through. I
wonder why they didn't just put the LEDs
on this side of the board. Oh, I know
why. All the solder joints are on this
side. They didn't need to wave solder
this side of the board at all. It's cost
cutting measure.
What have we got here? We've got
a screen
which is very probably a completely
standard screen with a standard pin out.
I can even see
this bit sticking out here
connects to the screen backlight and
that is attached to this flex cable. Oh,
wait a minute. Wait a minute.
That's a super high density flex cable.
There are two rows of pins.
Yeah.
Uh that's a shame. The reason why it's a
shame is there's no way I will be able
to connect this to anything other than
using this connector here.
So sadly, this is very likely no use to
me. Meanwhile, here we have
I think it may be a resistive
touchcreen.
I think it feels slightly squishy.
Yeah, I think it's a resistive
touchcreen. [music]
And it's
not that thoroughly glued in.
Quite thoroughly glued in. Okay, that's
dead.
So, the only remaining part is this
motor, which is thoroughly
comprehensible. It's a motor. A few of
these.
This little gearbox that I might as well
keep as a gearbox, although I'm not sure
it does anything terribly useful.
this motor and gearbox
which has a optical encoder ring
and the worm gear.
This board
which is worth throwing in the junk
drawer
and
the big glass slab.
And I think that's it.
Oh, I nearly forgot this thing.
I looked this up. This is a standard
Wi-Fi module that Canon use for a lot of
printers. I couldn't find any
description of what's inside it, but a
different module with very nearly the
same number has an offthe-shelf Marvel
Wi-Fi chip in it. So, this is probably
the same. If I can find out what it is,
it probably speaks SDIO or maybe even
USB, but chances are I won't. I may be
able to fogg this off on eBay for about
a tenner.
So, here you have it. My printer as
disassembled as I could possibly make
it. Out of this enormous pile of debris
on my dining room table, I have gotten a
handful of interesting parts, including
some motors, a lot of screws, some
sensors, some switches, a working power
supply, some stuff I need to play with
later, some stuff I need to disassemble
later.
Lots and lots of plastic gears.
Surprisingly few bits of metal. That is
really surprisingly few. So much of this
is made out of plastic. A lot of
plastic, which I now need to get rid of.
And a great deal of emotional
satisfaction because I really hated this
printer. So that's that.
No clever conclusion or anything. I now
need to bag up all the waste plastic and
other stuff and take it to e-waste. The
rest of it will go in my junk drawers.
And now I'm going to go away and crudely
slap together this video in the editor.
As always, I hope you enjoyed this
video. Please let me know what you think
in the comments and I will see you all
next time.