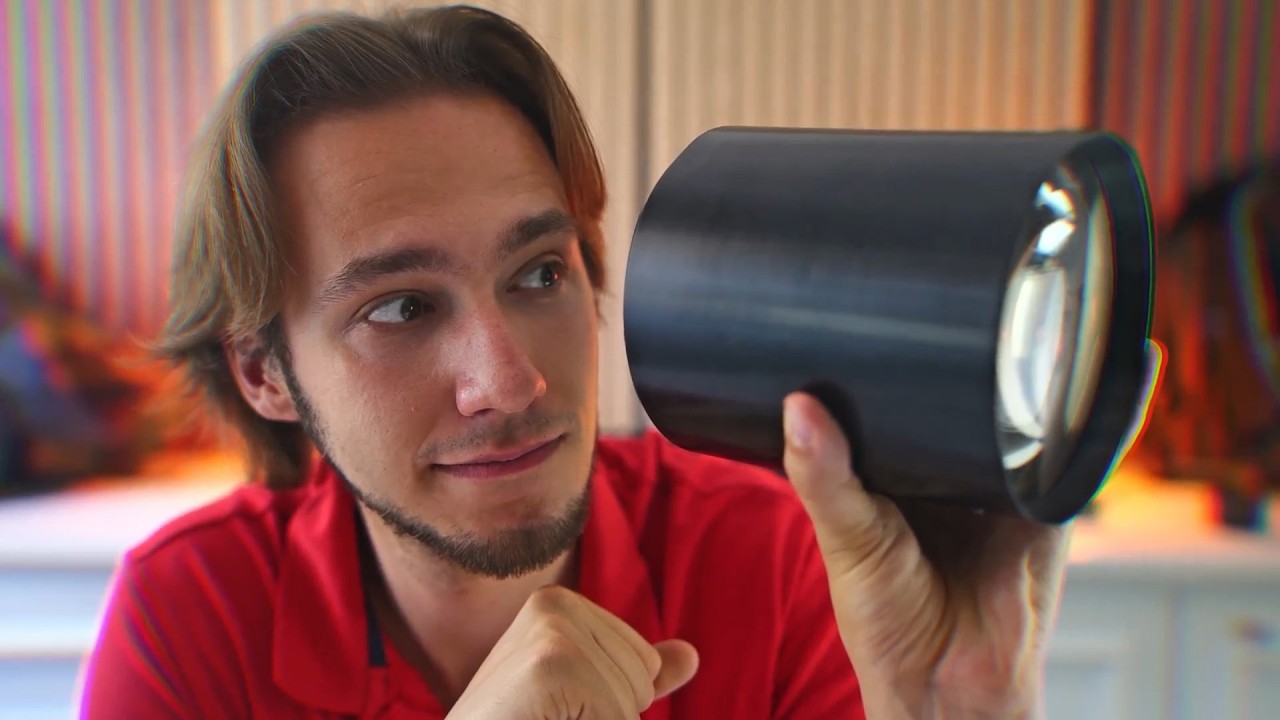
Video summary
The video explores the physics of camera lenses and depth of field by comparing small smartphone cameras with large-aperture glass optics like the Helios 44-29mm lens. The creator explains that a larger aperture allows for a wider cone of light rays, which results in a shallower depth of field where only a specific plane is sharp while the background becomes significantly blurred. While professional lenses can achieve this effect with apertures exceeding 50mm, there are physical limitations to how wide an angle of view and large an aperture can be combined; creating such a lens would require light rays so divergent that they would pass through the camera's own metal body before reaching the sensor.
To overcome these constraints without building a massive full-frame camera or using prohibitively expensive custom optics, the creator introduces a unique DIY solution involving a projector-style lens known as the Charles Beseler 18-inch Series III. This vintage lens has an enormous aperture of approximately 125mm but is designed for projection rather than photography on standard sensors. The project involves constructing a specialized rig that projects the image from this giant lens onto a large, semi-transparent diffusion screen acting as a "fake sensor," which then captures the scene through a secondary camera lens attached to the back of the setup.
Building this system required significant engineering challenges, including manufacturing custom bellows out of IKEA curtains and cardboard to allow for focusing adjustments between the massive 457mm focal length lens and the projection screen. The creator tested various materials like paper, wax, and frosted glass before settling on photographic diffusion film sandwiched between two sheets of glass to effectively scatter light without absorbing too much brightness. To ensure even illumination across the large projected image area, a Fresnel lens was utilized instead of a traditional curved glass element, leveraging technology commonly found in lighthouses to direct light efficiently while keeping the device flat and manageable.
Despite its size weighing several kilograms and requiring significant lighting due to inherent light loss from the scattering process, the final build successfully produced images with extreme background blur that standard cameras cannot replicate naturally. The creator tested this prototype on a short film project, expressing pride in the results despite minor issues like visible texture patterns and vignetting at the corners of the frame. While future iterations aim for better stability, longer focusing ranges, and improved light transmission, the experiment demonstrates an innovative approach to achieving cinematic depth-of-field effects using accessible materials and creative optical engineering rather than expensive commercial equipment.
Read the full video transcript
This is one of my favorite lenses, the
Helios 44. It has an aperture of 29 mm,
meaning that if you look straight
through it, the circle that you see has
a diameter of 29 mm.
Why do we care, you might ask. Well, you
probably know that pictures can be out
of focus.
But, why does autofocus exist? Well,
without getting too technical, the lens
takes the rays of light emitted by an
object and then converges them into a
single point. If you place the camera
sensor in that point, you'll be able to
see the object. However, if you place
the sensor closer or further away from
that point, then you'll get a circle and
the image will be out of focus. Now,
here's the kicker. The bigger the
focusing fo- focusing, sorry, lens is,
the larger the cone of light light rays
is, meaning that the out-of-focus parts
of the image will be more out of focus.
This is partially why phone cameras
can't naturally reach the same levels of
background out-of-focus that cameras can
reach. They have such small lenses and
sensors.
This is the camera lens that I do most
of my work in. As you can see, this lens
is much bigger. This is what I'm using
right now. Indeed, its maximum aperture
is more than 53 mm, almost double what
the Helios can offer, which allows for a
very strong separation between the
subject and the background. So, the
question is, how big can we go? How much
blurriness can we get out of a lens?
Well, assuming that we're okay with
carrying a lot of weight, uh we can go
pretty big. As an example, take the
Sigma 135 mm f/1.4, this lovely lens,
which I sadly don't own yet, has a
majestic aperture of 96 mm and it can
deliver pictures like this one.
There's a catch, though. Due to physical
constraints, all of these large lenses
are also very like zoomed in. Take your
phone camera and set the zoom to 4x, and
that's roughly what you're going to get
with this Sigma lens.
This can be great for some scenarios,
and it's my favorite focal length. But
what if we want to keep to keep the same
giant aperture but with a wider field of
view as well?
Well, we can't. The reason is remember
the cone of light rays above? The bigger
the lenses, the bigger the cone of light
is, too. But also, the wider the field
of view of a lens, the bigger the cone
of light is, as well. And the
combination of a wide-angle view and a
super high aperture would literally
require lights to pass through the metal
of the camera in order to reach the
sensor.
>> [snorts]
>> In order to work around this, you'd have
to quite literally tear your camera
apart in order to expose the sensor.
Somebody has Stanley done it, sorry,
namely some Stanley Kubrick guy. But
and of course, by the way, the lovely
folks at Media Division. There's a link
in the article. But even so,
Kubi Kubrick, how do you pronounce it?
Kubrick only reached 71 mm of aperture,
and that's still on a 50 mm focal
length, which is still 2.7 times wider
than the 135
mm as mentioned above, but also not
exactly a wide-angle lens, either. Media
Division instead went for 136
mm of aperture, but on a focal length of
100 mm, which is awfully close to the
135 mm.
Also, I am not taking my camera apart.
And finally, all of these solutions
require these giant piece of lenses that
are extremely rare and also very pricey.
Luckily, there is a solution to all of
these problems. Let me grab it.
Meet the Charles Beseler 18-in Series
III. As you can see, it's absolutely
huge. It's also really cheap to get. I
bought
two for 200 bucks including shipping
cost, and these lenses were produced a
lot of time ago, and they were used as
projector lenses in machines like this.
They are no longer used nowadays and can
be bought for cheap. And as one can see
by the naked eye, they have a giant
aperture. I can only provide an estimate
for it since there's no spec sheets, but
it should be around 125 mm.
So, you might ask, is this a wide-angle
lens as we want? Well, the 18-in in the
name is telling us it's focal length,
and converting to metric, that's
457
mm, which is which is roughly a 13
x zoom on your normal phone camera, and
so much more than we were looking for.
Oh, no. Well, we knew it was physically
impossible for this to be a wide
lens anyway.
Also, look how crazy of a contraption
you have to build in order to connect
this giant lens to a camera. Though, it
would produce
[ __ ] teleprompter.
Though, it would produce some pictures,
and indeed we can see a lot of out of
focus, but also a lot of zoom.
Fear not, though, the Charles gives us
an extra tool to work with. So far,
we've always assumed that we were
working with a camera like mine with a
size
standard sized sensor. It's called full
frame.
Suppose instead that we have a sensor
that's double the size of mine. That
would make for a pretty big camera, but
still a bigger sensor is able to capture
a bigger image image effectively zooming
out. And this one our 457
mm lens would become a 228
mm lens, which is still not enough. So,
let's double the size again.
We're zooming out by a factor of two
again, reaching a focal length of 114
mm. That's still too much zoom. So,
let's double the size of the sensor
again. We're now at 57 mm. This is
better already. Then we should probably
make the sensor just a big a bit bigger
still so that we can be around 40 mm.
This means that the size of the sensor
needs to be the original size * 2 * 2 *
2 * 1.5. That is, we need to increase
the sensor size by a factor of 12.
My camera sensor size is 35 mm by 24 mm,
which multiplied by 12 gives 420 mm by
288
mm, which is like 42 cm by 29 cm.
Pretty big.
That's the size of a painting you would
hang on your wall. This gives us a
couple of issues.
Firstly,
such a sensor simply doesn't exist.
Films should
Sorry, films shot on IMAX use very big
sensors. It's actually film, but still.
And we're talking about like 7 cm by 5
cm. It's not even in the expensive
territory.
Just doesn't exist.
Secondly, lenses usually can't project
an image big enough to to such a large
sensor area. Most lenses are designed to
be used on a full-frame camera or sensor
and slightly bigger ones such as
medium-size Look, I don't make the
names.
But the good news is that the Charles
was not built nowadays.
>> [laughter]
>> Maybe back then they didn't get the memo
about future sensor sizes. How can we
check how big of an area our lens can
cover?
It's uh thankfully pretty easy. You
simply put a lens near a white surface
uh like a wall and you'll be able to see
what the sensor would see. The Helios
projects a rather small image on my
white wall, but that's just enough to
cover the similarly small full-frame
sensor in my camera. I do also have
lenses that project bigger images. As an
example, this weird lens that I found in
some used market gives us a pretty big
image circle. It certainly covers a
camera sensor, even a medium-size one,
but not the 40 cm by 30 cm area that we
need.
The Charles produces a giant image. It's
tough to see it exactly because the lens
has to be very far away from the wall
now, thus the image is very faint, but
it's there. I'm not sure exactly how big
it is, but trust me, it's bigger than 40
by 30 cm and this is it.
Now we have to deal with the
incompetence of the human mind and
quickly invent a new giant bigger than
anyone has ever seen and it should only
take a few minutes, I guess.
Jokes aside, what we need to make this
work work
was invented um a long time ago for
camcorders. Back then we were dealing
with a similar problem. We had these
consumer video cameras with small very
small sensors and we had pro camera
lenses that were designed to handle much
bigger sensors and we needed some kind
of adapter that would allow to connect
the two. And this adapter is called a
depth of field adapter and here's how
weird it looks.
The idea is the following. We build a
fake sensor that's actually just a
semi-transparent paper and we focus the
camera lens onto that fake sensor. Of
course, paper by itself is not going to
capture the image, but we can then go on
the other side and take a picture of the
resulting image like what you saw. This
is a rather weird two-step process if
you think about it. It needs to have a
first lens that supports a bigger sensor
area, then you project to a big fake
sensor and then you need another smaller
lens that captures the image coming out
of the fake sensor onto the actual real
sensor of the camera.
Did you get all that? I hope you did.
All of this works because a
semi-transparent paper, when lit by the
light rays coming out of a lens, will
allow us to see exactly what a sensor
would see if it would if it was placed
there. The reason is that
semi-transparent paper scatters light
randomly and so it deviates the light
rays from traveling straight to
traveling towards our eyes and all other
parts of the room.
So, let's
uh see what's required to build this in
our scenario.
First,
we have the Charles lens which has to
see the world on one side, but should be
within a box on or something on the
other side so that there's no light
messing up with our image. And then
within the box, there needs to be the 20
uh sorry, 42 cm by 30 cm fake sensor and
it should be made by some
semi-transparent material that scatters
light without absorbing it. The Charles
has a focal length a focal length of 457
mm, which tells us that the fake sensor
should be at least 45.7 cm away from the
lens.
Also, in order to focus the lens, this
distance needs to be able to increase if
necessary, even by a factor of two.
Then, beyond the fake sensor, but still
within the dark box, otherwise light
will mess everything up, there needs to
be an actual camera that takes a picture
or a video of the fake sensor. The
distance here depends on the exact
camera lens, but it's usually around 35
cm.
So, let's build this.
Since the distance between all
components will need to be adjusted, and
since all of these components weight
quite a bit,
um the lens just just this is 3 kg.
Well,
I decided to go with a metal sliding
rail, more technically a V-slot 2080 for
the base, and then I bought a few
slightly sliding plates for it, which
have a variety of holes in them.
And let's start from the Charles lens.
We need to hold this lens at a certain
height and attach it to the base plate.
And my solution was to hold a second
uh plate up through some long screws and
nuts to adjust the height. And then, to
hold the lens, I found a couple of
telescope holders, which have three axis
adjustment and support lenses up to uh
15 uh centimeters in diameter. They had
holes in the bottom to screw them onto
the base, and then I can just insert the
lens within the telescope holder and
tighten the adjustment screws all
around.
Then, on the opposite side, I went with
the same idea to hold my actual camera.
However, however, we didn't need any
telescope holder here, as there's a ring
holder for my specific lens, which can
just as easily be screwed onto the base
plate.
So, onto the fake sensor then. Firstly,
what should be uh
>> [laughter]
>> What should it What should it be made
of?
I tried the following.
Paper. Doesn't work as it captures
almost all light that it receives and
thus you cannot see through it.
Papier-mache. How do you pronounce that?
This lets some light through but still
very little and it adds a very heavy
texture to it. Also not ideal.
Baking paper. A surprisingly good
solution, but it still doesn't let much
light through and still you can see a
light texture and it's great for quick
prototypes and I used quite a bit of it
still.
IKEA Pakkel fly.
This is frosted window film, which does
roughly what we want since it lets light
through but also scatters it. This
worked pretty nicely and was a great
option to me, but it also introduced
some heavy texture to the image uh and
you can see the grains in the in the
image.
Wax.
This almost sounds like a joke, but if
you're able to create a 0.3 mm thick
layer of melted wax, this should act as
a great scattering surface that still
lets a lot of light through.
I spent quite some time attempt-
attempting this, but I was ultimately
unable to create a uniform layer and
also it would melt on hot days like
this. I still have kilograms worth of
wax and I'm not sure what to do with
that.
>> [laughter]
>> Homemade frosted glass. They are um
There are, sorry, a few ways to achieve
homemade frosted glass and the easiest
is just to use some fine grit material
between the two sheets of glass and just
rub them together. I had some issues
finding the right grid and was
ultimately put off by the amount of work
that this option required.
However, it's also the option that
should provide the best results.
Photographic diffusion film. Okay,
context.
When you have a small but bright light,
this will cast a very hard shadow like
the sun. Uh if you instead want to turn
this into a bright large light uh that
cast a softer shadow, the easy way to do
that is to put a diffusion film in front
of the light which will diffract the
light around and effectively act as a
bigger softer light. This layer should
absorb little light by design and is
available in most photographic shops. Uh
it's also cheap. I paid like 10 bucks
for it and it will it works well.
The only issue is that there's
plenty of options and uh all of them
have some texture to it and after much
much experimentation,
I went with a Lee Filters 251
Quarter White Diffusion which provided
the best results for me.
Note that it needs to be kept between
two layers of glass since it's a sheet
of film.
>> [sighs and gasps]
>> Next up, I need some component that
keeps the layer of glass and attaches to
the base of the plate. I decided to go
with a 40 by 30 cm picture frame. The
benefits
The benefits of this choice are that
it's a standard size, that it's easy to
find glass for, and there's plenty of
frames, too. There's also a drawbacks. A
drawbacks.
Cameras don't record enough 4 by 3
aspect ratio, but rather in open gate 3
by 2, which is a bit wider. Thus, I'll
have either have to record more area and
crop or only record part of the fixed
sensor. Still, it's not a big deal.
So, in order to secure the picture
frame, I simply used a few screws. It's
more stable than you would think, and
note that, just like for all components
here, I went through multiple
iterations, and the frame that you're
seeing is like the fifth different
picture frame that I bought.
Now, we are finally able to position all
components correctly. It sounds simple,
but it took some months just to get to
this step. I had to receive most
components from China and go through
multiple iterations, but we got there.
Now, for the hard part. We need bellows.
Camera bellows are these components that
can change their size, but remain
rectangular in shape, allowing to change
the distance between the lens and the
sensor, but without letting light in.
They are expensive.
Luckily, it's easy to manufacture a
small bellow. Sadly, we need an enormous
one, and we still need to manufacture it
ourselves. There are multiple ways to do
it, and I've tried them all, but I'll
keep the details light here.
The general idea is that we need some
material that can bend, such as paper,
but within it we need some places where
it cannot bend. Usually, this is done by
attaching precisely cut cardboard onto
some paper.
Then, you can bend specific parts to
make the bellow. This is a rather
time-consuming and fatiguing process
when the bellow is as large as I needed
it to be, but
after much thought and research, I was
able to come up with a couple of tricks
to simplify it.
Firstly, all bellow images that I've
shown you so far were of bellows that
where the entrance rectangle is bigger
than the other side, and thus they have
this trapezoid look to them. This is
appreciated since we've got a 40 by 30
sensor on the other side, but the lens
on the other side is much smaller.
However, this makes them harder to
manufacture, so I decided to go with a
much simpler simpler bellow that's 40 by
30 cm on both sides.
Secondly, I used IKEA curtains.
No, I am not kidding. Meet the Scottish.
This curtain is provided folded in 3.4
cm stripes and it's available in a black
color. Since it's a curtain, it's able
to block light effectively and since
it's IKEA, one side is plasticized and
does tough to break or tear apart. This
makes our job much easier and now it's
just a matter of leaving the folds where
the IKEA intended them, cut the curtain
into four different pieces, tape them
together in a different direction, and
then refold the entire thing correctly.
The final folds on the bellow are either
the existing one in the provided
curtains, possibly in the other
direction, or in the places where we cut
the curtain. So, everything else gets to
remain more rigid.
This was still a multiple hours long
process, especially since I had to
manufacture a couple of bellows to test
different properties. This year I
decided to catch up with Severance and
I'm not joking when I tell you that I
watched the entirety
entirety of the first season whilst
folding IKEA curtains, cutting them, and
taping them together again.
>> [sighs]
>> Ultimately, I had my bellow. It doesn't
look stylish,
but it works.
>> [laughter]
>> On the lens side, I placed another
picture frame with cardboard inside and
made a hole at the center so that I had
40 by 30 components on both sides.
Then, let's talk about the space between
the fixed sensor and the camera. There's
no way that I would make another bellow,
>> [laughter]
>> but thankfully, the distance here has to
be fixed depending on the taking lens. I
measured the most convenient distance
and made a cardboard cardboard element
with the correct sizes. It's not as sexy
as the bellow, but it does the trick and
if necessary, I can still insert a lens
within the all that varies this
distances for small adjustments.
There's one final component to put in
place. Right now, everything works, but
I get some heavy vignetting, i.e. the
corners of the
fixed sensor are dark. This is expected.
The frosted surface reflects some of the
light, but most of it just goes through
it and we don't see it.
And there's an easy solution to this.
Before the fixed sensor, we can place a
lens that will change the direction from
of the light from outwards to towards
the sensor. This way, most light will
still travel towards the camera after
passing through the sensor. However, you
should see an issue coming up. A lens
that's big enough to cover physically
cover a 40 by 30 sensor
would require a diameter of 50 cm, which
is a gigantic lens. The Charles
Perreault felt pretty big already and
this is just 14 cm.
So, it would be extremely hard to
manufacture and pricey.
This is where lighthouses come to the
rescue. Yes, you read that right.
Lighthouses.
Each lighthouse is a big source of
light. However, in order to make that
light shine in the right direction and
at the maximum intensity, you also need
to place one lens in front of it.
However, a lighthouse light is even
bigger than our fixed sensor and the
required lens would have to be
absolutely gigantic. Because of this, a
new type of lens was discovered. It's
called a Fresnel lens and it works
similarly to a normal lens, but it's
flat.
>> [laughter]
>> Thus, a lighthouse was able to use big
flat lenses, which are much, much easier
to manufacture as they don't require
huge chunks of glass. And fun fact, you
can actually see Fresnel lenses used in
multiple places where a normal lens
would be too big or expensive.
As an example, my own building places
first Fresnel lenses in front of
exterior exterior lights to direct the
light correctly.
Anyhow, the good news is that we can
just use a Fresnel lens without worrying
about it affecting the image quality or
being too expensive. They can be bought
for cheap on AliExpress. They come in
various sizes,
including, thankfully, 40 by 30 cm.
And that's everything really.
Having placed a Fresnel lens, we're now
able to get a usable image on the whole
40 by 30
40 by 30 cm sensor and the only thing
that's left to do it is, well,
shoot some scenes with it.
The good news is that I had already
planned to shoot a short film last
month, so I brought this along and used
it for multiple scenes that specifically
required a very thin depth of field.
I was shocked by how good results were
and among amongst the many mistakes that
I've done on this production,
this was one of the few things I'm very
proud of.
Here's a
few more pictures
um with an earlier prototype.
Now, there are a few details that should
be improved in the next iteration of the
system, which I decided to call Lampone.
Firstly, I need to build a longer
bellow.
[ __ ] And
buy a longer rail. This would allow to
keep the lens further away from the fake
sensor, which would allow to focus on
closer objects. Right now, the minimum
focusing distance is awfully large.
Secondly, I should probably work on the
structural integrity of it all. Any
camera movement will generally generate
weird
wobbliness within the video tube.
Overall, I thought it was reasonable.
I've included a few pans in the scenes
even, but more stability would have been
beneficial. Thirdly,
you can definitively see the texture of
the diffusion film and even the pattern
of the Fresnel lens. You can fix the
former by using better ground glass and
the latter by placing the Fresnel lens a
bit further away from the diffusion
film. There's also visible dirtiness on
the fake uh sensor. I didn't really care
because I felt like it added to the
image, but you
to get a clean video, you should be
extremely careful when assembling this
part.
Even if all of this was fixed, one
remaining issue would be that this thing
is huge.
Not only it requires a large minimum
focusing distance, but it's also 120 cm
long by itself right now, and it's
pretty heavy as well. My tripod could
barely hold it. This is not a problem by
itself, but it does mean that it's only
possible to use it with the when what
the the the when there's enough room on
set, and sometimes there just isn't.
Another intrinsic issue is that you're
losing a lot of light by doing this.
There's no way around it. Scattering the
light around in the fake sensor means
less light reaching the actual sensor
camera lens. You should consider about
three stops of light reduction compared
to the taking lens, i.e. the lens that
they used to photograph the big sensor.
That's a lot of light loss, sadly. The
scenes just have to be well lit.
And finally, I would like to thank the
many people who posted details online
about their builds. Uh the video that
inspired all of this is, of course, the
one by DIY Perks. He named the build
next level camera, so I decided to go
with that name as well. I think I went
for a different enough approach that it
justified its own video. And there's
also a great detailed video by Media
Division.
All of the links in the article in the
video description. I loved, by the way,
that Media Division decided to include a
second video for patrons with exact
details for the components that they
chose. It was really helpful when doing
my design, even though I eventually went
with quite different take.
And finally, there's the F0 project,
which tried to make this type of lens
possible to be bought instead of just
built at home. I didn't quite have the
budget
for that, and I feel I feel like I ended
up with a slightly better specs compared
to the F0, even though a worse design.
But that design by them is incredible
and definitely an inspiration going
forward.
Anyhow, I will be using this again, and
I loved the experience. If you want to
watch the short film, thanks. It's still
in post-production, but it should come
out in a
couple of weeks.
Uh feel free to subscribe to the
website, link in the description, and I
don't know, I'll post an article when
it's ready.
Also, if you need to shoot something
with this camera or want to play with
it,
feel free to reach out.
Uh I can't speak. How long was this?
30 minutes. Way too long.
But also, like,
I love this.
Come on, let me
>> [laughter]
>> Okay, I'll stop.