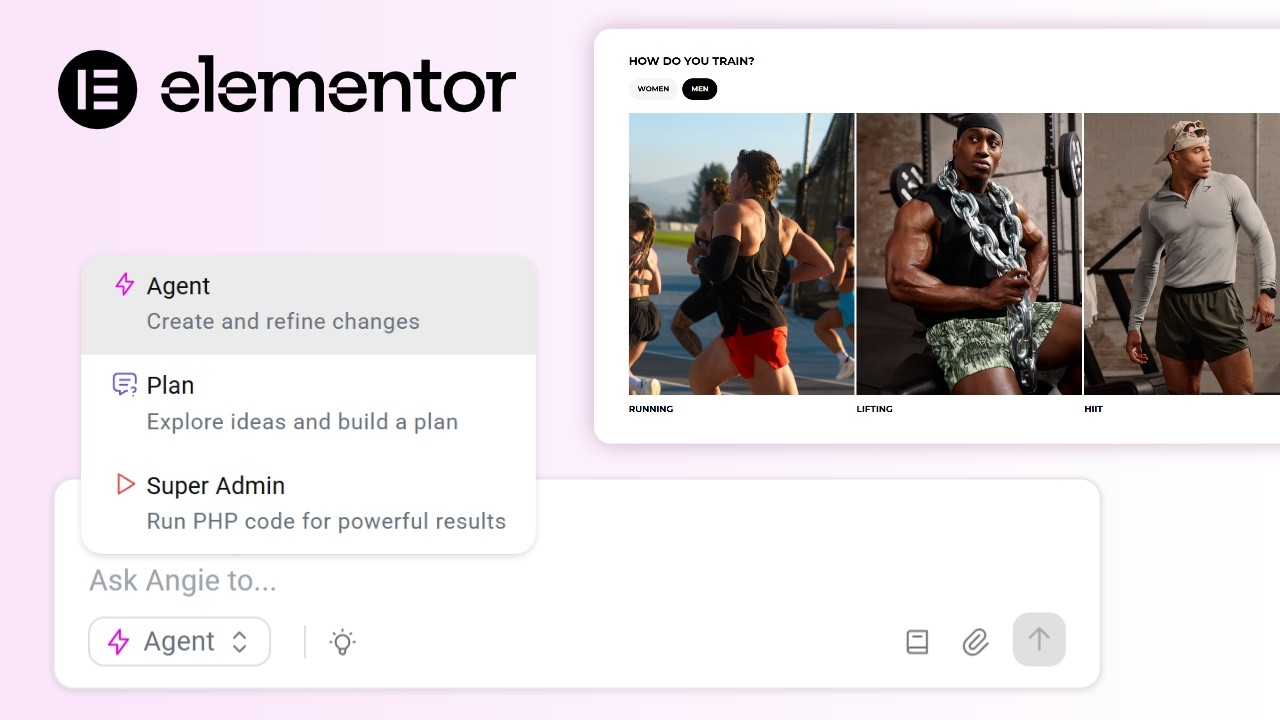
Video summary
The video introduces Angie AI, a powerful tool specifically designed for WordPress and Elementor users who want to bypass traditional hours of coding when building custom widgets. The creator demonstrates how this free plugin can generate fully functional, customizable elements from simple text prompts in just minutes. After installing the plugin via the standard WordPress dashboard or directly from elementor.com, users gain access to a sidebar interface that allows them to visualize and construct complex layouts without writing code. The tool even integrates with image libraries like Unsplash to automatically source placeholder graphics, streamlining the design process significantly for those looking to replicate specific website sections quickly.
To illustrate its capabilities, the creator tackles three distinct challenges: replicating a tabbed section layout from Gymshark, creating an interactive promo code scratch card, and building a dynamic countdown timer. For each task, he provides a basic prompt describing the desired functionality—such as toggling between tabs for men's and women's categories or revealing hidden discount codes—and Angie AI instantly generates the corresponding widget. These generated components are not static; they can be easily edited within Elementor to change headings, update text content, swap images, and adjust specific settings like dates on a timer, proving that the AI creates robust starting points rather than just rough drafts.
The video concludes by highlighting an advanced feature called Super Admin Mode, which allows users to execute PHP code directly against their live site for bulk actions. This capability is particularly useful for managing complex setups involving WooCommerce or Advanced Custom Fields, enabling tasks like updating prices across multiple products simultaneously with a single command. While the creator notes that some generated elements might initially appear as snippets rather than draggable widgets in certain instances, the overall workflow remains highly efficient. The demonstration confirms that Angie AI offers a transformative approach to Elementor development, combining speed and automation while still providing developers full access to edit the underlying HTML, CSS, and PHP if deeper customization is required.
Read the full video transcript
Hey, welcome. Building custom Elementor
[music] widgets used to mean hours of
coding, tweaking, and testing. But, I
recently started testing [music] Anji,
an AI gigantic AI built specifically for
WordPress and Elementor, and the results
have generally surprised me. In this
video, I'll walk you through how I built
three fully customizable widgets, a top
section layout, a promo code scratch
card, and a countdown timer, [music] all
generated from simple prompts. Plus, I
will show you the new feature called
Super Admin Mode that allows you to run
PHP code and take direct actions on your
live site. If you build with Elementor,
you're going to want to see this. Hey,
before we get started, I wanted to say
that Anji is completely free, and you
can use it on any WordPress website. In
order to get it, you can go to
elementor.com and then click on products
and then Anji. From here, you can either
download it straight away, or the
easiest way would be to simply go to
your dashboard and then go to plugins,
add new plugin, and search for Anji.
Make sure that you're using the one from
elementor.com, and you should be good to
go. Once you install it, you should see
Anji here on the left side, and you
should be able to see what you can build
with Anji. Saying this, I can show you
some of the prompts. So, Elementor has
an Anji prompt library here that you can
check out. It's under
elementor.com/anji-prompt-library,
and you can see some of the examples
here like creating a new page,
installing a plugin, creating a virtual
product, and so on. You can basically
copy those prompts and try to replicate
what they've done. And as you can see,
this one requires advanced custom
fields, which is pretty cool. Close
this, and I just wanted to mention that
if anybody is looking to get Elementor,
I would appreciate it if you use my link
in the description below. I will also
leave you a coupon code that will give
you a further discount. And if you go
under pricing, I just want to explain
that you can either buy a single
license, which is what I have here. I'm
using one. Or you can get building for
clients, which is basically unlimited
websites. And this gives you all the
cool new AI stuff. And also image
optimization, site accessibility,
priority support, email deliverability,
and site management. These are some of
the new features. And I've already done
a video on this. If you wish to check it
out, it's on my channel. And let's go to
the website. So, today I'm going to be
using a website that I developed in the
previous video. If you wish to check it
out, I'll also link this in the
description below. I've basically done a
step-by-step tutorial on using the new
Elementor V4 editor. Now, once we have
Anja installed, click on the Anja button
here, and it should open on the left
side. The first challenge would be to
replicate a section that I found on the
Gymshark website. So, I'm going to go to
the Gymshark website, scroll down to the
bottom,
and the one that I want to replicate is
this section here. I basically want to
have a section with a title and two
tabs, women and men. So, I'm hoping that
these images we can update, we can
change the text, and we can toggle
between those two. That's the first
challenge. So, I'm going to take a
screenshot.
And then I'm going to close this and go
back to Anja here. I'm going to upload
my image. Let me upload my screenshot
that we just took. I'm going to copy and
paste a very basic prompt, which is
going to say, "Create a section where
the user can toggle between tabs. I need
four columns like the screenshot. I need
to be fully responsive." Now, this is
not going to fit my website exactly
because, as you saw, they have white
background and so on. But that doesn't
really matter. I just wanted to see
whether we can replicate this as much as
we can. So, I'm going to press go here.
I'm probably going to speed up the video
here just because it could take a couple
of minutes.
Okay, this is actually pretty cool. It's
searching images from Unsplash, which is
basically a website for free images. And
I'm hoping that it will use those images
for the example. I think that would be
pretty cool if it does.
Okay, something is happening now. It's
deploying the training tabs widgets to
WordPress. And as you can see, it's
switched on the test mode, which is
great. So, we can now hopefully test it
in a second. Here we go, deployed. And
let's see what happens now. Awesome, the
training tabs are created. And now we
need to reload the page. Okay, so to see
the results, we need to go to Let me
minimize this. We need to go to edit
with Elementor.
And if we scroll down here on the left
side, you we should see the Angie
widget. As you can see, this is
currently a draft. We haven't published
it.
But if I go here at the bottom, for
example, let's drag this in.
And as you can see, it's actually done a
pretty good job so far. Okay, so let's
have a look at what we can do. So, we
can definitely change the heading here,
which is cool. So, we can change the
tabs and we can add more with comma.
Oh, okay, that's pretty cool. And then
we have the items. So, as you can see,
running woman, let's click on this.
Okay, so we can change the title on
every single tab here. So, we have
running, and I can do running 1 2 3, and
it changes. We can also update the
category tab, which So, this one goes in
the woman, which is actually really
good. And we can update the image from
here. I'm actually really impressed with
this. So, what I'm going to do is first
of all, publish this. publish widget on
page. Okay, that makes sense.
And now I just wanted to test this to
see whether it actually works on the
front end. So, I'm going to go to the
website. Let's go down to the bottom.
Uh this is looking pretty cool. If I do
a right click on inspect, let's scale
this down so to see how it works.
Okay?
So, my other cards, yep. And if I scroll
if I scale it down, you'll see whoops.
Yeah, the sh- all the images are
shifting and that's why it's shifting.
But basically, I believe that this is
pretty good. So, this was the original.
And as you can see, this is the one that
Angie created, which is pretty cool.
Now, let's ramp it up a bit and let's
create something a little more
specific. All right, the second thing
that I'm going to try to build now is a
promo code scratch card. Basically, I
want a little promo code that pops up
and I can scratch it. The idea is that
we can actually change the promo code.
So, let's say save 20, we can maybe
change to save 50 and so on. I'm going
to copy this and let's see whether we
can do this. So, I'm going to go back to
Angie and paste the code and see what
happens. So, I'm assuming that this is
going to take a little longer. And
again, I'm probably going to speed up
the video and let's see what we get. And
one thing that I I should have probably
mentioned earlier is that we can
continue change stuff on this widget
with Angie. We can just basically, like
any AI chat out there, we can just
prompt it to change something for us and
that would be absolutely fine.
All right, this was a little bit too
quick. So, let's reload and let's see
what we get.
I'm going to be very impressed if this
is already done. Oh, wow. Okay. Scratch
to reveal your exclusive offer. So, let
me do that.
Oh, yeah. All right, this is actually
pretty cool. This took less than a
minute. Let me copy this. Copy it. And
now I'll paste it here. Oh, wow. Okay.
This is really impressive.
So, let me close this and publish to
live. And now let's go to the website.
And now let's see if it works. Oh, we're
still in test mode. Okay, it still
worked. It popped out, and I can just
reveal it. Okay, maybe I need to do
more. Save 20%.
Nice. All right, this is all great, but
we didn't actually check the widget. So,
let me click with Elementor, and let's
see whether we can update some of the
details. So, here it is.
Um I don't know.
Okay, scratch card promo widget is live.
Published under WordPress. Available in
snippet library. Let's go to the snippet
library.
Here it is.
We can click edit.
Okay, and here it's giving us the
snippet. And you can actually see how
this was made. I didn't expect that I
was going to be able to maybe have a as
a widget that I can drop it on the page.
But nevertheless, this was really good.
And if you see here, you can actually
edit the PHP code that is generated. You
can edit the HTML here. You can edit the
CSS, which is great for developers. And
you can also edit the promo code, which
is pretty good. The only downside from
this is that it didn't do as a widget,
which I maybe should have mentioned, and
then I would have been able to drag and
drop it and change detail like the card
that we had here basically. But
nevertheless, this is pretty cool. Let's
move on to the last challenge, which is
a countdown timer.
Uh this countdown timer essentially
uh let's say we have a product launch. I
want it to go down to a specific date,
hours, minutes, and seconds. And I want
to be able to update that uh date and so
on. So, I'm going to copy this prompt.
And then, this one we have widgets, so
I'm hoping I can just drag and drop it.
So, let's go to Angie, and let's create
a new chat, and let's paste it here, and
let's go.
Okay, it's already done. This is
impressive. Let's reload.
And now, let's close this.
Let's go to widgets.
Countdown timer. Okay, this is exciting.
Let's drag it somewhere. Let's just drag
it in here. I like the animation. I
think that's really good. And if I click
on it, you see that we can change the
headline. We can change the date. Oh,
yeah, it even has a date picker, which
is pretty cool. Let's change it to the
14th. Okay, it changes straight away.
And then, the end message is sale is
life. All right, I think this is super
impressive. Let's publish it, and let's
see the full website now.
So, if I go here,
and yep, we should have that scratch
card super quickly. I'm going to scratch
it off.
Save 20, copy the code. No worries.
Let's go down, and let's see this one.
Absolutely fine. And the countdown timer
is absolutely fine. If I was to look
this on mobile, let's say, right click
and see it on mobile.
Let's go to the bottom, and this is
actually working really well.
Before we finish this video, I wanted to
add this new mode called super admin.
And I believe that this is going to be
super useful, especially for websites
that have WooCommerce installed or
advanced custom fields. I wanted to try
myself, so what I've done is I basically
added advanced custom fields to my
website and I created a custom taxonomy
called products. In those products,
essentially, if I go to product details
here, you will see that I have a couple
of labels like the price, short
description, category, in stock, and
product image. Went to the products here
and I added two products just for this
example. And if I was to go to the front
end of the website, I actually built
this with Angie as well. This is using
the advanced custom field. It has fully
working search, so if I do wood, it is
going to pop up with the wooden chess
set, which is great really. But this is
not what I wanted to show you. The
example that I wanted to show you in
this case is that you can do bulk
actions. So, for example, if I was to
open Angie here and let's say I wanted
to make every single product on sale I
wanted to change all the pricings, we
can actually do that, which is great.
So, what you need to do, let me see if I
can zoom in a little bit more. And here
we go. If you have a look at the
pricing, they're different at the
moment, but what we can do is switch
from an agent to super admin. And from
here, we'll need to obviously allow
this. So, enter super admin mode and now
we can say something like update
all
advanced custom field products
to have the price of 22.99,
for example. And now I'm going to press
go and let's see whether the pricing
updates. We need to approve the action.
Okay, it says update advanced custom
field product price, which is correct. I
didn't give it that, but I actually
found it in my database and it's going
to update it to 22.99.
And let's see whether this works.
Okay, it says that it's done. The page
didn't refresh itself, so I believe that
if I do let's refresh it from here
manually. And as you can see, the
pricing is now 22.99 for both products.
Now, as you can see, this could be
really, really useful because you'll be
able to do bulk actions, you'll be able
to target different products.
Essentially, this is going to be great
for advanced custom fields, in my
opinion, and especially WooCommerce. And
of course, you can do so much more than
this, but this was just a quick example.
So, Angie is super impressive so far and
is still in beta. I think that's going
to be everything from this video. Let me
know what you think of Angie in the
comments below, and I'm looking forward
to see what they're going to bring in
future. Make sure that you like this
video, subscribe to my channel if you
want to see more videos like this, and
hopefully I'll see you in the next one.
Bye.