How to Connect Multiple Quarky Robots using PictoBlox | Quarky Connect Tutorial
Watch on YouTubeVideo summary
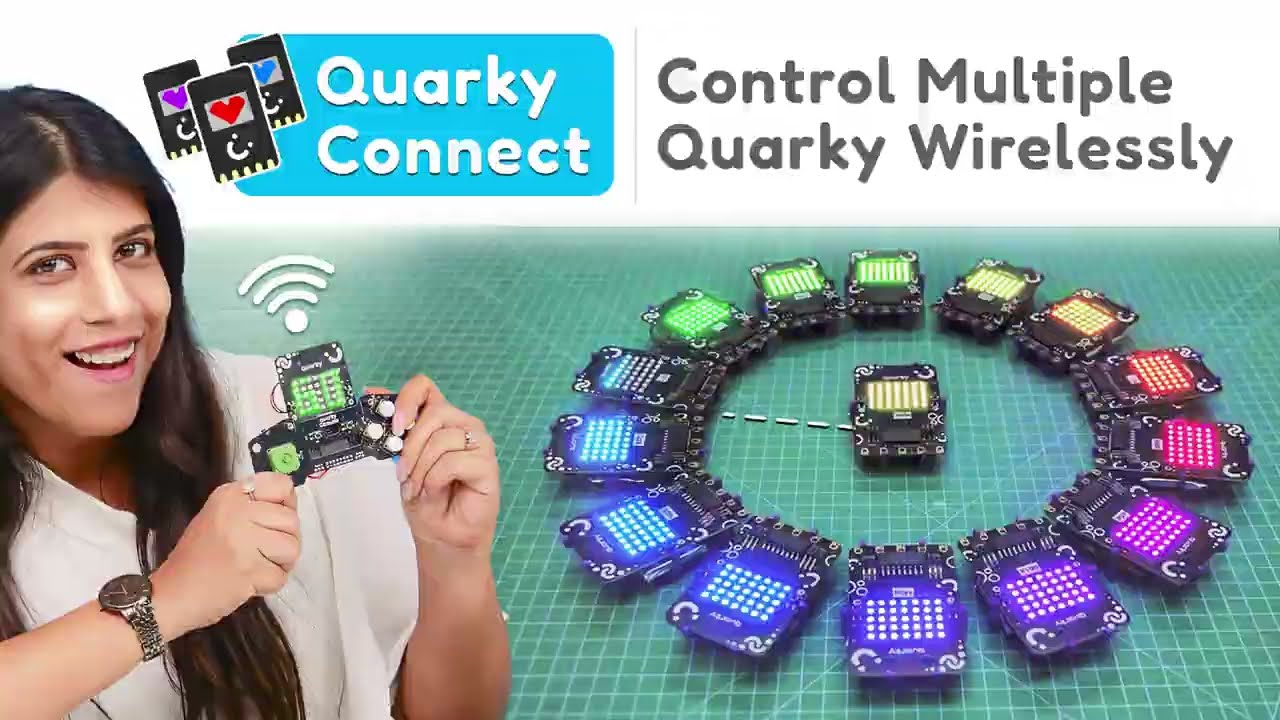
The video introduces Quarky Connect, a new feature within PictoBlox that allows users to link multiple Quarky robots together, ranging from two up to twenty units, to create advanced collaborative projects. The core logic of this system relies on designating one robot as the "Master" and the others as "Peers," where the Master sends commands and the Peers execute them simultaneously. To begin using this feature, users must ensure they have the latest version of PictoBlox installed and update their Quarky firmware via a serial connection before establishing a Bluetooth link between the Master and the Peers.
Setting up the connection involves specific coding steps within the Quarky Connect extension, starting with initializing the system and adding each Peer by its unique ID number. A critical distinction is made between the operating modes: the Master can function in both Stage mode for testing and Upload mode for deployment, whereas Peers must always be coded and uploaded in Upload mode to receive commands correctly. The code for the Peers requires placing a "Receive Commands" block inside a "Forever" loop to ensure continuous listening, while the Master's code is uploaded sequentially to each Peer via USB cable before the system can run successfully.
Once the hardware is connected and the initial code is uploaded, the tutorial demonstrates creating a synchronized LED animation where eight Peers display a green leaf pattern followed by red, controlled by a button press on the Master. The video highlights an important optimization technique for managing complex projects with many robots: instead of writing repetitive code blocks for each Peer individually, users can create a custom function to add all pairs at once, keeping the main script clean and efficient. Furthermore, the default behavior sends messages only to specific numbers, but the code can be easily modified to target "All" Peers simultaneously for synchronized actions across the entire network.
Beyond simple animations, the video showcases the versatility of Quarky Connect by demonstrating its use in controlling a DIY joystick car, playing Robo Soccer on a custom console, and racing go-karts. The presenter emphasizes that the Master robot can send and receive data up to 40 times per second, enabling fast-paced multiplayer games like "Fastest Finger First" or "Pac-Man." The tutorial concludes by encouraging viewers to explore endless possibilities, such as synchronizing tasks across robots or assigning different functions to each unit, and suggests a fun challenge project involving sensors to create an automatic street light that turns on when it gets dark.
Read the full video transcript
[music]
>> Wow, what was all that? Multiple
quirkies working together? You mean like
multi-connect? Something like this.
Or
like this.
Interesting, isn't it? Now one quirky
can talk to the other.
>> [music]
>> Hey baby quirky, how are you?
Hi master quirky, I'm good. Let's start
the video without waiting any more. Oh
yes.
Hey hey everyone, this is Avni and I
would like to introduce you a brand new
feature of quirky called quirky connect.
With this feature, now you can connect
multiple quirkies together like two,
four, 10 or even 20 [music] and build
some really advanced project. I'm sure
you're very excited. So without waiting
any more, let me show you how to use
this feature by making this beautiful
LED animation. The fundamental [music]
logic behind quirky connect is that you
choose one quirky as a master and others
as a peers up to 20. Master gives the
command and peers follows the action.
So now we will discuss how to get
started with quirky connect. But more
technical details I will give you a
little later. Make sure you have the
latest version of pictoblocks installed
9.1.0
or you can click on link given below in
description to install the same.
Note, for all of you who have old
firmware, do upload the latest firmware
like this.
Connect it serially [music] first.
And then click on this upload firmware
button.
Once the firmware upload is done,
connect your master quirky to
pictoblocks via Bluetooth. Click on
extension [music]
and choose quirky connect extension.
So first, let's understand what
>> [music]
>> each block are doing in this quirky
connect extension.
So first we will always choose [music] a
initialize quirky connect block for pair
or for master when we are coding. It is
very important. After that, I can
[music] add a pair like this.
And let's choose one pair quirky.
So the number of this quirky is D91A.
Same I'm going to type over here.
D91A. [music]
If I want to add one more,
same way I will add
add pair, [music]
add pair.
The second one is 24FA.
24FA. [music]
And make it as quirky two.
Same way, let's do the third one which
is 55BE and make it as third. Now if I
try to run this block,
nothing is [music] happening
on the pair quirkies
and you can see the red light coming
over here. Now the reason is we have not
[music] coded yet for the pair quirkies
and we have to always upload the code
[music] on pair quirky, remember that.
So let's code for pair quirkies.
>> [music]
>> Again for pair quirky also, initialize
quirky connect block and we have to put
this
receive commands from block. [music] But
as you can see, it is inactive. The
reason is pair blocks only work in the
upload mode. So let's go to upload mode.
And now if I go to quirky connect,
I can [music] add this receive command
from. So here this block
is saying that we can receive the
command [music] from the master. So what
is the master number?
E5 [music]
A2.
So now remember, you have to always put
this block inside the forever.
Now the reason is pretty simple because
we want [music] all the pair quirkies to
keep receiving the commands from the
master quirky. If you don't put forever,
it may just work once.
All right. [music] Now once this is
done, I will again click on
this block [music] of master.
But still see it doesn't work because I
have not uploaded the code. You can
connect the USB cable and upload the
code in each pair quirky.
>> [music]
>> So for that, I need to get this block
also when quirky [music] starts up.
Then I will connect my each quirky one
by one
serially
and upload the code in that.
Now once the code is uploaded, now let's
check if it works, [music] right?
So for that, you need to again connect
the master quirky via Bluetooth.
Now I [music] will click on this master
block and let's check. So as you can
see, it works [music] because you can
see a green tick in the LED of all the
pair quirkies. And on the [music]
master, what is the indication? You can
see yellow LED for the number of pairs
connected. [music] There are three pairs
connected, so you can see three pair
yellow LEDs.
Good to know. Remember this that master
quirky works in stage [music] mode and
also in upload mode. It can work via
Bluetooth and also via serial
connection. But remember [music] this,
pair quirkies will only and only work in
upload mode and you have to upload code
on all the pair quirkies. Now I hope
you're familiar with all the blocks of
quirky connect. So without waiting any
more, let's start [music] the activity
of this beautiful LED animation.
So let's connect
the master quirky via Bluetooth.
>> [music]
>> Now the first block which I will put is
initialize quirky connect [music] and
after that, I need to add pairs. So for
this flower pattern activity, I'm going
to use eight pair quirkies.
So let me put eight of [music] them.
Now the first one is D91A. Let's put
that. D91A.
Second one is 55BE.
Now I will change the quirky numbers
accordingly. I'm going to make this one
as number two.
This one as number three.
This one [music] as number four.
Right? Now first we will code and see
only for the first quirky how it's
working and rest of them will do a
little later. So I'm just keeping it
separate for now. [music] All right. Now
what do I want to do is I want each pair
to display a green leaf pattern
on this matrix and then go off and then
come on again with the red [music]
color. Same pattern needs to be repeated
10 times.
So what I'm going to do is
>> [music]
>> I'm going to put a forever block
and then I'm going to put
if block in this. I want to give it a
trigger that when I press the L button
on my master quirky, then it starts
flashing the leaf pattern.
So I'm going to put is L button pressed.
Let me put this little [music] on the
side. Okay. If the L button is pressed,
what do I want to do? I want to display
a matrix.
So
I will not use this display because this
is for master. I will go in quirky
connect
and I will choose the block of this
matrix, okay? So I'm going to choose,
let's say this one.
And I'm going to make this as a leaf
pattern. Let me just [music] clear all
of them and choose a green color and
then maybe make a leaf. [music] So the
leaf would look something like this,
right? Let me make it okay.
After wait few seconds,
let's say wait 0.3 seconds
or 5 seconds, up to you. I want this
light to go off.
So
and then display the red light. So to go
off, I'm going to put a clear screen
block.
>> [music]
>> Now in this, I can actually choose that
I want to send this message to all of
them or to number one, number two,
number three. So right now I'm going to
code only for the number one which is
D91A. So I'm going to choose
>> [music]
>> number one, clear screen for the number
one quirky and display matrix for the
number one quirky. And now again, I'll
put this block and I'm going to make it
red.
Okay, so now it is red. I'm going to put
wait again and display red.
And again, I'm going to clear it before
the green one
>> [music]
>> comes.
Wait 0.3 seconds in between.
All right. But now I also want [music]
that master quirky should also display
something like a circle in between. So
now for the master quirky, I will use
this display block
and I will say
display matrix as I'm going to clear it
and
>> [music]
>> as a circle.
And then it will clear the screen when
my pair quirky is clearing the screens.
At the same time master quirky, I also
want to clear the screen.
>> [music]
>> And at the same time, again I want to
display a similar pattern. I'm going to
duplicate [music] this.
Not the entire thing.
I'll put this here
and will change the color to let's say
blue.
Okay, and then again clear the screen.
[music]
Looks good, right? Now we can run and
test this.
>> [music]
>> But very important, we haven't coded for
the pair quirky yet. So let's do code
for the pair quirky.
>> [music]
>> So again, I'll go in quirky connect
extension.
The first block always needs to be
initialize quirky connect and I need to
put a block for receiving the command.
As you know, this will not work in the
stage mode, so I need to go to upload
mode.
So now, while I'm in the upload mode,
now I can use this
receive commands block. So I want to
receive the command for pair [music]
from master Quirky with the name as
E F
A 2.
You remember that? That we need to
always put this block in a forever.
So let's put a forever block.
Works. Now I need to upload the code, so
I need to go in Quirky and get this
block when this Quirky starts up. So
what I'm going to do is I'm going to
connect this pair Quirky, the number one
pair Quirky
by USB, because when you want to upload
the code, you know that that we need to
connect serially. [music] And now, we
can click on upload code.
You can see Python script has been
uploaded to the board.
So we can test if it works for the first
Quirky. So now, let's connect the master
Quirky again by Bluetooth.
Okay, I'm going to turn this Quirky on.
And now, let's see.
I'm going to switch on the code of
master Quirky, so I'm going to click
over here.
It is connected. Yes, if [music] the L
button is pressed, then the pattern will
start. So I'm going to press the L
button.
Now, as you can see, it is only doing it
once. I want it to repeat it at least 10
times. So what I'm going to do is I'm
going to put this entire
in a repeat block.
This entire [music] if condition.
Let's say not the end if condition, the
display part. I'm going to put it in the
repeat 10 times. I'm going to put
another if condition in this.
Is R button pressed?
If the R button is pressed, what do I
need to do? I want to
I will clear screen.
And let me also put one more wait block
[music]
in the end.
Wait 0.3 seconds.
So that the time is equally distributed.
[music]
Let's check again. I'm going to run this
block.
>> [music]
>> Okay, connected.
Beautiful.
>> [music]
>> One by one, you can start uploading code
on all the eight pairs. [music]
Connected serially.
>> [music]
>> Upload the code.
Repeat the same thing.
Now, once all the code is uploaded,
>> [music]
>> do you see we need to do some changes in
our code of master Quirky?
Right? What is the change? I need to add
all these pairs now over here. So if I
put this down and add all these pairs,
so can you see the code has become too
long. It's a little difficult for me to
manage, right? So what I can also do is
I will put this entire initialize
[music]
Quirky or the add pair block in a maybe
function. So what I will do is I will go
to stage [music] mode.
Okay, so now what I will do is connect
this master Quirky again. [music]
And
I will create a block as a function to
add all these pairs, so that my code is
not such long code, right? I'm going to
go to my blocks, create a block, and
maybe name it as add pairs actually.
>> [music]
>> And I will remove this
>> [music]
>> forever.
And maybe put this one
little here.
>> [music]
>> And this one here.
So what did I do? I just created a
function
to add all the pairs.
>> [music]
>> And now I'll just put this add pairs
block over here. So immediately,
whenever this function is getting
called, all these blocks are getting
executed. Right? So I'm going to put
this a little over here, so it's little
clean. So let me create a flower pattern
with all the eight Quirkys. Okay, now
moment of truth. Let's see if it is
working. I'm going to click on this
master blocks.
Yes, as you can see, all are connected.
You can see the green tick on all of
them. And you can see the eight LED
coming on over here.
Now, if I press the L button, then it
will start the pattern.
>> [music]
>> But, now can you see it is only coming
on the first Quirky. Why?
>> [music]
>> Because we did not change this
over here. So what we'll do is let's
stop the code.
And [music] we will change this to all,
which means I can send the message to
individual Quirky, or I could also send
the message at the same time to all the
Quirkys.
So all over here.
Again, [music]
all also over over here. Clear screen
also for the all
>> [music]
>> pairs. Same way over here as well.
Same thing we'll do over here, too.
Let's initialize it again. Let's check.
>> [music]
>> Can you see such a beautiful flower
pattern is coming on?
>> [music]
>> Wow, this was pretty interesting, right?
>> [music]
>> Fun fact, you know the master Quirky
sends and receives data up to 40 times
per second. So you know, it's really
fast. Now, let me show you the most fun
part. I made this one master Quirky as
this DIY joystick using a cardboard and
a joystick module.
Using which I can control this Quirky
car like this.
Or use this Quirky console
which we built to play Robo Soccer.
And also to race in go-karting like
this.
Wow, thrilling, isn't it?
One of my favorite game with Quirky
Connect was this fastest finger first.
I literally enjoyed with kids a lot.
Or this Pac-Man one.
And this fruit chase, too.
Multiplayer games are really fun and
exciting.
The possibilities are endless. Like you
can make them perform a similar task in
a sync like this.
Or give them different functions like
this.
Now it's your turn to go really crazy
with your innovations using Quirky
Connect. To help you with that, I have a
fun activity for you. Try using
ultrasonic or LDR sensor to create some
exciting project. But do let me know in
the comments below what you built. I
have a hint for you. You can make
something like sensor-based street
[music] light, which will come on when
it's dark and go off in the morning. I
hope you enjoyed today's video, [music]
but do follow us and subscribe for the
next update. Till then, happy learning.