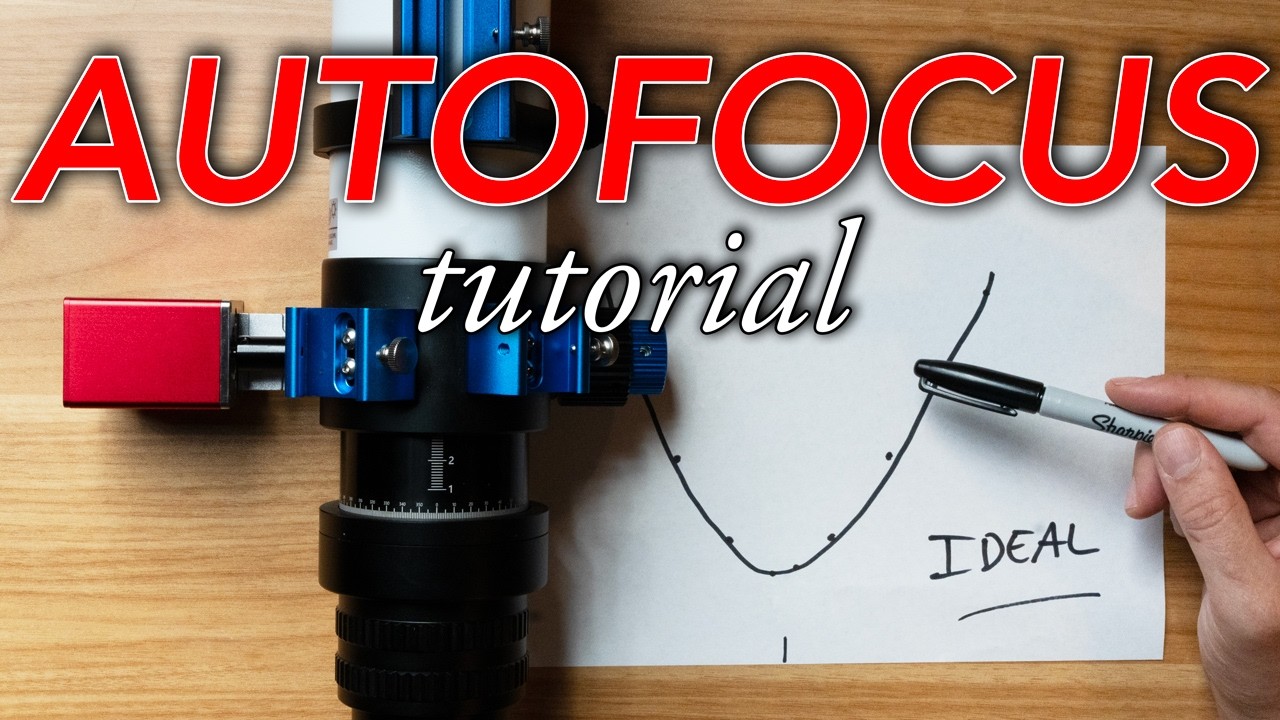
Video summary
This video provides a comprehensive guide on how to upgrade almost any manual telescope with an electronic autofocus system using devices like the ZWO EAF. The presenter explains that while standard camera lenses use built-in motors and electrical contacts for automatic focusing, telescopes typically require manual adjustment via knobs. To bridge this gap, users can install an external auto-focuser by replacing one of the existing coarse or fine focus knobs with a motorized unit. This process involves removing the locking screw to secure the telescope's current position, detaching the old knob, and carefully attaching a specific coupler that connects the new electronic device to the focuser shaft without damaging the internal gears.
The installation requires precise attention to detail regarding alignment and spacing. A critical step is ensuring that at least one set screw on the coupler makes direct contact with the flat surface of the telescope's focusing shaft, while leaving a small gap between the motor body and the coupler to prevent rubbing or mechanical interference. The presenter demonstrates how to loosely attach the mounting bracket first, slide in the autofocus motor, align the internal components so they sit squarely against each other, and then tighten all screws securely. Throughout this process, it is essential to verify that the focuser moves smoothly by hand before fully tightening everything down, as any misalignment or stripped screw can render the system unusable.
Once installed, the video details how to configure the software settings necessary for successful astrophotography sessions. Users must ensure they start roughly in focus manually so the autofocus routine has a baseline to work from; otherwise, the camera may struggle to find the correct position within its travel range. The tutorial covers adjusting step sizes and exposure times based on whether filters are being used, as well as troubleshooting common issues like backlash (gear slop) or jagged focusing curves caused by incorrect settings. By optimizing these parameters—such as increasing the step size for faster operation or extending exposure time for better star measurement—the autofocus system can reliably lock onto stars quickly and accurately throughout an imaging session.
Read the full video transcript
This video is sponsored by Squarespace.
In normal photography, many of us rely
on autofocus. The camera and lens work
together to automatically focus the
subject when you press the shutter down
halfway. And this works because any lens
with autofocus is going to have focus
motors built into the lens body here.
And then those motors are designed to be
controlled electronically through these
contacts right here on the lens flange
that connect to the camera body. On the
other hand, almost all telescopes off
the shelf are manual focus only. So, we
need to actually turn these manual focus
knobs in order to focus on the stars.
However, we can add autofocus to almost
any telescope with something like this
that goes for about $200. This is an
electronic auto focuser designed for
telescopes. Hi, my name is Nico and I do
astrophotography full-time thanks to the
community support on my Patreon and this
video was actually suggested by one of
my Patreon members named Jan um and he'd
been struggling a little bit to get his
ZWO EAF working. I was able to help him
with it and he said that I should make a
video about uh the topic. So, here we
are. And this is going to be a basic
nuts and bolts kind of video showing you
step-by-step the installation and the
configuration process for a telescope
auto focuser. And I will be using the
ZWO EAF for this tutorial because it's
the most common brand uh that I
typically see people going for with for
the auto focuser, but I will uh
you know, be going through basics that I
think would apply to other auto focusers
if you happen to use a different brand.
Okay, so let's go ahead and get started.
This is your typical telescope focuser.
Um so, on this side you have the coarse
focusing knob. This is also a coarse
focusing knob and then this is the fine
focusing knob, which is a 10-to-1
reduction. Okay, and then here, this use
this little screw in the bottom usually
comes in a little baggy and you you
install it. It's the locking screw.
Once we actually install the auto
focuser, we're going to remove this
locking screw and the telescope focus
will be locked. Um we can't manually
focus anymore once we put the auto
focuser on there, at least with the ZWO
EAF. It locks it in that position and
then the only way to move this focuser
is through the auto focus motor, which
you're going to have to control either
with the little hand controller or with
software. The first step though is we
need to install the electronic focuser,
the EAF. And where are we going to
install it? We're going to put it on
this side. So, we're going to replace
this coarse focusing knob with the
motor. Okay, so the first step in doing
that is to actually take off the coarse
focusing knob. What I would suggest is
go ahead and lock down your
focus like this with that little hole
right there straight up.
So, that this isn't going to move around
as you're trying to undo that set screw.
Okay, and then your auto focuser
probably came with two Allen keys for
this set screw. It's It's almost
certainly going to be the smaller of the
two Allen keys, so I'm just going to
open this bag
and put that in there
and then loosen
the set screw just by turning the Allen
key in a leftward or counterclockwise
motion until it's loose. And then once
it's loose, this whole knob just comes
off quite easily.
Now, what I would suggest is to
put this little coarse focusing knob
with the set screw in there in like a
Ziploc bag and label it and say, you
know, this belongs to the Askar 71 F
telescope and keep it with your random
telescope parts, but definitely label it
so you remember where does this actually
belong, what telescope? Okay, with that
coarse focusing knob removed, we can now
see the focuser shaft inside there. And
if I loosen this locking screw and turn
this, you can see that focusing shaft
moves as I move the focuser.
Um what you want to look for is that one
side of this focusing shaft will have a
flat surface. And it's just important
that when we attach the next part, which
is a coupler, which is going to what's
going to attach the EAF to the focuser
is this coupler.
Um is the important thing is that at
least one of these set screws here is
making contact with the flat part of the
focuser shaft. Now, there will be a
couple
set screws on each side, so you can
tighten them both down. So, one of the
set screws is going to be making contact
with the round part of the shaft just as
sort of like a safety
um to strengthen up the connection a
little bit more, but you just want to
make sure that at least one of these set
screws is directly on top of the flat
part of the shaft on both here, and then
we're also going to make sure that that
happens with this one, too, which also
has a flat part.
Now, um depending on your focuser model,
how old it is, or uh which brand, you
might have a coupler that looks like
this, which is flexible in here, or you
might have one that looks like this,
which is rigid. Usually, when you buy a
focuser, it's going to come with many
different couplers. And the reason for
this is on one side of the coupler, it's
always going to be the part that fits on
to the ZWO EAF, but the other side
there's many different size holes there
so because these shafts on the different
telescope focusers come in different
diameters. So that's why you have all
these different couplers. So the next
step is just finding the coupler that is
a good fit on to that shaft. So you
there should be one in the bag that is
like basically fit not too loose or too
tight. Go ahead and put it on there. Now
mistake I often see people making is
putting it all the way
in
to
just just jamming it all the way in. But
if you look carefully on most focuser
shafts, this little flat part doesn't
actually extend all the way in and there
it actually goes back to a rounded shaft
there.
And so if we if we go all the way in
it's going to be it's sort of a weird
angle. So you actually need to leave a
little gap here between this part of the
focuser and where you attach the
coupler.
Okay, and then we're just going to use
the same
Allen wrench that we used before
to attach that
like so.
And then you can loosen your
focuser if it's not already loose and go
to the other
set screw and tighten up that one.
At each step of this process as we're
adding things, what I'd recommend is to
make sure that things are
working as you'd expect them to work.
One thing that you can do right now is
just take the whole coupler and see if
you can move the focuser back and forth
just by hand. Because for instance, if
this was loose, then this would no
longer work. You'd no longer be able to
move the focuser like this. But, this is
all working well, so we know that we did
it correctly.
Okay, so we have the coupler on there
securely. The next thing is we need to
attach the EAF. That's shaft is going to
go into there,
but
we also need to attach this bracket to
firm up the connection of the EAF to the
telescope. So, um I think the best order
for this is we're going to we're going
to attach the bracket loosely. We're
then going to slide in the autofocus
motor and attach the motor to the
bracket, then tighten everything up.
However, there's one thing that I would
suggest to do before we actually even
attach the bracket, cuz it's going to
start getting in the way, which is So,
we're lining that up like this with
this, and then I'm just going to turn
the coupler
until this set screw right here is lined
up with the flat part of this shaft.
So, see, here it's not lined up because
my shaft the flat part's right there.
So, I'm going to turn
this until
those are lined up. So, then when I
tighten this all back down after I've
attached the bracket, it's all ready to
go.
If you forget this step or this seems
too complicated, another thing you can
do is uh attach get power to your
EAF through the USB. If you have the
hand controller, you can attach that,
and then you can just move the shaft to
whatever angle. So, if I powered this up
right now and attached the hand
controller, I could just move this
shaft so that it the flat part was
straight up. Sometimes I like doing it
that way. Um it's really up to you
though, but this way you don't even have
to power up the auto focuser. You can
just move this
so that everything is at the right
angles. So, the flat part is facing me
now and this is lined up like this.
Okay, next step, go ahead and take out
the locking screw.
Okay, and there'll be a bag of screws
that came with your electronic auto
focuser. Find one that
works with that same screw hole. This
focuser
actually has uh five screw holes up
here. So, we're probably going to want
to attach the bracket in a couple
different places. Okay, and then there
will probably be a washer in the packet
and the screw
and you put the screw through the
washer.
Uh if you don't want to uh keep track of
this locking screw, another thing that I
see a lot of people do is just actually
use the locking screw as one of the
screws to hold on this bracket. I think
that's a good idea. So, I'm just going
to use that as my second uh screw down
here.
And there's no need to tighten these up
uh much yet. We actually want to keep
this loose at this point so that we can
adjust the spacing over here with the
electronic auto focuser.
Okay, so now at this point, I'm going to
bring
this into the coupler right here, the
shaft into the coupler. We've already
lined up that set screw
on the side here.
So, then I can just get the spacing
just right. And again, you don't want to
push that coupler all the way up to the
edge of the focuser body. You need to
leave a little space in there. Okay, I
just changed the angle here so you can
see this cuz this is an important part.
There's probably going to be about a gap
here between the EAF and the coupler
that's about the thickness of this small
Allen key.
Um and that is so that this set screw
right here
makes good contact with the flat part
and it's not rubbing up against the auto
focuser body at all.
Okay? So, just keep that in mind when
you're adjusting the distance of this to
the coupler.
About that much is is about right.
It could be a little bit more or a
little bit less, but like that you don't
want to push this all the way up against
the coupler.
Okay, I'm going to switch this back to
the angle we were at before. Okay, so
remember this part is is just is held on
by these two things here, but it's still
loose. So, the reason for that is we can
now push it right up against here.
And then there should be in the bag two
little M4 screws and on the focuser body
there's two screw holes right here
that we're going to attach
these two. Okay, so you see there's two
screws right there.
You're going to use the bigger Allen key
to tighten those.
Okay, and then the order that I would
tighten now is go ahead and tighten this
down.
Okay, so now the bracket is tightly
attached to the EAF. Then I'm going to
turn it back up this way so you can see.
Then you're going to tighten these two
screws.
So, in my case this one is
this M4, the bigger Allen key, and then
this one is a
thumb screw
that came with the telescope.
Okay, and now this bracket is very
securely on there. So, the the EAF is
very rigidly attached to the
uh focuser assembly. And what you can
try now is try just moving Don't do this
with any force, but just try a a little
bit. Just try moving this coarse knob on
this side, and you should feel that it's
locked.
What you'll see is that if you if you go
like this, you'll see the fine focuser
knob moves like a little bit. It's like
a little wiggle, but don't force it.
Just let it be like this, and that's
it's locked, okay? If you have access to
all the different set screws, go ahead
and go in there
and just give each one
a check. Okay, while you do want all
these set screws to be tight, I will
warn you they're easy to strip, and you
really want to avoid that because if you
strip the set screw, then it can you can
get into a situation where this coupler
is like permanently attached to the
focuser shaft, and you don't want that.
So, the key thing to not strip them is
just make sure that when you put this
uh
hex wrench, this Allen key,
into the set screw,
that it's actually
fully in there, and you're not just sort
of like trying to jam it in at a weird
angle. So, just take your time and just
make sure that you actually find
the angle for the Allen key
where it's going into the set screw and
is not just sort of like jammed in at
some weird angle, that it's actually
in there. And it can help to actually
look at it and then look at the angle of
the Allen key and just line the two up.
So, once you have
this all installed, now is the moment of
truth, which is we're going to test it.
You can do this inside, doesn't matter.
And just make sure that it smoothly
moves the focuser back and forth.
And there's a couple different ways you
could do this. One is you can attach the
focuser to a PC or to this guy, to an
ASI Air
just with the USB cable. I have an older
one, so it's still this USB B style.
Once you connect it to
the computer ASI Air, you can just then
open up the software and move it using
the software controls.
An even easier
way to go about it
is to buy this additional device, this
EAF controller
hand controller.
You just plug that in as well as the USB
cuz the USB is needed for power.
>> [snorts]
>> And you can put it on fast.
And then just try
So, I'm going to move it one way.
This is moving it, you can see, in.
And then move it the other way.
And you can see the focuser is moving
out.
Now, I should have said this at the
beginning, but if you know
where your camera comes to focus and
your focuser travel has these millimeter
markings
you can now go ahead and just move out
your move out or in your focuser
to the point where you know it roughly
comes into focus.
Because for the autofocus routine to
work, you have to start roughly in
focus.
So, if you don't know this, if you're
installing this and you either forgot
how far this should come out to reach
focus or this is brand new to you, this
telescope um just get out under the
stars and if you have this
just
loop exposures or just take a test
exposure,
move in, take another test exposure,
move in, and eventually you should start
seeing some big out of focus stars
appear, and then you can fine tune it.
And when you get really close to being
in focus, you can
go down to the slow mode,
and it'll just move the focuser much in
much slower increments. And of course,
when you also get close to focus, you
can use a Bahtinov mask if you have one
to really make sure you're in focus. So,
again, steps are after you've installed
it,
go ahead and either with the app or with
the hand controller, make sure that it's
smoothly moving in both directions.
Now, what if it's not smoothly moving in
both directions? Um
if if you find that you can you can move
it one way, when you try to go the other
way,
it just doesn't move. It just sort of
like locks up.
That is almost always some issue with
your physical connections here. So, if
this is, you know, askew, if anything is
loose, you just want to make sure that
everything is just like solidly put
together here. Basically, if you find
that it's not working,
it's time just to take this all apart
and start again. Just try to slow down,
make sure that every that you're
attaching to all flat surfaces, that
along every step of the process you're
making sure like oh yeah, the coupler is
tight onto the shaft there. This is all
square, all these different steps that
are so it's mechanically solid. Um and
then if if you've done all of that, it
should just work like this. It should be
able to move the focuser
in both directions, and that's all it
needs to do to work as an auto focuser.
Okay, but now that I can see this is all
working, we're ready to bring this out
under the stars. Okay, we're in the ASI
error here and I have my camera
connected and the EAF is also connected.
If you if you don't have your EAF
connected,
um just go up here to EAF.
And
you should be able to connect it right
here. If you have a plug-in over USB,
it's this symbol. If you want to connect
it over Bluetooth, it's that one.
I'm going to connect over USB.
And so this is one sort of auto focus
screen. This is the focus settings,
basically. But this current position and
go to is actually a control option. Um
so there's a control option in the
settings, just so you know. But the main
control thing is actually over here on
the left. It's this little focuser thing
right here.
And
if you have it on slow mode, when you
press one of these up or down buttons,
it's going to move uh in
the number of steps that you have for
the fine number of steps. So that was 10
by default. And in the fast mode,
it's going to move the number of steps
for the course setting. So I think that
was 100 by default. Okay, if you want to
increase or decrease those numbers of
steps, you can just go back here into
the EAF settings and type something else
in.
So for instance, if I
take a picture here,
and I can see I'm pretty far out of
focus cuz like, you know, this out of
focus star is still pretty big. So I
know that I'm going to have to probably
move
a bunch of steps, but let's just see. If
I just move 100 steps,
how much that out of focus star changes.
Barely at all. So yeah, I was right. So
I think that I'm far enough out of focus
that I'm going to want to set my course
setting higher. I'm going to set it to
500 steps.
Okay, and then I'm going to try hitting
that
once and taking a picture.
And I hit the down arrow in this case.
So, if the focused out of focus target's
bigger,
which it did, then we know we have to go
in the opposite direction. So, now I'm
going to go
I'm going to hit the up arrow twice.
And the focused the out of focus star
should get
much smaller.
Yes, so it is.
Now, I'll mention that this way of doing
it, of controlling it with the arrows,
is of course only one of several control
options. So, another is if you have the
[snorts] hand controller,
you can just use the buttons on here.
And the nice thing with these buttons is
you can actually just hold them down.
So, I'm going to hold down the up
button, which is pushing the focuser
out.
And you can see now we're getting a lot
closer to focus.
So, I'll just go a little bit more.
So, now that looks pretty close to rough
focus. I'm going to switch to a Bahtinov
mask just to make sure. Okay, I can see
I'm a little bit out of focus.
So, this is where it can be handy to
switch to the slow mode. So, I'm going
to switch to the slow mode.
Okay.
That looks pretty good. I'm going to
take another test exposure.
Okay, and then I'm going to press the
detect button
over here on the left.
This is going to calculate the star
size.
Okay. And I can see the star size is
2.3.
We've now reached a point where we're
basically in focus. It could probably be
a little bit better.
But if we look at the focuser position,
we can see it's 29,281.
That sounds good. Um if
our limit is 60,000, that gives us a
huge amount of range to work with. Like
you want to be sort of in the middle of
the range. Now, let's say
you went through this whole process and
for some reason it said current position
right here
20.
>> [laughter]
>> I don't know. Something very very low.
Um
that's not going to work. So you you
would then want to actually change the
current position. You can just type
something in here. So I just changed it
to 30,000. Uh
but it was fine before too. It like
whatever it was 20 28,000, whatever. Um
the point is is just you don't want to
be too too close to either end. When
you're at the good point of of reaching
focus with your telescope, you want it
sort of right in the middle of the
range.
Um so if it's something strange there,
you can change it. Otherwise, you can
just leave it alone. Um I'll also
mention this right here, this go to
function. So um this is another way just
to make big changes in focus position.
So I already mentioned this coarse and
fine adjustment which you can do with
the slow and fast buttons over there.
But uh if you ever just want to make
like bigger changes because you're
finding focus and you're finding using
those buttons is too slow, you could
always just type something in here in
the auto focus settings.
Um 2 seconds is probably fine for you
know, no filter. If But if you're going
to be using like a heavy filter, like a
dual narrow band filter, I'd probably
increase that to maybe 5 seconds.
Um maybe even higher depending on uh you
know, the band pass of the filter. But 2
seconds is good for no filter.
And um I think the default step size is
30.
I find that that's maybe with a lot of
telescopes probably a little bit
conservative um and it's going to make
it so that there's lots of steps. So, I
usually increase that a little bit like
to 40 or 50.
Um let's try 50. Okay, and now we're
ready to try an auto focus run. So,
we'll just click on this little AF
button down here. So, if you don't see
that just tap on focuser and then tap on
AF.
And then hit play.
Okay, and it just moved the focuser out
quite a bit um and now it's finding a
suitable star that it's going to track
as it moves the focuser.
Um and once it finds that star and takes
a picture of it, it'll appear in this
upper left box here.
And when it first appears, it should be
very bloated and very out of focus.
Like that.
And then this green line that just
appeared is it trying to basically
fit a curve to those
uh samples. So, basically each time it
takes a picture of that star,
it's a sample and then it's basically
now mapping
um
how the star size is getting smaller
with the change in focuser position. And
eventually the curve should start going
back up in the other direction. Yep, see
it just did. See that sample is now
higher.
And
this curve actually looks pretty good
without any backlash compensation. Let's
see here.
So, that's basically it. Now, there's
more to troubleshooting, of course.
Okay, I'm going to draw out some focuser
curves and sort of diagnose what's going
on if you see these different problems
with your auto focus curve. So, let's
start by just drawing out an ideal auto
focus curve. This is what you want to
see. If you see this, you know that all
your settings are fine. You don't have
to do anything. So, an ideal auto focus
curve, you're starting roughly in focus,
so the the in focus position is going to
be right in the middle of here with the
focus position. It's It's going to move
the focuser out and start out here
and start making points down like this
and then come up on the other side
like this.
And so, the curve should look something
like this. So, it's just a nice even
hyperbolic curve like that uh where it
comes down, it sort of make a sort of a
U-shape down here at the bottom, and
it's pretty even on both sides. Now, if
you start uh
out of position, like if you're not
quite in focus, like let's say you
started
here,
um but then the actual focus position is
over here, that still should work. So,
but in that case, your your curve
wouldn't look so even, it would look
more
like
that or something. But, as long as it's
it's um
able to sort of make a nice sort of
gentle U like that and come up at around
the same slope on the other side, you're
still good. You still don't have to
change any settings.
So, either of these two, we're going to
say are
ideal, don't have to change anything,
okay?
Now, if you start your auto focus run,
you hit the play button, and you
basically get this.
So, it's not making a curve. It's just
making basically sort of a line. Maybe
the line has a little bit of variation.
There's one of
two or three things to be going on here.
The first thing to check is try
increasing your step size. So, it could
be that your step size
is too
low. And so, if you see this and it's
just not making a curve, try increasing
your step size because maybe it's just
not moving the focuser enough to see
sort of that that nice curve happening.
The other common thing that's happening
here is there's a mechanical issue with
how you set up the focuser. So, again,
that's why it's really important before
you run an autofocus curve, make sure
that the focuser is moving smoothly in
both directions because if there's any
issue with the focuser not being able to
move, then of course, you're not going
to be able to get a nice curve. So, the
other um
diagnosis of this is
mechanical problem.
And so, check check that just the basics
again. Check that you can move the
focuser in and out. Um and then uh check
your your step size.
Okay, the next kind of curve, what if it
if this happens? Basically, it makes
this
uh
step here, you know, that it's measuring
the star at something like uh
you know, 15. And then the next one,
it's like at two.
And then all of a sudden, it's way over
here and it's at
18.
That is step size is too high.
It can't make enough inferences from
just this kind of thing where it's it's
jumping it's basically jumping too far.
So, it's it's way out of focus and then
it's maybe in focus, but maybe there's a
better focus here, but it it doesn't
know because then the next step is way
back over here, way out of focus again.
So, if you see something like this where
it's just jumping around and then it's
it's trying again, but it's still just
making this very sort of jagged kind of
curve, that's step size too high.
Okay, next one. This is going to be a
really common one. Um
you'll see that it starts
and it starts maybe like
there's some issue, right? Where like
the step size is too low, like it's
it's it's really not moving very much
like this.
And then all of a sudden, it's like it
kicks into action and you have a big
drop like this.
And then maybe you have one more here.
And then another big up like this.
And then maybe another one and then it
starts doing this again.
So basically you get this kind of thing
where it's it looks like a bat, right?
See like the bat wings like this.
This is an issue with backlash. So it
moves the focuser out here, way out of
focus, but then when it reverses
direction, there's a lot of slop in the
gears. And so it's taking quite a while
before it can actually engage the focus
gears and and move the position.
And so this is an extreme example of of
backlash. Uh you might get a much less
extreme one. It might be something more
like this.
Where you just have a little bit here at
the start, but then it basically makes a
normal auto focus curve. And in that
case, you really maybe don't actually
have to do anything, but if you're if
you're sort of being perfectionist about
it, you can add a little bit to the
backlash compensation to get rid of
that. Maybe just like 10-15 steps.
If it's a case like we saw before,
like this, then you're definitely going
to want to deal with the backlash
compensation. And so
the issue here is backlash. I'm not
going to get into how to measure
backlash. There's other YouTube videos
that do that if you're interested. Just
something that's
almost making a curve, but it's it's
like you have like these like weird ups
and downs.
My guess is that this is a measurement
error where it's not it's not able to
measure the stars accurately enough to
give you a nice focus curve. And so
usually, I would say the issue here,
especially if you're using like a narrow
band filter or something, is that your
exposure
uh length is
too low.
So, you need to increase your exposure
length so that it's it's measuring the
star well enough um to actually make a
good
focus curve. Okay, last thing is if you
have the default if you're using the ASI
air and the EAF, and it's doing its
thing very well,
but it's just making
a lot of points like that. And it just
takes a really long time to complete. Um
I think usually what you can do to speed
this up is just increase your step size.
Because it's it's
if in some you can you can actually some
focusing systems you can tell it exactly
how many steps to take. In ASI air, it
seems like this step size is the only
sort of control you have. So, I think
that just increasing your step size
means that it will just sort of get rid
of these sort of intermediary points and
just get you down into focus faster. So,
if you find that you have everything
working and your problem is just that
it's taking too long,
then the answer is usually, I think on
ASI air at least, is increase step size.
Um the other thing, I guess, with taking
too long is you could decrease your
exposure time.
So, if you have it at 5 seconds and
every one of these samples is taking 5
seconds, try setting it at 2 seconds and
see if you still are making a nice auto
focus curve and coming to focus.
Um and that would also speed up your
auto focus run. But, again, if you go
too low,
um you might have issues there where
it's not actually getting good
measurements of the stars, um or not
finding a suitable star, um
because the all the stars are too dim or
something. So, play around with that,
but but basically, this is just sort of
some advice where if you're finding,
"Wow, it's really eating up all my
imaging time because every focus run
takes, you know, a several minutes." You
could try decreasing your exposure time,
increasing your step size, and it should
go a little bit faster for you. Once you
have this whole thing working like we
have it now, now it's just up to you to
set up these settings right here about
when to run the auto focus. So, if
you're running a mono setup, you can set
it to run the auto focus after switching
every filter, which is very nice. I
would recommend that one.
Um you can also have it set up to
uh run the auto focus at the start of
each target, after the auto meridian
flip.
You can have it do an auto focus run
every
1, 2, or 5 degrees of temperature change
because the auto focuser has a
temperature gauge in it.
I think um for a very fast system, like
if you're like F3 or faster, you might
want to do this one.
Um every 1 degree temperature change.
For a normal system, like this one's an
F7, every 2 degrees is going to be fine.
So, it's definitely super satisfying to
figure out your auto focuser, get it all
working, but what's even more satisfying
for me is getting to the final picture
and displaying it on my own website,
nicocarver.com.
And that's where today's sponsor,
Squarespace, comes in because they make
that super easy. You can purchase a your
own domain name, like maybe your name,
and also hosting all in one place. And
Squarespace includes professional
templates for your website that are
intuitive and easy to customize due to
Squarespace blueprint, which is their
design system. Everything you need is
included from a spam free contact form
to selling tools.
And so, you know, if you do want to sell
you know, a service, maybe a
consultation or a product like
prints of your astrophotography through
your website, customers can pay however
is convenient for them, whether it's
credit card, PayPal, Afterpay. So, if
you need a professional website, check
out squarespace.com/nebulaphotos
for your free trial. And if you like it,
you can get 10% off your first purchase
of hosting or a domain with code
nebulaphotos at checkout.
Since this video is over 20 minutes
long, you're now seeing the names of
everyone who supports this channel on
patreon.com/nebulaphotos.
Patreon members get a bunch of exclusive
benefits like monthly bonus videos,
one-on-one messaging support with me,
tons of additional channels on my
Discord server including the monthly
imaging challenge, a Zoom call with the
whole Patreon community the first Sunday
of every month. And that list was just
the benefits that everyone gets starting
at $1 a month. There are of course
additional benefits
at higher tiers. So, I think it's going
to be well worth your time checking out
what I'm doing over on Patreon if you
like this YouTube channel. That's it for
this one. This has been Nico Carver,
Clear Skies.