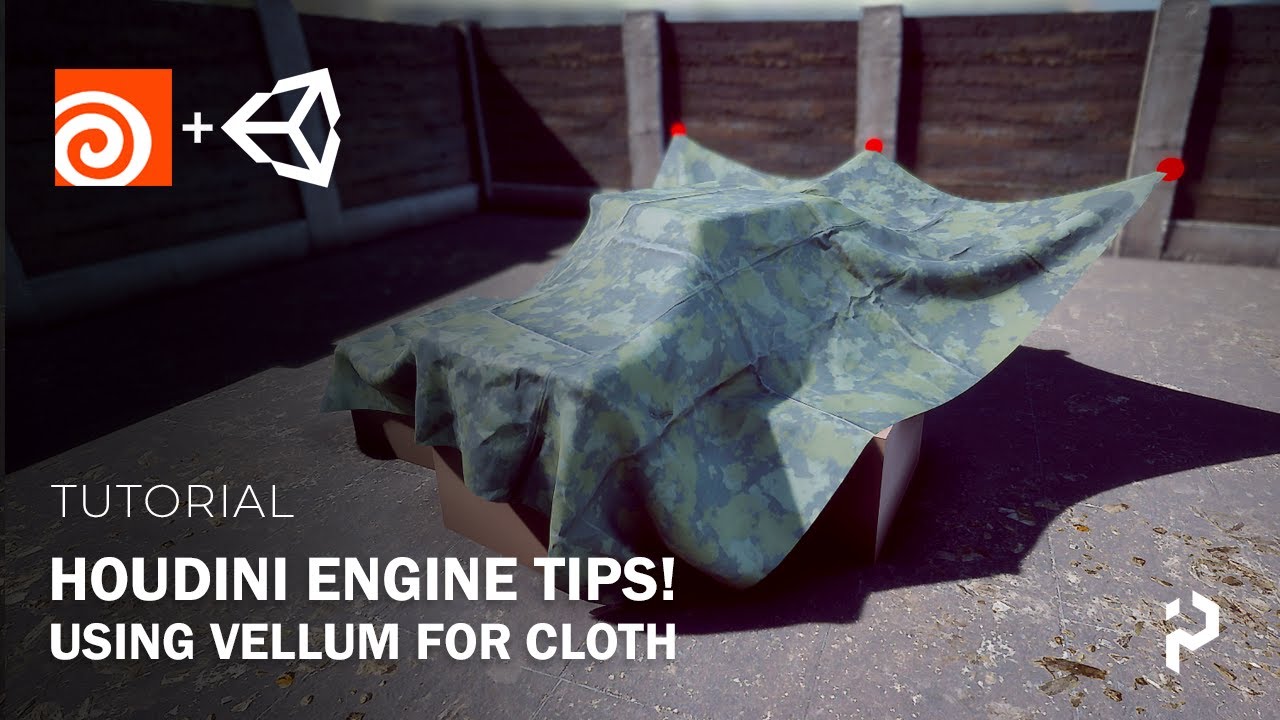
Video summary
This video tutorial demonstrates how to configure a Houdini Digital Asset (HDA) to utilize the Vellum cloth simulation system within Unity, while also noting that the workflow is compatible with Unreal Engine. The process begins by creating a new geometry note and converting it into a digital asset with a specific namespace and version number. Inside the HDA, the creator sets up a basic grid as a placeholder for any mesh, ensuring UVs are applied and using a remesh node to optimize triangle density for a more realistic cloth simulation. Crucially, parameters such as target size and frame count are promoted to the HDA's type properties, allowing users in Unity or Unreal to adjust simulation resolution and control time progression without needing a timeline, which is handled instead via a Time Shift node.
To make the simulation interactive within the game engine, the tutorial explains how to import scene geometry for collisions and pinning points using Object Merge nodes. The creator sets up an input specifically for collision objects, allowing static meshes from the Unity scene to interact with the cloth solver. Additionally, a mechanism is established for pinning specific areas of the cloth by merging user-assigned geometry into a designated point group within Vellum. This setup enables artists to easily tie down corners or edges of a tarp-like object by simply placing spheres or other shapes in the scene and assigning them as pin inputs through the HDA's interface.
The final segment focuses on optimizing performance and visual fidelity by exposing additional controls for material assignment and polygon reduction. A wrangle node is used to accept a material path from Unity, which is then applied to the simulation output, while a Poly Reduce node allows users to toggle between high-resolution simulations and optimized versions to manage polycount. The tutorial concludes by saving the updated HDA type and re-importing it into Unity, where users can rebuild the asset to access new features like a reset simulation button, dynamic material swapping, and adjustable reduction settings. This comprehensive workflow ensures that complex cloth simulations can be efficiently managed and visually tuned directly within the game engine environment.
Read the full video transcript
howdy guys indiepixel here
in this video we're going to walk
through how to set up an hda so that we
can take advantage of using vellum
inside of our hta's inside of unity and
inside of unreal
so i'm just going to cover the unity
side of things but we're going to look
at how to make
it so we can assign collisions to our
cloth objects and how to
set up pin points for our object as well
as go over some reduction stuff
and just the whole workflow in general
so let's take a look at how to get all
this stuff set
up inside of houdini and unity
all right so the first thing we're going
to do is we are going to create a new
geometry note
i'm just going to give this a name of ip
vellum cloth something like that
and we're going to right click on it and
say create digital asset
and i'm going to go and set up my
namespace
so you just put the cones like so and
then at the end you just
do the version number same way then you
can also give it a different label if
you want
down here i tend to go and capitalize
these things
there you go and then we want to go and
save it into our project so in this case
it's my hip directory
and so uh i'm going to name this folder
hda
and i'm just going to save it right
there for now say accept and we're going
to destroy all spare parameters
i'm going to go to the version number
and put in 1.0
and in the parameters i just want to go
and hide everything because we want to
go and set up our own custom ui so i'm
just going to set those guys to
invisible
hit accept and just make sure i save the
node type
and we now have our hda so now let's put
in the meat of the actual hda i'm going
to double click it to dive inside and
for this
demonstration i'm going to just set up a
simple grid you could actually feed in
any sort of mesh that you want but in
this case i'm just going to make a
simple grid here
and we'll default it to 10 by 10 so
let's actually add that to
our type property so just right click on
the hda right here just go to type
properties
and we can just go then and do an alt
middle mouse click on the label here for
the size
to promote it to our hda up there there
we go
now your defaults you might want to pay
attention to uh you might want to set
that to
just one for the minimum size and maybe
you know 50 for the max
this is a simulation so you know you
could get quite a bit of
geometry created from this particular
technique
system so you want to keep all this
stuff in mind so the defaults are tenant
and that's good
cool so i'm just going to say apply and
accept
with our grid done we need to apply some
uvs first so it's a good idea to do that
just so you know you have the uvs now if
you want to just verify that your
projection plane because
we are using the orthographic setup here
if you want to verify that in the scene
you just want to go and select the node
and then hit enter in the scene view
over here and you can see that our plane
is perfectly oriented correctly and we
can do a spacebar five on the keyboard
and to go into the uv view just to also
verify that we actually have uvs
then do a spacebar one just to go
backwards just one if you're already out
of
um or in camera mode all right so
now we've got uvs i'm going to do a
remesh
so let's drop down that remesh node and
really we're just doing this because
if the villain solver likes to work
these triangles you just get more
realistic cloth look
out of it so the one thing that's really
important here is the size this
allows you to change the resolution of
the simulation so we should probably
promote that
so i'm just going to go to my type
properties again and i'm just going to
do another alt
middle mouse click there to promote it
to my type properties up here
so i can tweak this stuff inside of
unity also inside of unreal for using
the unreal engine as well and so i'm
just going to leave the labels and all
this stuff set up by default for now
you can tweak it all later i really just
want to cover the technique here
all right so with that all set up we now
have
our grid so i'm just going to drop down
a volume configure cloth
i'm just going to wire that in like so
and all the defaults will be fine for
now
as well and then we're going to go and
get the solver
so we just want the vellum solver i'm
just going to mouse over the
guy to auto hook up those lines there
there we go so now we have a vellum
solver in here so i'm just going to hit
play just to verify that it's moving
yep there you go and it's actually got
some
pins there that's pretty weird um all
right so
let's go now and set this up for the
houdini engine so i need to actually
drop down a time shift node here
to control the solver because inside of
the houdini engine we don't have a
timeline
right there's no timeline and so this
time shift node allows you to
push time forward and backwards which
then triggers the vellum solver to run
inside of the houdini engine
so all we need to do is expose this
frame value
to our type properties so i'm just going
to open up type properties here and just
do an
alt middle mouse click and now we have
our frame
one thing you should take note of is
just lock this at one because if you get
zero frames it just removes all the
geometry from the hda
alright hit apply and accept all right
you can also leave that open if you
don't want to have to constantly be
doing that
and then finally we're going to drop
down a vellum post
so let's do a volume post process this
just
smooths things out for you we'll set the
subdivision to loop you can also put up
the blur
a little bit as well or just promote
these parameters to your hda
alright then i'm just going to drop down
that output node here
and there we go so now we have a really
basic vellum
set up for our hda so let's go and test
this out now
inside of unity first thing always
remember right click on your hd and save
it so
let's go and test this out in unity now
okay so what i did is i open up the
folder
location of where my hda is and i'm just
going to drag and drop it into
unity over here into my hda folder
wherever you want to save these guys
and i'm just going to pull this guy off
screen and now i just want to drag and
drop this into
the level you can put it into the
hierarchy you can put it in the scene
view it doesn't really matter
all right so you get your grid and we
don't really have a lot of parameters
yet but you can see over here
in the inspector i can grab this guy
there we go
all right so what we can do is go and
change the size so we can do something
like 4x4
and we can change the overall target
size so to see that we just go to
a shaded wireframe there and we go to
something like
0.5 you can see we've got really big
triangles if we do like 0.05
we get really tiny triangles so you get
more resolution out of it which
gives you a better solve so i'm going to
leave it at point 2 just to start here
and if i were to increase the frames now
to something like 20
and let the houdini engine run you can
see that
our cloth piece is all the way below the
floor here
and that's because we're not colliding
with anything yet so what we need to do
is we need to go back to our hda and add
some collision properties to
our system so in order to do the
collision basically we need a way to
actually import
geometry that we set up inside of our
unity scene into our
hda here and to do that we use object
merge nodes
this object margin node allows us to
basically fetch or
you know go and find geometry that the
user is assigned
and so to set this up what we need to do
is we need to set this to
into this object for the transform
option the reason being is that this
will import the
location of the objects in the unity
scene into houdini here
so it's all relative basically which is
what we want
so i'm just going to wire this into the
third input here on the vellum cloth
node which is for
collision and so now whatever we assign
inside of unity we'll collide with our
cloth solver there and so i'm going to
actually name this i'm going to call
this get collision
and we need to promote this object one
parameter up to our hda so let's go and
do that i'm going to go to my type
properties
and i'm going to put in a separator for
this you can also use folders or
organize this stuff however you want
and then i'm just going to do a middle
mouse click and uh
alt on the keyboard to promote my
parameter up to the hda up here and i'm
just going to call this
collision
input like so we'll call this collision
input just to make it clear inside the
editor and hit apply and accept
so now we'll be able to assign
collisions to our vellum solver inside
of the houdini engine which is super
cool
and to finish this up i am just going to
right click on the hda and say save node
type
and then let's hop back into unity and
test that out
okay so to get those changes back here
inside of unity that i made to the hda
i'm going to go and
right click on my hda here inside of
unity and i'm going to say show in
explorer let me
go to the location where i've been
working on the hda so this is a
different hda than the one that
is actually inside the project now you
could be working on these particular
hdas
i tend to keep them separate just as
backup all right so i'm just going to
copy this
and i'm going to paste it and replace it
there so now it's all imported or
re-imported
so all you need to do is go and select
the vellum cloth and hit a rebuild
on it and what that does is it basically
updates the
internal hda all the nodes and stuff to
the latest version that we just updated
all right and you can notice that we get
this new collision input over here in
the inspector
well this allows us to go and assign any
geometry any static mesh
from the scene to our hda and what will
happen is the
vellum cloth solver actually interact
with those pieces of geometry so in this
case
i want to add all these cubes that i set
up here just to act as like
cardboard boxes or something like that
and so i'm going to go to
the hda here and say add selection
and then i want to go and turn on roots
only so i can select just these
grouped bits of game objects here and
i'm going to turn on
collision objects hit accept and those
are all the objects that i actually want
to collide with
and in this case i do want to add one
more so you can actually go and add a
separate slot and in this case i want to
go and drag and drop the ground into
this right here so what we need to do
now is actually go back to frame one
right and then sim to something like
let's do like 50.
and see what happens so now we're
running the vellum solver
it's just that you don't get a real-time
update or anything like that so it's
just skipping the frame 50 but it's got
to go and cook all that stuff
so you can see that our cloth is kind of
bundling up over there
so i'm gonna go and set this to one but
you know it's actually kind of a pain to
constantly go and
toggle this back to one than having to
set the sim time again
so it'd be nice to actually be able to
trigger that and you can actually do
that
inside of the hda by promoting the
resimulate button
so let's go and take a look at that all
right so i'm going to go up here and i'm
going to go and expose the type
properties
and we really just need to go to the
vellum solver here then
go and promote this reset button right
here so i'm just going to alt middle
mouse click and that puts it
right there so let's actually move it up
with these other values here and let's
actually put a separator
between these two guys so we have all
simulation stuff then we have size stuff
and then our inputs all right so hit
apply and accept
and then just make sure you save it and
now we can go and update our version
inside of unity
so let's copy our new hda or the updated
version and paste it over the old one
over here
i'm going to jump back into unity and
hit a rebuild on the hda and you'll
notice now we have a reset simulation
button which is great so i can leave
this now
at something let's say like 40. and
when i want to update the simulation i
can just hit the reset simulation button
and it'll re-cook so
let's go now and just move this and then
just say reset simulation
let it cook for a little bit and there
you go so now we're starting to
fold but you'll notice that we're
getting quite chunky
results here and that's just because of
our target size so let's set this down
to something
like 0.1 and hit reset simulation and
there you go so now we're starting to
get something a little more realistic
let's turn off our wireframe just so we
can see this
yeah starting to look pretty cool so
there's a couple more things i want to
do
and i have an example already set up
here let me actually turn this guy over
off over here and turn on the previous
version here
so i want to be able to go and pin
certain sides of my cloth like if i want
to tie up this tarp or something like
that
well i can also go and assign spheres in
this case i use spheres you can assign
any geometry you want to use as a
pinning point
and hook it up to the hda so that way we
can control the look of our cloth here
much easier all right so let's go now
and take a look at that inside of
houdini in order to pin geometry on
vellum cloth you need to go to the
pinpoints
group right here so this particular
parameter right here is actually looking
for
a group of points to pin all right so if
you hit this drop down
you'll notice there's no groups i
haven't set anything up so we need to
set up that group
right so i'm going to go and drag these
guys up here and
drop down a group node and the way i
want to do this is i want to allow the
user to assign any piece of geometry to
select an area of the cloth to pin all
right i just find that to be a good way
to let users interact with the cloth
and just really art direct it all right
so i'm just going to drop down an object
merge note that again this is going to
import geometry that the user
assigned so i'm going to call this get
pins
there we go and we need to set this to
into this object as well and then we
need to promote this object one
parameter so let's go up to our type
properties up here
and i'm going to create another
separator
and this will all be for pins so i'm
just going to do an alt middle mouse
click there and we'll call this
pin inputs and i do like to keep these
lowercase so pin
inputs and pin
inputs for the label and everything else
is fine hit apply
and now in the group node here we need
to set the group name
first that's very important so we'll
just do pin and we're going to change
this from the base group
to keeping bounding regions now this
only works with points so we need to
convert the group type to points there
and then we need to change this to the
bounding object
so the bounding objects are going to be
all those spheres or cubes or whatever
you assign to this object merge node
and i'm going to feed that into that
first input of the vellum constraints
node
and inside of that volume constraints
node i'm going to go and select that pin
group
alright so that will allow us to then go
and pin the
parts of the cloth so let's hit accept
everything looks good there
i'm going to go and save my hda by right
clicking on it saying save node
and then let's jump back into unity and
take a look so i went ahead already and
did a rebuild and updated it everything
looks to be fine so what we need to do
is go
and create a new empty game object i'm
going to call this my pins
and underneath that i'm going to create
a sphere to
act as my pin group or the object that i
want to use is my pin group so i'm going
to call this pin01
and let's go now and i'm going to scale
it down quite considerably
and we're going to then move this over
here
and to make this a little bit easier on
myself let's go up to the vellum cloth
hda and i'm going to set the
frame back to one just so i can see
where it's starting from
that'll help a lot not also i'm going to
assign a material i made for this guy
a bright red material just so i can see
it easily i'm going to call it
pin matte i'm going to use pin mat there
and let's now go
and put this into position like on one
of these corners here so let's make this
a little bit bigger
just make it easier on myself there we
go
so let's do both these corners over here
i'm going to go drag it there
and then do a control d and move it over
here and these two are going to act by
pin points you need to make sure that it
intersects it just so it has some points
to select
all right and then on our hda here let's
go and assign those
two guys again you can just go and get
your pin group so i'm going to go and
add selection
turn on my roots only and go and find
pins
up here say yeah accept
and then we can go and resimulate so
let's set this back up to
oh let's do 50 this time and let that
cook
and there we go voila we're now pinning
our stuff so you can even go and add a
third one in the middle there
so let's do that and let's make sure we
go and grab
our group again so i'm just going to go
like so
and hit accept and let's just remove the
original one there and let's do a
rebuild
or i could hit reset simulation and
there you go
so now we've got all three so you can go
and pin it wherever you want
pretty cool stuff so the last couple
things i want to do is i want to make
sure that we get a material assigned to
this and then i want to be able to
reduce the polycount because you're
going to want to go and increase the
polycount on these things
i tend to go to something like .05
for these and then do reset simulation
you'll end up with
quite a bit of geometry and so i want to
be able to probably reduce that here
inside of the editor
and so once this is done we're going to
take a look at how to set that up
all right so the first thing i want to
do is just assign the material which is
pretty easy you just drop down a
wrangle note here and go call this
unity material and i want to make it so
that you can assign whatever material
you want especially for something like
lots you might be swapping out cloth
materials quite a bit so to do this you
say s at unity
underscore material is equal to chs
and the name of the property so when you
say chs you're making a string channel
so a parameter that'll exist down here
and i'm going to call this
material call whatever you want it's
really just the
internal name for this particular
parameter all right and so then we need
to promote that to our hda so
go into the type properties here and i
think i'm going to put it at the top
right because that is you can just drag
and drop it as well
that is um all the kind of the base
parameters over there
all right so that is all set up let's
make sure we set that to the primitives
as well
it'll still work on points i'd usually
just put it on primitives
all right so the last thing i want to do
is go and probably reduce
so let's drop a poly reduce node in here
and we are going to set this to
by default let's say 50
and i want the user to be able to switch
this on and off
as need be because it is a heavy
operation
so might as well let them run the vellum
solver without the poly reduce it'll
just make the hda go faster and then
when they're ready to reduce it
let them reduce it with a switch note so
they can just toggle between the two
different states
so switch reduce and now i need to
promote two parameters from here
one on the toggle so oral and the switch
node here
so to do that you can just drag and drop
this down here and i think i'm going to
put it up
here and put a separator between this so
it makes it easy to see
and we're going to call this the reduce
toggle and we'll call this reduce with
the question mark
and then we'll convert the type of the
parameter from
integer over to a toggle just so it
shows up as a checkbox in unity
and then we want to give them control
over the
amount to reduce so in this case i'm
just going to promote the percent to
keep
for now you can use you know the other
settings as well for now i'm just going
to say 50
is the default so if you go to the
channels tab that'll be where your
default is
and then this is your range so you hit
apply and accept
and then make sure to put the display
flag on the output and right click on
the hda
save to node and let's take a look
inside of unity and after rebuilding i
get my new
options here so we have our reduce
option here so i can go and turn this on
and then set this to oh i don't know
let's do like 20
let's see there we go so now we're
getting a lot less polys which is
perfect
we can go lower and see what happens
here so you can really stretch that
let's set this to shaded and it looks
pretty much the same
so the other new feature here is the
material so the way this works is you've
got to go over to
the material you want and right click on
it and say copy path
and then paste it into the option here
and hit enter
and that will set it up so because we
set up uvs this will work
i went through and basically made these
materials inside of a qixel mixer
and just kind of blended a few things
together as a mixture of tarp
and custom layers which is some noise on
top of it and just kind of blended with
the bottom
tarp material same with all the other
stuff here
so nothing here is really all that fancy
so anyways that is how you set up
vellum inside of houdini engine for
unity now the
really only differences between uh unity
and unreal for this they both basically
work the same way as you need to set up
in this case for this hda the material
assignment needs to be set to the s
at unreal material attribute inside of
houdini so just keep that a note if you
are using
unreal this totally works in unreal too
i have tested it myself so
thanks so much guys see you soon