Hacking a mobility scooter for features and lights - EMF 2026
Watch on YouTubeVideo summary
The video features an amateur hacker presenting their ongoing project to modify a mobility scooter with custom features and lighting at the EMF 2026 event. The presenter, who holds a computer science degree from twenty years ago but is not part of any formal hacking organization, explains that they own three scooters and have been working on this specific one for several years after their previous units failed due to motor issues. They emphasize that while they are not qualified engineers, the project serves as a demonstration that retail workers and individuals with limited technical training can successfully edit and enhance existing devices. The presenter notes that the scooter is quite dusty from being driven around the event and clarifies that some photos show a replacement red unit because their original scooter failed earlier in the year.
One of the main arguments presented is the importance of making practical modifications without compromising the vehicle's legal status or safety. The hacker initially considered using a universal key for all three scooters but abandoned the idea due to security concerns, opting instead for the distinct keys provided by manufacturers. They also discuss replacing the original control levers with sturdier switches and short-circuiting them to allow full speed when engaged, ensuring both hands remain free for safety. A significant portion of the work involved using a 3D printer to create custom solutions for mounting components like USB voltage displays and control boxes, as the scooter's frame did not have enough depth for standard parts. The presenter highlights that failing often leads to learning, citing numerous iterations of 3D printed parts where they had to adjust designs to fit curved surfaces and ensure proper alignment.
The technical modifications extend to adding custom lighting and improving usability through software and hardware integration. The presenter installed an Arduino board to control a variety of LED strips, including a yellow display from AliExpress and rubber-coated tape glued to the bottom of the scooter for visibility. They encountered challenges such as the original screen preventing power-up if removed and the incompatibility between different microcontrollers, which required them to program both devices to communicate effectively. Despite blowing out an Arduino case due to incorrect voltage handling, the presenter views these mistakes as valuable learning experiences. They also mention integrating a clock and temperature module, though some features are still being debugged, illustrating that coding is an iterative process where errors are expected and part of the journey.
In conclusion, the project demonstrates that complex modifications can be achieved with patience, creativity, and accessible tools like 3D printers and online components from AliExpress. The presenter stresses that while they avoided reclassifying the scooter as a car to prevent needing licenses and taxes, they felt free to tear apart and rebuild almost every other part of the device. By sharing their struggles with wiring connectors, debugging code, and managing limited energy levels, the speaker aims to inspire others to undertake similar projects. The ultimate takeaway is that anyone can hack a mobility scooter to add interesting features like custom lights and displays, proving that technical expertise does not require formal engineering training or extensive resources.
Read the full video transcript
So, yes, this is hacking a mobility
scooter. That is the mobility scooter.
Um, this one is phenomenally dusty
because I've been driving around EMF um
for since since I arrived. Um, who am I?
I am an amateur hacker. Uh, I'm not part
of Hackspace. Um, I did a degree in
computer science about 20 years ago. And
I decided after turning up to um remote
controlled chaos cart last time they
were doing a lot of work with motors and
um getting the thing moving. So, I own a
device that already moves. It does it
quite well.
um it doesn't like the hills around EMF,
but it does it quite well. I have well I
can take all the other features they've
got and work on this. So um yeah, I am
not qualified, not in the slightest. Um
anyone who gets to see my code will know
this, but it's a it's a project. It's
been a project for the last couple of
years. Um, on a side note, when I'm
showing up photos, there will be a fair
number of photos of the red scooter on
the left, which is not the one that's on
stage. Um, that's because that one
failed uh back in April. Uh, and I
replaced it with this one, which is now
uh here.
The original list of um plans um had a
few interesting twists to it. It turns
out a fair number of those things are
not as trivial as they seem and some of
them are more trivial than they seem. Um
so locks mobility scooters um all have a
key on them which turns them on and off.
And one of my initial thoughts was well
I own three scooters. Let's make them
all use the same key. The sen key turned
out to be a terrible idea. Not least
because you can buy them on Amazon for a
couple of pounds. This is not secure.
I'm fairly certain the um key that the
more distinct keys that come with
scooters are probably more secure. So,
good idea. No. No, it wasn't.
The next thing I looked at was fixed
fixed speed traveling.
Scooters are absolutely fine at going a
decent speed, providing you've got your
hand on the wigwag. The wigwag is, uh,
the standard control levers that go
around the middle of a scooter.
Um, it's a fantastic technical term. Um,
and actually with a very small amount of
wiring, they are just a variable
resistor on the inside. You can just
wire a switch. Uh, the original switch
is uh up there. That one took about
quarter of a mile before it broke
because that's uh that's where my foot
goes and it wasn't sturdy enough. Uh
replaced it with a much better quality
switch. Um and I've just shorted out the
wigwag. So when you press it down,
whatever speed the speed dial is set at,
you go full pelt, but it means you get
both your hands.
Um the um previous scooter had no useful
voltage display. In fact, most scooters
have no useful voltage display. They
have a little needle that goes from red
to orange to green that tells you
absolutely nothing. And as someone with
autism, I'd like to know what voltage
I'm actually getting because that tells
me how flat my scooter is. Um, so,
um, I stuck up a This is designed for a
a car
system that just has voltage and three
USB ports, um, on it and it's quite deep
and the
frame for this scooter isn't. So, I've
had to set it off. Um, which has its own
little set of problems.
I own a 3D printer. I am very grateful I
own a 3D printer because as is uh
evidenced on the middle here, this
little knob goes around with a notch on
it. It goes around and it hits
the um the USB supply. So, I 3D printed
a solution and then I 3D printed a
solution and then I 3D printed a
solution where it didn't hit and then I
did the same again.
Um,
a lot of the things I've designed and
done have been benefited by a 3D printer
cuz it allows me to design something,
change it, or fit it, find out it
doesn't work, change it, and do the same
over the course of a weekend. I didn't
quite touch um on the beginning side. I
have me so I have very very limited
energy levels which means that yeah I
don't have time to send things off get
them back send things off get them back
I just don't have the energy for it so
yeah a selection of things I've uh 3D
printed um a control box
um the frame for the USBs box it those
were the prototypes for that box uh this
is the prototype for the uh top of the
scooter I've got on stage, which turns
out to be a blindingly complex uh shape.
I taught myself how to use Fusion 360.
I'm not any good at it, but it's good
enough. And it has now printed out as an
actual item.
Horns. Anyone who's used a
Yeah, thank you. Thank you. Because the
the original electron horn on this one
does not work because the first thing I
did was unplug it because it makes a
horrible horrible tiny sound that makes
your that one.
Yep.
>> Yep. Yep. They are pathetic.
Um, the key phrase here is clown horn
because Amazon will sell you
something that goes honk for £850.
Uh, likewise, bottle holder um,
originally designed for a bicycle um,
with a couple of large straps for
attaching on a bicycle goes around the
middle. Um, I've owned about four,
[laughter] in fact, I think it probably
says I've purchased three times. um for
the number of those I've bought for
various scooters over the years.
Um but sometimes you don't have to go
particularly hacky to solve these
problems. Disconnecting the original
horn and adding one on the side. Um
likewise the little rubber clip is from
Amazon so that it just it just not that
well attached. Pulls off frequently
falls off in the car but recips.
Um
there you went. So work out where I am
in my talk. Um
I have in fact I might be able to
demonstrate this depending on the
lighting in here.
No, not visible. There is a set of LED
lights that are underneath this scooter.
Um, and I learned taught myself how to
um program an Arduino. Uh, this is the
uh original version. There is no wiring
uh in that uh box. The second photo is
after the spiders mess that was my
wiring. I'm no good at this and it's
fine. Um, yes, the Arduino is missing
out its holder on this uh picture. I
don't know quite what happened, but I
fitted it in um later. And this box just
has linear controls on the fact I think
the previous photo is probably better.
Not really. Linear controls on the
front. Red, green, blue, white, which is
intensity. And you just turn the turn
the knobs and it turns the lights up and
down.
In this process,
I discovered what happens when you put
24 volts through an Arduino.
Um, it blows a hole off its case. It
lets out magic smoke.
Um, and luckily Arduinos are cheap. But
I can't wire. Uh, this is evidenced. Um,
and it doesn't matter when doing
something like this. Blow things up,
make a mess, be happy, because I learned
way more from this mistake than I did
from the few things that work first
time.
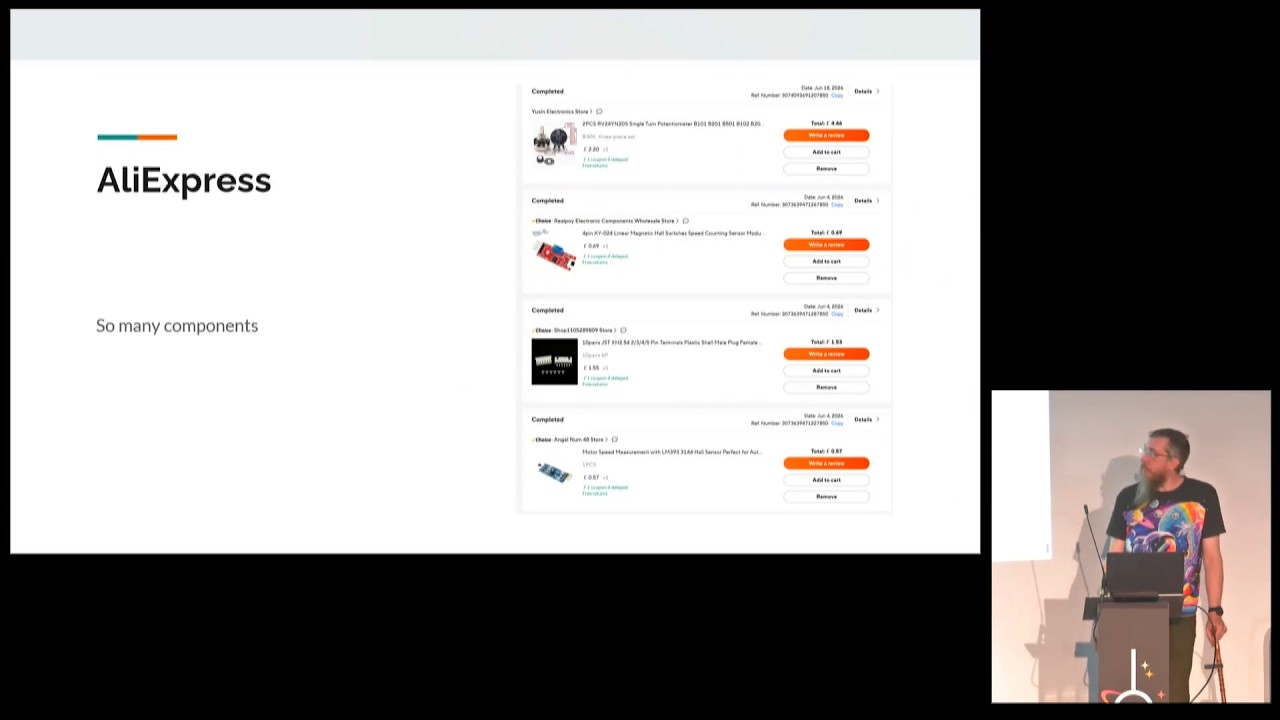
Um, likewise, AliExpress.
AliExpress is a great place for getting
everything. This is just a selection of
the um bits I've been buying from
AliExpress. Um anything that's designed
for a car will typically work at 12 to
24 vol. The majority of scooters are 24
volts. Um which means you can just plug
uh a lot of things straight in. Um and
with a buck regulator switching it down
to five volts um in the control panel or
in the bottom of the control. It is not
visible in that photo is it? Yeah.
Bottom of the control box. Just uh any
voltage in 5 volts out and then you can
buy Arduino accessories. Um
and add on whatever you like.
Um the story on what happened with the
two scooters.
Um I am not an engineer. I'm barely a
computer scientist at the best of times.
Um so when the motor on the original
scooter failed, I went to um eBay and I
bought a replacement. I fitted it in. I
discovered that the plus and minus
wiring on the new one were backwards
from the previous one. So first time I
pulled the throttle, it went backwards.
Always entertaining when you've then
wired it in. So red goes to black, black
goes to red, and you have to remind
yourself, no, this is fine.
The motor is wired backwards for a
reason.
Um, and that was Christmas roughly. Um,
and last April the motor went again.
Went just dead short circuit. Nothing's
powered. I can't get these motors a
second time. I tried. So, um, at this
point, what I actually achieved was a
new scooter.
Um, scooters are surprisingly
inexpensive.
Um, especially if you buy them
secondhand, especially if you have a
local friendly um, scooter place that
does tradeins, uh, which is where this
one's come from, um, in Norwich. Uh, if
anyone really wants to know what it is,
TJ Zest Plus. Um, and this was April.
Um, it turns out that a between April
and EMF is not enough time to get it all
fully working.
Um, and [sighs]
I have no idea what the second half of
that sentence was going to be. Um, so I
started modifying this one and lessons
were learned. The control panel from the
previous slide was down at my feet. It
wasn't that accessible. It wasn't that
easy to operate. And I had, well, why
not? Why not do something better second
time around? I've learned some lessons.
Apparently, not enough. Um,
and we come to this lovely device. This
is a photo stolen off the internet,
unlike everything else. Uh, because I'd
wired it in before I remember to
photograph it. Um, this is a cheap
yellow display. It was about 10 or 12
from AliExpress. It is cheap. It is
horrible. Um, and it has an ESP32 on the
back that doesn't talk nice with an
Arduino. It talks, but it doesn't talk
nice. Um, didn't have enough inputs and
outputs for the various sensors I
wanted. So, I currently have both of
them barely talking the same language.
Um, both sat in the control box.
But again, we can make failures. Um, in
fact, the next slide shows the inside of
the uh control box of that one.
Um, and
I 3D printed uh in increasing number of
layers the
um top piece that would end up on there
to make sure that it fitted. It's not a
straight. It's not parallel in any
direction. It's curved at both ends.
Um, and I learned way more about Fusion
from this than I had anything from the
previous scooter. But by failing, by
trying, um,
it can work. Um, the if I go through to
the, uh, halfway produced one on the
left there, um, a slightly taller one
because it turns out that there's not
enough volume in that. and a slightly
taller one again,
which I think Oh, no. That's me tearing
it apart. Let's move that back.
But I've torn this scooter apart
dozen times.
And every time I do, I learn something.
The key the excuse me,
the thing I learned most at the
beginning is it starts off as a
perfectly useful drivable device and I
should not touch that. I'm not an
engineer. I do not want this thing
reclassed by DVLA as a car
because as a class 2 scooter, it's fine.
The moment it becomes a car, I need to
get it I need to get it certified. I
need to get it licensed. I need
indicators, which this one doesn't have.
Uh other scooters do. Um and I need to
get a V5 for it and tax. No, no, no, no,
no, no, no, no. Uh let's leave that very
much in its original configuration. But
that doesn't mean I can't tear it apart.
It just means I shouldn't touch the
motor assembly. No, really. Um, so I
touched everything else.
Um, this one has a weird or wonderful
quirk. The original screen that came
with the uh, came with it that looks
like it's just displaying a four LEDs
for how much power it has or not. Um,
turns out if you remove that, the whole
thing won't power up. I have no idea
why, but hiding in the middle of the
control panel is the original screen
still plugged in, hacked into everything
else because if it's not in there, it
doesn't work. No idea why. Don't think I
care to know either because again, it's
not necessary.
How am I doing on time? Cool. Um,
you don't have to
be any good at this to do this work.
I strapped I got some cheap I have no
idea where I got this LED tape. I bought
it for another project 10 years ago. Got
some cheap LED tape uh rubber coated so
I'm less likely to damage it unlike the
screen which uh does come up in a
second. Um, and I've just hot glued it
to the bottom of the scooter. Um, as I
say, I was hoping this might work for uh
visibility. In fact, I might ask the
lighting team if they can try turning
the central light off and I'll see if I
can get the uh LED strip tape to be
visible.
>> Yep.
Changing colors slowly down there. It's
got a couple of preset patterns on it.
Thank you, text. Um,
and that runs up through the Arduino,
which is actually got the inputs and
outputs for it. Um, up to the screen,
which doesn't it has a single available
input and output pin. [sighs]
Um, and then
I've just I've programmed the touchcreen
for a variety of little controls. Um, if
I'm out after dark, which is not a
guarantee I have me, you will see this
wandering around with its light display
up
because it's a bit of fun and it's just
more interesting and more
unique as as a as something that looks
different. You don't see that many LEDs
on scooters. And I've just hacked it
together. the wiring that's connecting
it's two sets of uh strips which means
the RGB white or RGB power more
accurately on both sides turns out to be
exactly the same number of connectors as
is in a network cable. So this is cat
six. It's cat 6 cuz I didn't have any
cat 5 lying around uh network which runs
up through the through a bunch of
wiring. I've just cable tied to the
middle. Um runs up through here and all
into the unit at the top.
The where are we? Last couple of slides.
Um my workspace has been a little
challenging. I'm not part of a
hackspace. Um this is my hallway. Um
both my husband and my dog are terribly
upset that I keep blocking the front
door uh with it. Um, but I've learned um
way more about connectors when doing
this than I've ever liked because
getting the thin LED tape to connect
with thin wiring requires small
connectors and small connectors are an
absolute bugger to crimp. Um, and I've
got through hundreds of them. There is a
plastic tray of them visible on my desk.
Yes, there. because I got through a lot
and again I failed and I tried again and
I succeeded. Um,
and that's what this project is about.
It's about proving that someone who
works retail can take a device and can
edit it and we can get something more
interesting.
Um, [sighs]
I've got more than a few pages of
Arduino code, half of which works, most
of which currently doesn't. Uh, I have
aspirations. There is in there a time
module, a temperature module. I'm rather
grateful the temperature module isn't
working, otherwise I had to find out how
hot it's been this weekend.
Um, there is a clock. Um, my challenge,
my challenge just before I left was I
could either get the clock transmitting
to the screen or the screen transmitting
to the LED tape. So, currently the time
says it's midnight and it's been saying
midnight for the last 10 hours despite
how hot it's been. Um, [sighs]
and there will be more coding. I've
discovered I do not know the correct way
to code in Arduino.
And that's fine. Um, and that's I I know
I've said this once already, that is the
takeaway is it's fine. You can do these
things. I, as someone with little to no
training, can do this. Um, and so can
everyone else.
My next steps are to finish
the last bits of wiring. Um, it's not
actually all quite plugged in, but it
works. The scooter I've been driving
Grand EMF all weekend. Um, so the
scooter still works. And I will get the
time working. I will get the temperature
working because that's just code. And
with enough time and enough effort, if I
can do this, absolutely anyone can.
Thank you.
[applause]