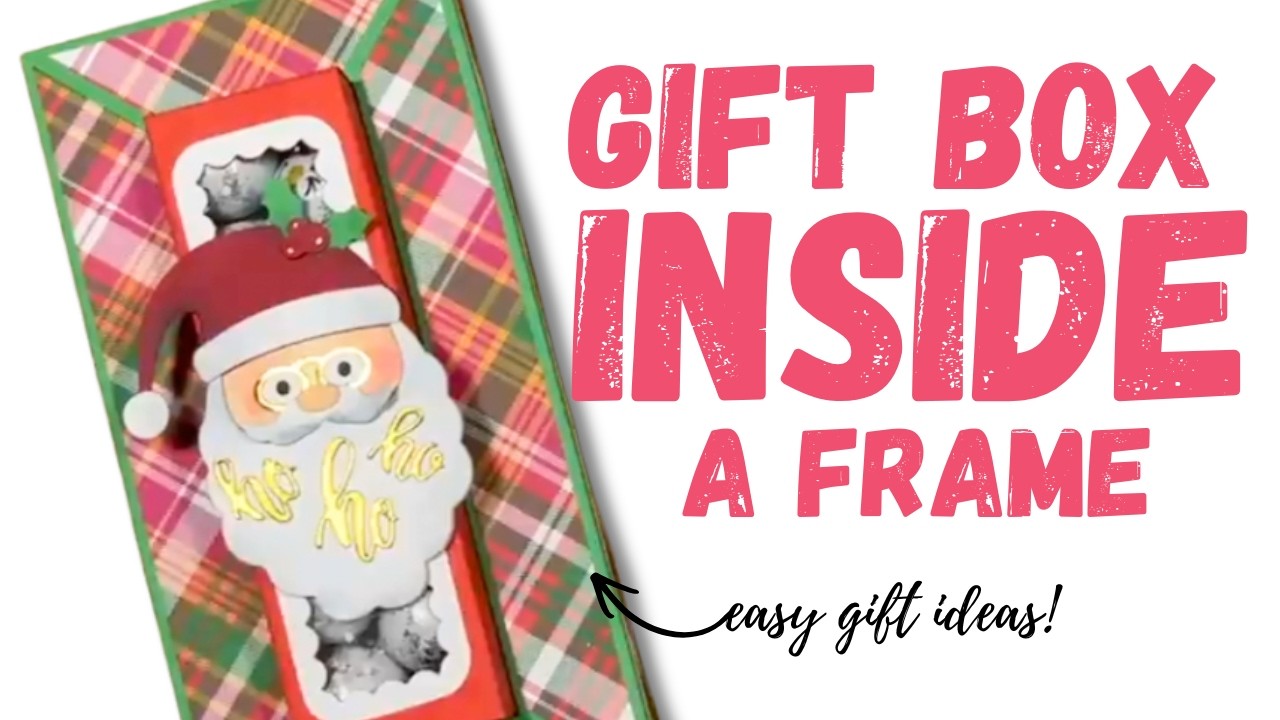
Video summary
This video provides a comprehensive tutorial on creating charming DIY stocking stuffer boxes using simple cardstock and pattern paper. The creator begins by detailing the precise measurements required for cutting multiple pieces, including two larger sections measuring 6¼ by 9¼ inches and smaller strips of 4½ by 6¼ inches. Viewers are guided through scoring these pieces at specific intervals along their lengths to create fold lines that will form the structure of the box. The process involves rotating the cardstock after initial scoring to add additional score marks, ensuring that all edges can be folded neatly once burnished with a bone folder or similar tool. This meticulous preparation is essential for achieving clean folds and a sturdy final product capable of holding small gifts like chocolates.
Once the pieces are scored and prepared, the assembly phase begins by joining panels together using adhesive to form pockets and walls. The creator demonstrates how to cut away specific slivers from certain edges to prevent bulk that could cause buckling when folding flat sections inside one another. A key step involves constructing a chimney-like feature on some boxes to accommodate items like chocolate bars while maintaining the box's structural integrity. Throughout this process, the video emphasizes trimming excess material if resistance is felt during assembly and ensuring that joins are secure before moving forward. The creator also shows how to apply decorative pattern paper strips to the exterior sides of these initial structures, offering tips on angling cuts for a seamless fit or simply sliding them under existing joints for a quick finish.
The tutorial then shifts focus to building the main gift box itself and adding an aperture window using acetate sheets to display festive elements like snowballs behind it. The creator explains how to cut tabs from specific sections of cardstock, wedge off edges to reduce bulk, and lock these pieces together so they stay closed securely without popping open easily. Optional steps include creating a frame around the viewing hole or adding layers of pattern paper inside for extra decoration. Using strong construction glue is recommended for 3D projects like this one to ensure durability, while small circle punches can be used to create easy-to-open apertures in the lid. The video concludes with filling the completed boxes with chocolates and decorating them further with textured materials like Craft Tex or Snow Tex to add dimension and a fluffy appearance to details such as Santa hats and berries.
Read the full video transcript
So, you want two pieces of 6 and 1/4 by
9 and 1/4. Along the 6 and 1/4 side,
you're going to score at 1 and 1/4, 2
and 1/2, 3 and 3/4, and 5.
Do that twice. And then, you want two
pieces of 4 and 1/2 by 6 and 1/4.
And along the 6 and 1/4 side, again,
you're going to score the same. So, 1
and 1/4, 2 and 1/2,
3 and 3/4, and 5.
Then, rotate it back onto the short
side. You'll do this on both pieces.
You're going to score at 1 and 1/4 and 3
and 1/4 down to the second score line.
So, again, 1 and 1/4 down to the second
score line, and 3 and 1/4 down to the
second score line.
So, this is cut from a piece of A4, so
it's 8 and 1/4 by 11 and 1/2. And you
want to score along that 8 and 1/4 side,
you're going to score at 2,
4, 6, and 8.
And then, rotate it so that 1/4 inch tab
is at the bottom, and you're going to
score at 2,
8 and 3/4, and 10 and 3/4.
Okay?
Fold and burnish all of the score lines,
and then we're going to start putting
this part together. I'd already done
half, and I've put some pattern paper on
that one as well. What's going to happen
is Oh, no, it's going to be that way.
It's going to slot in like so. So, we
need to do this side. So,
how I show you to do this one, you'll do
the same. So, you've got two, and again,
with this one here. I'll do this one
first. So, you're going to cut down
those two score lines where you scored
down to the second score line. I'm
removing the score line, so I'm cutting
to the left-hand side of this one, and
then I'm cutting more to the right-hand
side of the score line
on this one. Just so you've got two nice
clean edges there.
And then, you're going to cut from the
third score line at the end, you're
going to kind of cut up so you join the
bottom.
So, like So, you've got that slope.
You've got like a little chimney.
Like there's the rooftop, and then the
chimney.
You can come down if you want and then
cut across. You might want to draw a
line if you're worried you won't get
that cut straight.
And just draw a line if you need to.
And then what I would suggest you do is
just take a little sliver off of this
end here because that is going to stick
and fold inside. You want that to be
nice and
You don't want it to buckle the card cuz
it needs to be able to fold flat. That
way you know you're getting it all
straight.
Okay, so do that twice and then on this
one just fold and burnish. And then
again on one of the sides
just cut a sliver
away.
In fact, we can stick this one down
straight away. So add your glue all the
way down.
Fold it over so you've got one panel and
then the one with the glue on facing you
and then fold that one over.
And it should all fold perfectly flat.
If it's feeling like it's resisting a
bit, it's because you've got a bit of
bulk under there and you just want to
cut a little bit more off. And then fold
it back the other way.
So now we've got I always like the join
at the bottom facing inside.
And then that one's going to go in
there.
And now with this one
add your glue and again fold it over so
you've got a plain and then the one with
the glue and then fold that one over.
Again, if it's buckling a little bit,
just take a little bit more off.
And then this one will slot in at the
bottom.
Like so. We're going to have a base
added in a bit. But you can see now
we've got this pocket
to be able to add that box in which is
going to be filled with these lovely
chocolates.
So to decorate these, I've cut myself
four strips of for these pieces.
Four strips of one by
nine.
With the join at the bottom facing in,
I've stuck one on that side. So I'm
going to stick this one on this side
here.
The ones on the top I I to cut a little
angle
so it follows the shape
of the shadow box.
It is optional. You don't have to if you
don't want to. I'll show you in a
minute. You can just kind of slide it
under the joining part. So, this one's
going on at the side cuz you'll see all
of that pattern.
This paper is from an old I know some of
you might ask, but it's from this one
here. It's an old It's It's one of my
favorite pads that Helen did. Holly
Jolly Christmas paper pack. I think it
was a couple of years ago now. I've used
this one here, but it's some useful I've
used nearly all of them on previous
Christmas
projects. Really, really pretty. So, now
these ones are going to go on here. And
like I said, I want to cut an angle.
But if you don't want to, you can just
put them on as normal and then just
stick it under like so.
And then
you can do an angle just on that one,
but I think you're not going to have
like the green border. It It might just
look a little bit odd.
So, if you just pop it in there,
lay this one on top, make sure you've
got a nice border at the bottom and on
the sides.
And then just
lay it down like so.
I'll give you the measurements as well,
but this is just me. This is how I kind
of work it out.
You only have to do it on one cuz we can
use this as a template. So, just come
down on the left side just over 1 in and
then you're just going to cut
from the corner down to that
marker.
So, now when I set that back down,
I've got a nice
mat there with that same little border.
Then for the next size, all you got to
do is put them pattern to pattern so you
get your angles in the right direction.
Okay?
And then again, snip across.
So, now I've got that one
and that one.
And then
if you just don't fold it, but just loop
it so it joins the top,
and then just cut across.
Let's just make it easy for ourselves
rather than doing the measurements on
all of them. So, once I add that base
one in, it's going to follow that angle.
And then again,
and then for the short ones, I'm going
to do the same. So, I'm just going to
fold that that way actually, so I can do
the pen mark on the
Now, these I might end up bringing down
a bit shorter. Yeah, I think I'm going
to trim this. I'll give you the new
measurement actually, I've just thought.
So, I'm actually going to trim this
down. So, I don't think I've given the
measurements for these ones. These
you're going to want four pieces of 1 by
4.
And then you're going to come in 1 in.
Maybe just Yeah, it's it's probably 1 in
should be fine on all of them.
And then
again, you're going to cut
from that marker to the point. And now
I've got
perfect one for there. These ones are
going to be Actually, no, it'll be two
pieces of 4 by 1, and then two pieces of
4 and 1/4 by 1, cuz they're going to go
on the tops there. So, they're a little
bit bigger.
So, with my other one for the bottom,
again, just put them pattern to pattern,
and just follow the
shape again.
So, just lay it together, just so you
can get
an idea.
In fact, what I think I'll do is stick
it to the base, and then stick the
pattern paper on, cuz that way you can
definitely make sure you're getting your
borders all nicely lined up. You can see
how it's going to look. And once that
red's added in the middle, it's going to
pull out the red in the uh the paper
there. So, you want to cut yourself a
piece of cardstock. Now, you can do the
cardstock bigger if you wanted to, so
you have like a frame. I'm going to just
keep it
um flush with this shape, but if you
want to go bigger, then you can. This is
4 and 1/2 by
9 and 1/4. So, you want to cut yourself
one, maybe two pieces, if you want it to
be really strong. One is going to be
fine for me to, you know, add the
chocolates, and I can put a little maybe
might add a matte layer of the same
pattern paper inside so that when they
take the box out, they've got some
pattern there. You could also decorate
the inside of this bit as well if you
wanted to. But yeah, just um cut that
piece and I'll show you how to stick it
together.
So, just add some glue
on the bottom there and then just just a
little bit on that angled bit.
Just to kind of tack it in place. And
again, on that one. And if you do
this one as well, this glue doesn't dry
straight away. You've got a little bit
of
wiggle time. So, you're going to slide
that one in there.
That one in there.
And then
the bottom. If you get them all in and
then you can spend some time you kind of
want to push against all four corners,
like so. And try and kind of just put a
bit of pressure on the tops
of the joins there as well.
So, just kind of hold that for a minute
until you're happy it's all
secure. And then flip it over, add glue
all on the back and stick it onto that
piece.
So, you should now have something like
this. I mean, you could do other things
with this. You could make it into maybe
a little storage. You could put your
glues and your little, you know, tools
and stuff and have it on your desk. I
think it looks quite nice.
But we're going to now add the box. So,
with this one here, you should have
already folded and burnished all of the
score lines.
You've got your 1/4 in tab here on the
right-hand side. You just want to cut
away
that little corner.
And then come up to this side and cut
away the top little rectangle.
And then the one below.
So, you just want to be left with
one tab
that's the width of the largest section
there or the height.
And just
kind of wedge off the edges there. Okay.
Then come back round again. So you again
you've got that 1/4 inch tab on the
right. And you're going to cut up all of
these to the first score line.
Okay. And then flip it all the way
around. And you're going to do the same
on this side, but you're going to cut
past the first score line and down to
the second.
Now, if you bring it all around, turn
till you've joined it together. I want
that join so it's in the bottom left
corner.
So I'm going to have my box is going to
close away so that if for some reason
maybe that doesn't close quite well or
it pops open a little bit, the box is
going to keep that closed. So this is
actually going to be my front kind of
opening.
These are going to be the sides. So I'm
going to remove I'm going to do this
like so. But I'll cut them in half. And
then I'm going to open it up and then
you'll have a visual of what I've cut
away. So I'm going to cut away the two
sides and then I'm completely cutting
away
Where is that now? This back one.
So.
Now if I open that up,
should have something like that. So
there's your 1/4 inch tab. I've removed
all of that part. Cut these ones so
they're in half and then I've just left
that one.
Okay.
What you can now do is go back to the
short ones.
I'll break it down like this I think
it's a bit easier to understand. Just
take a little wedge off of
each side.
And then again on this one.
Like so.
But now leave that one because you want
that to kind of lock. You want it to be
quite snug. So just leave it for the
minute. You can always take a little bit
off later if we need to. So again with
that coming around, so that's going to
fold in and that will go down like so.
So this is going to be on the top. So I
want that one to kind of hide
underneath. To hide I want that one to
hide all of these. So again if I open it
up, so just fold up the second one in
from the bottom, and then all of the
other ones, again, just take a little
wedge off the bottom. It's just going to
remove the bulk, and you won't get any
bits kind of hanging out the bottom.
Now, next I want to cut the aperture.
So, this is optional, and you might be
doing it by hand.
I'm going to cut the frame first cuz
I've stuck that down, but this die, or
the aperture size I'm going to use is
I don't know if you go from the points,
about 1 and 1/4 by
just over 5 and 1/2. I'm going to cut
that into this one here, and then I've
cut this piece of white card so I can
create a frame. It's just under, it's
about 1 and 5/8 by 6.
And then I'm going to cut the die into
that again, and then I can frame it. You
might want to, like I said, keep this
all as a solid box. You can add mats and
layers, pattern paper onto this, so I
would cut yourself four pieces of 1 and
3/4 by uh 6 and 1/2.
And then you can cover all the sides
there.
If you want to cover the tops, I think
these are 2 by 2, so I do a piece of 1
and 3/4 squared.
But I'm going to get my aperture cut
into there. I'm going to back it with
some of this snowfall acetate, and then
you'll be able to see the the snowballs
there behind. Then we can start putting
it together, so just run some glue
all down your
tab.
Again, fold it over so you've got one
facing you, and then fold the other one
over, and then just go back the other
way. Just make sure that's all nicely
burnished.
Looks like
And then bottom. So, I'm going to fold
the that one in first.
And I'm just going to use the
construction glue. I tend to use the
quick grab for like little areas and
details, and then construction glue I
always use. This is Collall. You can use
Beacon 3 in 1 as well. But it's really
good for structures, like, you know, 3D
projects. It just makes them very, very
strong.
You see there, I they're stuck each one
down with a layer of glue in between and
then that last one
just make sure you've got it all lined
up, but you'll see it just covers
all of those
other layers. And if you just take a
ruler, you can go inside and just spread
all that out. And fold that in and then
this is where I said about don't cut off
the edges yet. Just give it a test if
it's going to be too
too hard, which I knew mine would be.
You usually have to take a little bit
off, but you just want to take a sliver.
Just a little sliver. It's usually the
score line that you need to remove.
And then again, but you want it to
really lock in like that does. See,
that's not going anywhere. And then just
so it's easy for the recipient to open.
If you've got a little circle punch,
these are really handy. You can pick
them up very inexpensive. This is a half
inch one.
You could use a little die as well and
cut it with if you're going to cut the
aperture, but just cut
in the middle there.
A little semicircle and that way it's
going to be really easy then for someone
to open. So, now you can pop this one
inside and it should snugly fit. That's
the whole point. It's got to be snug.
You want to hear like the air being
pushed out of it.
Oh, I think that looks lovely. Very,
very pleased with this. So, I'm going to
put the chocolates in
and then I can decorate my Santa. I'm
thinking, well,
yeah, they should all fit, all four of
these. What I would say as well, when
you go to pop that in, if you are
worried yours isn't going to fit, maybe
make this first and then when you go to
stick the sides down, stick them all
down around this box and then you'll
know it's definitely going to fit cuz
I'd hate for you to get this far and
then it not work.
Oh, no, I think we're only going to get
the three in. Maybe I'll have to eat
these ones myself.
Let's fill it to the top and get two
more.
Two more, maybe? Yeah.
I think that's it. That is a nice
amount.
A nice amount of chocolate. I want to
try and get their faces turn their faces
around a bit more.
There we go. It's nice and heavy.
Yeah, I think I can get one more in
actually. I'll do that again in a
moment. That's all right, two left for
me with a nice cup of coffee. Although
they're popping one so we'll see
[laughter] what those ones are like.
Okay, so that is everything ready. Like
I said, you might want to keep it like
this. You can have a nice big sentiment
across the middle. Ho ho ho.
Yeah, everyone's going to be decorating
it differently. It's not just going to
be Christmas. And here is the finished
gift box. I'll bring it up close here.
Can you see all of that lovely detail?
I've used this fantastic product called
Craft Tex. No, Snow Tex. I've got it
here.
And this gives you really good, very
hard dimension. You can add color to it
if you want, but it looks perfect on his
trim there on the hat to make it look
fluffy. I've added some glaze on the
berries, on his eyes, and I added one
more tree inside as well. So that is
nice and full now. It stands up.
Like so, if you wanted it to. I think
that's a really nice little gift for
your neighbor, for a child, teacher's
gift. It's just one of those I think
quite unusual. And you can fill it with
whatever you want.