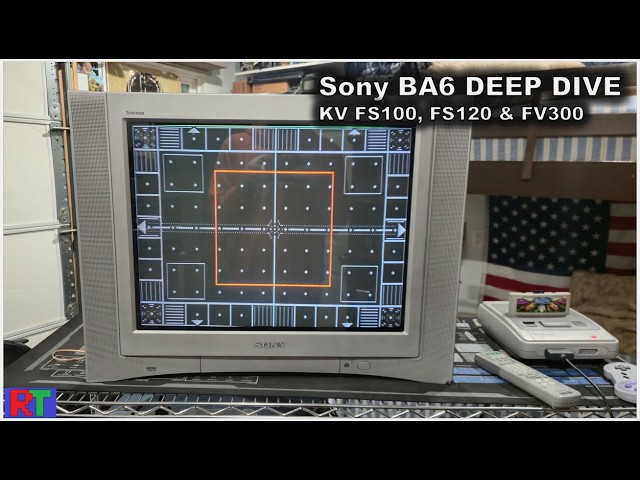
Video summary
This video provides an in-depth examination of three Sony CRT televisions from the early 2000s that feature flat Trinitron tubes and the BA6 chassis: the KV-20FS100, the KV-20FS120, and the KV-24FV300. The host begins by introducing the FS100, noting its boxy design and American-manufactured tube, before detailing the internal components such as the two-board setup involving a CV board and primary board. A significant portion of the restoration process involves cleaning the interior, replacing aging capacitors, and addressing specific image quality issues inherent to this chassis. One major characteristic discussed is the "red push," where the red color drive is significantly higher than green or blue, which the host corrects using the service menu's cut-off settings to achieve better color balance.
The video then explores the common limitations shared by all BA6 chassis models, most notably a persistent screen flickering caused by noise leaking from the single-chip RGB encoder. The host explains that this flicker, primarily affecting the red and blue electron guns, is an unfixable hardware limitation of the chassis design rather than a result of poor maintenance or missing capacitors. Additionally, the video addresses the issue of deflection yoke wedges falling off over time due to failing adhesive tape. To solve this, the host demonstrates how to replace the old tape with durable 3M mounting squares and secures them further using caulk and tamper-evident markers to prevent future movement that could distort the image geometry.
Finally, the presentation highlights the unique features of the KV-24FV300, which is identified as the host's favorite model due to its superior sound system with SRS technology, additional S-video input, and a specialized set of rings designed to correct screen bowing or curvature at the top and bottom of the display. The host also demonstrates how to eliminate rotational noise by adjusting specific settings in the service menu and disconnecting the rotational ring hardware entirely if necessary. While acknowledging that all three models suffer from composite video limitations when connected to older consoles like the Sega Genesis, the FV300 is praised for its extra geometric correction tools and better audio capabilities, making it the most versatile option among the trio despite the unavoidable quirks of the BA6 chassis.
Read the full video transcript
Hey, welcome to Retro Tech. My name is
Steve. Today we're going to be looking
at three different Sony KV televisions,
all from the early 2000s. And these set
of TVs are each going to have a flat
Trinitron television set or tube in
them. And also, each set has the BA6
chassis. Now, I don't want to get too
into the details right here at the
beginning of the video. I wanted to just
tell you that this video is going to be
broken up into sections. So, I'm going
to have chapters marked out below for
each one of the TVs we're talking about
here. If you want to just check out a
single TV, do that. But there will be
sections for each one of those. And I'm
also going to have to go into and do a
yoke adjustment and receding in one of
these videos. So, I will specifically
put that chapter in there in case you
come to this video years down the road
and want to know about yoke receding on
the Trinitron. I'll refer to that
section. So, that's how it's going to
be. You can either watch the specific
section you want or check out the whole
video in full. Thanks again for watching
everybody. Today, we're going to get
started with the Sony KV 20 FS100.
And this is the first in the model lines
of these flat screen TVs that came out
in North America in the early 2000s. So,
now let's take a closer look at the Sony
FS 100. First thing I want you to notice
is that it does have a boxier design
and definitely has that flat trinitron
tube right there. All flat glass, 4x3
and 20 in in size.
And down here we've got our classic Sony
logo and button array for power
channel volume and then video inputs
switching. And then over here we do have
a push down or pull down
tab and we can access our regular menu,
some arrows to make adjustments and
enter button. Then we have a video input
too.
Right. Here's a look from the back side
and the top. And then you scroll down
and we've got our Sony logo right here
embosed in the plastic. Our label. Um,
this is again BA6 chassis May 2002.
And
it's about 120 watt max usage. If we
look down here for inputs,
we have
RF,
another composite video input, and then
our best input here is component video.
And that's it.
We're going to start from well, the CRT.
How about that? And
here's our tube number. It focused
there. A51 LPT50
X-ray
made in the USA.
And for our stereo speakers, we have
some 8 ohm 8 watt shielded Sony in-house
speakers.
Okay, here's our deflection yolk. And we
have some potentiometers for convergence
alignment. And then there's actually a
ring around that for rotational
adjustments.
We'll get into more into that later on.
There's some convergence rings for
adjusting that. And then we do have
velocity modulation on this set. So
there's some of that hardware attached
to the CV board here.
And uh
this is a two board two primary board
setup. It's got this CV board for the
back of the CRT. And then down here is
our primary board. And the primary board
is going to have things like our
deflection
uh capacitors, our power supply
capacitors, and then here's the flyback
transformer.
And um the inputs are down there too.
So, um,
got a nice degazing coil on the back of
this TV. And when you turn it on, you
should hear that activate right at the
beginning to help try to balance the
tube colors. And there's not a whole lot
more to talk about in here. It's a
pretty simple design for Sony TVs.
Now that you've seen inside the TV, what
I like to do in my restoration process
is actually take the circuit boards out,
clean inside, and then inspect parts. I
have a capacitor kit that I work through
on this particular chassis and
television. So, I'll do that. I'll test
some other components and I'll do some
other maintenance to the boards. And
after that, I like to put them all back
together, put the TV back together, run
some tests, and then pull up the 240p
test suite on multiple consoles and see
uh kind of the quality of the image, and
maybe see if there's anything that we
can do to tweak that image to make it
look a little bit better.
Well, I've got the
TV restored and I'm just going through
some adjustments and testing and you can
tell on here that our
red drive is just way maxed out, way
higher than our green or their blue.
Some people call this like a red push,
but this isn't specifically like a
setting where the red is being overdone
except for on this drive where our red
drive is set at 55 and the other drives
are around 40. So, I'm not really sure
why it's set up like that. I'm gonna
reduce it and I want to see let's I'll
come back in a second after I reduce it
in the sub menus and uh hopefully we can
get this to balance out more with these.
So to make this type of adjustment you
have to be inside the service menu and
then you use one and four to cycle
through the settings in here and it's
the cut settings. So it's the cut off
settings that you can change. If you go
to the drive settings, you don't
actually make it doesn't do anything on
the screen, but the cut offs will. So,
you could probably see the blue is a
little bit high. Makes sense. It's a
little higher than the others. So, I'm
going to try to take it down a little
bit more, but you just use three and six
on here and then one and four to shuffle
through. Three and six lets you go up or
down on the individual setting. And then
you got to press once you get it set,
you can press mute and enter and it'll
say right like that and uh it'll save
your settings when you turn off the TV.
But that's much better. See that red is
not pushed all the way out here while
the others are at a different point at
it. So that's just a real quick uh way
to adjust color on these old TVs.
All right, we have the BA6 chassis here.
which has the well-known and documented
flickering issue.
So, we're going to look at this real
quickly on
Air Zonk here.
I'm going to zoom in on the trademark.
Let's get to a good spot.
Depending on what your background is,
you'll see the flutter better, you won't
see the flutter better. Um, you could
really see it
the it's the it's the red gun that
primarily does it. and the blue gun. The
green gun is really stable, but most of
the fluttering comes from the red
gun. And that's again just part of the
processing of this television. All
right. So, unfortunately, that screen
flickering that you just saw on that
little trademark is just a part of this
BA6 chassis.
And the way that the uh RGB encoding is
done, it's like on a single chip. And
that's the thing that prevents it also
from being RGB modded. But that single
chip design allows for a lot of noise to
leak over. And so a lot of times you end
up with like that flickering image. And
there's really nothing that can be done
to fix this. It's on all the BA6
chassis. You just have to deal with it.
So don't think that recapping the whole
set or doing some magical adjustment
will fix it. It's going to do that
little flicker. Just have to live with
it. So, there are a couple more tricks
that we can talk about besides just the
red push and unfortunately that screen
jittering problem. Uh, there's the
rotational hardware around the yolk as
well as velocity modulation on this set
that do impact your screen quality. So
before we get into how to correct this
or maybe use these tools to uh get a
better screen image quality, let's look
at the other TVs in our list. Starting
with the 20 FS120.
All right, so the biggest difference uh
at first glance here of this FS120
is the actual design of the TV.
Sony really shifted here to this curved
back and really thin bezel line as
opposed to the FS100 which had that
really boxy square cube kind of look
still that's been totally abandoned
here. And we've got again more of a
futuristic curved style along the back
edge. And then the bezels very straight,
very flat, but there are some curves uh
and features in here that again are
unique to the time period for Sony. So
that's a big difference is the look of
it. One of the things I like about this
model
from these years is sometimes you'll
find these little tags here and they
tell you
the model, serial number, the place it
was made, the chassis, and the year and
month it was made.
So, this is 2004. There are differences
with these speakers. They have a little
bit more shielding. They're 10 watts and
10 ohm speakers. The deflection yolk
looks pretty much the same. We have
potentiometers to adjust convergence,
convergence rings. We have the
rotational hardware
and then we have velocity modulation
hardware and the CV or socket board
looks the same. Now, the tube, the tube
also has the same tube number here, but
it says it's made in Singapore,
and the FS100 was made in the USA, but
the numbers are the same. Uh, we do have
the exact same input,
uh, configuration, composite, and
component video, and then everything
else in here looks almost exact. I mean,
it is a little different
as far as the build out from first look,
but it looks to be about 95% the same.
So, this is the BA6
chassis, and it's the unmodable
chassis,
so you can't update it at this time. And
I'm just doing a general inspection. And
one thing I did find was these two
wedges
are meant to suspend or hold the
yolk at the appropriate angle. Two of
them fell off. That's pretty common in
these old TVs. You can tell those
those that two-way tape right there just
isn't that great.
So, that's one thing we'll want to
address in the back of the tube.
We're going to prep these to reinstall
them on the back side of the CRT. And
this is that old tape. It doesn't stick
to anything anymore. So, I found these
at the
store
and they are double-sided mounting
squares by 3M.
cost was about $4, but they were
designed to be used on glass. No tools
needed and
uh they are meant to hold up uh a little
bit more weight than a normal one. They
were also a little bit thicker if you
see there. So, what I've done is I've
actually cut one of the squares in half,
which came out to a perfect size to fit
on the back of the wedge here. So, the
first thing I did was remove the old
tape by just peeling it off and then
cleaning the surface of that a little
bit. And then I added one side of the
tape. Removed the two-sided tape.
And
now we can install this over on the
tube. And one of these is going to go in
right here.
Uh, and then another one will go in over
on this side in the same spot kind of.
And then when I have those two set, I'll
probably redo this one because I'm sure
it's not good anymore. And then I'm
going to go over them with a little bit
of um a caulk material.
Now, before we get in here and install
these, I want to just make sure this
surface is nice and clean right in here.
And I can just take a little paper towel
wipe in there. And I did put a little
isopropyl alcohol, just a tiny bit on
the end of this paper towel. And you see
you get a bunch of stuff here that just
get out of the way so your adhesive will
stick good. Now, don't rub this darker
area that's actually painted on there.
That's your aqua dag, which is a vital
part of your CRT tubes. just stay in
this section inside the aqued where you
just have glass going on right there.
Now, before we actually install these,
let's take a quick check of the geometry
and make sure that our yolk is sitting
in the right spot. All right, I've fired
up the monoscope pattern coming out of a
Turbo Graphics and it's going through
component video here. I'm just checking
kind of the screen to make sure
we have good lineup.
Like especially up here
where these things kind of line up next
to each other in the corners. It's a
little tilted. So I'll try to maybe turn
it just like a hair this way. Um and
then
it doesn't look like it's too bad for
anything else. So it doesn't really look
like I mean that kind of off that's so
minor that that could have always been
like that from the factory. So there's
not um really evidence here that the
yolk has slipped.
Um and that's a good sign. So we may
just need to get those wedges in there
again to protect it from moving in the
future. All right, I'm just going to
remove
this
There we go.
Let's try to
set this in here
about like that.
Push it a little bit back here.
That actually looks really good.
So now we have both the bottoms.
Reinstalled and secured.
And
I'm going to remove this one now because
I bet you, watch this. I bet you it just
comes right out. No, actually it's
still,
you know what? It still
has some tackiness to its tape.
So, we'll just leave it
and we will
put some
adhesive caulk over top of it.
All right, our screen looks pretty good
for geometry
and
at least as far as
the cornering is concerned. We'll make
some more adjustments to things like
horizontal centerness, but that's all
done after I close the machine up. And
again, there's our wedges. And I went
and changed this one out, too, just to
make sure that all of them would be in
good shape. And then let's do one final
thing here to make sure that they don't
move again. I'm going to add some of
this stuff. It's called VizTorque.
It's tamper detection marker. Comes in
different colors. Um, it doesn't have a
whole lot of like structural hold to it,
which we don't need a ton cuz we're
going to be using it as a secondary
adhesive, but it's the lighter style of
stuff that you kind of see, similar to
what's here on the rings
and the yolk assembly.
similar to that uh in a consistency. So,
if you do need to remove it, you can
actually get rid of it. But I'm just
going to squeeze some of this over each
one of them and we'll finish her up.
After a little time, this will cure out
and harden and it will help just hold
that and prevent it from falling off.
Now, if you want a more permanent
adhesive, you could always use RTV
silicone over top of the wedges and put
a little bit on the tube as well as the
deflection yolk and that will stabilize
that wedge and hold it and then you'll
have a much more permanent bond with
that. Uh, but it will take longer to
cure. If your yolk has moved around and
you see some kind of really oblong
shapes on the screen, you should uh
again look at the yolk and see if it
looks tilted at all. If it is tilted,
please, please, please follow this guide
on the CRT database on how to receat
your yoke. I'm not going to just move
this client's yolk all around just to
show you what bad yolk looks like. You
can get more information at the CRT
database.
So, this TV did get the full treatment
on restoration. So, all the boards are
rebuilt with the same capacitor kit as
the prior TV we studied. So, no
difference there. The chassis is the
same. Honestly, I can't tell much
difference at all in the performance
between these two TVs. I guess the one
side is you get the made in the USA tube
with the FS100, but with the FS120, you
get a little tiny bit better speakers.
Uh, but all in all, they're practically
the same TV. It's just which one of the
two form factors do you like more of the
two? And unfortunately, both of these
TVs suffer from this uh jittery effect
that I explained a little bit before
earlier on the FS100. The 120 does the
same thing. And in fact, any TV that
uses this BA6 chassis from Sony
will do this same little effect.
All right, we're about to look at our
final TV in this video, but I did want
to mention something. All these TVs
again have the BA6 chassis, so they all
have a couple of the same features built
into them. One of those features is
velocity modulation or VM. Now, this is
a screen effect that Sony use as a tool
to try to enhance like darkness around
edges of images and things. Um, it's
supposed to enhance the image of TV
shows and movies and stuff like that,
but it can really hurt uh pixel art and
things that are like uh platforming
games or anything that's in kind of that
240p range of video signal. So, if you
want to turn velocity modulation off,
please look at the page for your TV on
the uh CRT database, whichever of these
three TVs you have, cuz each has its own
way to turn velocity modulation off. And
there's another thing, too. uh these TVs
since they use that BA6 chassis and they
have that same like video encoder,
whatever you want to say for the RGB
processing and it's all done in that
single chip. Well, that also makes for
poor reproduction of composite video um
with things like the Genesis. There's a
lot of this digital comb filter that
doesn't really work right with these
older consoles. So, it looks really bad.
Again, there's more ways to tackle this
with modifications to the TV set or like
I say, always just avoid using composits
straight out of the Genesis unless you
have to or you want to make it look like
hideous mess. There's one more thing
that all these uh TVs have in common,
and that's called rotational setting,
but we'll get into that in a minute
where I can show you more on that with
the FV300. So, right now, let's take a
look at the Sony KV 24 FV300 this time.
So, this is the Sony KV FV300
model line. It's a 24 incher, so it's a
little bit larger. It definitely has
more of a front-end style similar to the
FS120.
And if we go down here, we'll notice a
new little acronym here called WOW by
SRS. And that is talking about the sound
system. This CRT TV has a much better
sound system. It has two speakers that
are better and they have a uh design on
them to help the sound carry better out
of the TV and it's much more hardware.
So, it's a better sound system inside.
Now, if we look down here at our front
under our Sony logo, we've also got this
push down tray. The same setup of
buttons as the others, uh, pretty much
identical to all that under there. And
then the video 2 input right there,
stereo, headphones, and then if we slide
over here and start looking at the side,
uh, this is kind of a mix, I say, of
both of them. You don't have the extreme
point where it comes all the way here on
the bezel of the FS20,
but you have kind of a middle of both.
And I really like the way the back of
this looks better than the FS120. And it
might look better than the um 100.
That's up to you to decide. If you look
back here, this was made around the same
time as all the others, October of 2002.
This one does use a little bit more
electricity, 180 watt max. see that
marker for the same BA6 chassis. And
then if we go down here, we have
actually a better setup for our input
board. We've got RF. Now we've added
Svideo to our composite video input here
on the back, which is a nice upgrade.
Still have component video support and
left and right audio out now for if you
want to hook something uh and have
additional stereo audio out of the TV.
Now, the FV300 did add something really
cool inside on the neck of the CRT, and
that is a second set of rings that look
a lot like the convergence rings, but
they are not the convergence rings. It
is again a set of two rings. And if you
manipulate and move these rings, it
affects your curl or lean of the bottom
and tops of your screen. So, it's like
when you hear that these TVs suffer from
screen bowing or it looks like it's
curved at the top and the bottom where
it's making almost a U shape or an
upside down U. This has those two sets
of rings to help correct that. And I
cannot tell you these things can be a
game changer. If your
image is really looked curved along the
top or the bottom of the image, you can
adjust these rings. The best way to
adjust them is to carefully cut the
adhesive off while the TV's turned off.
Then mark the rings where they're
currently located and slowly move them
away from each other to see how it
manipulates the top and bottom of the
screen quality image there. And then
once you get it in the right spot, just
go ahead and put some more of that vizqu
tamperproof stuff we used on the yolk
wedges on the last TV. use that again to
stick onto the two rings and hold them
in place for the future. Now, the one
thing I told you about that I hadn't
talked about yet is the rotational
uh software in this TV and the hardware,
but unfortunately that adds a bit of
distortion to the image. Uh let me see
if I can show you what I'm talking
about. Hey guys. So, I'm working on this
Sony KV 24V300
and there's like a a pattern that's
strobing across the screen that you can
see in the green.
Um,
but there's a way to get rid of this.
It's kind of like a noise. It's almost
It's very difficult to see probably on
this screen right now. Let me turn the
lights out and see if that helps.
Keep this still.
All right. So, you can see the problem
right there. And we're going to get in
here and uh we're going to fix it. And
we need to remove the back shell. And
then we're going to
inject our 240p test pattern once again.
And we want to check our calibration
out. And we want to make sure the top
and bottom of our our screen are leveled
out as good as we think we can get them.
And once that is completed, we're going
to power the TV off. And then we're
going to disconnect the rotational ring.
All right. This is the inside of an
FS100 because I forgot to film this part
on the 3000.
So, this is the rotational ring right
here. And again, this is on all of these
models, this rotational ring. What you
want to do is you want to fully have
this TV turned off and set the way you
want it as far as screen tilt on the
yolk. And then if you need to use that
rotational setting to set, you want to
make sure that you do that in the submen
and make sure that your calibration is
good, which you saw in the picture for
the TV we're working on, that it is
good. Then after that, you can come in
and power this down. And you just want
to disconnect this right here. And you
can store this somewhere safe. And I'll
hook it right here for now.
And that's it. Okay.
Now,
let's go in here and let's do the rest
of this process. Now, with that done, we
can turn the power back on to the TV.
Get back into the service menu and pull
up the rotational setting again. Get
into the service menu, get to the
rotational setting, and just max that
out. And if you max it out all the way
up to like 255,
it completely eliminates that noise.
It's the same on every uh one of these
BA6 chassis.
So,
um you will get a lot of noise
in here if you don't do that.
And uh that's how you get rid of it. All
right, there you have it. three
different TVs, all with the BA6
chassis
from Sony. And to be honest with you,
the BA6 chassis leaves you wanting
wanting more because you always hear
about the 310, which has the 5D chassis,
which actually can be RGB modded, and it
has additional features that this one
does not have. It doesn't have the noise
from the encoder chip and the RGB
processing and blah blah blah blah blah.
And I don't know about the digital comb
filter being as bad on the other TVs as
it is on this one. This one is okay
though. I mean, it's still an awesome
Trinitron. And we've gone through all
the steps we can do to kind of make it
look better. you can take the additional
steps I referred to on the uh CRT
database if you're concerned about
trying to get composite video to look
better with your video games from the
'90s. But, um, if I had to pick a
favorite one overall, I mean, it has to
be this one, the FB300. I picked the
FV300 simply because it has the extra
controls for correcting screen uh
geometry at the top of the bottom and
then also the sound system. And also
since you get SVideo with this one, you
don't seem to get Svideo very often with
the uh other two models. And anyway,
there are a lot of variations of these
models still out there from different
years of production. There are even more
TVs that feature the BA6 chassis. Uh,
but that's these three. And believe it
or not, I have more to say about the
FV300
and the FS120.
And I will link both of these videos
right here next to my head. And so you
can check those out. And uh, otherwise,
I'll see you guys next time with some
more retro content.