Video summary
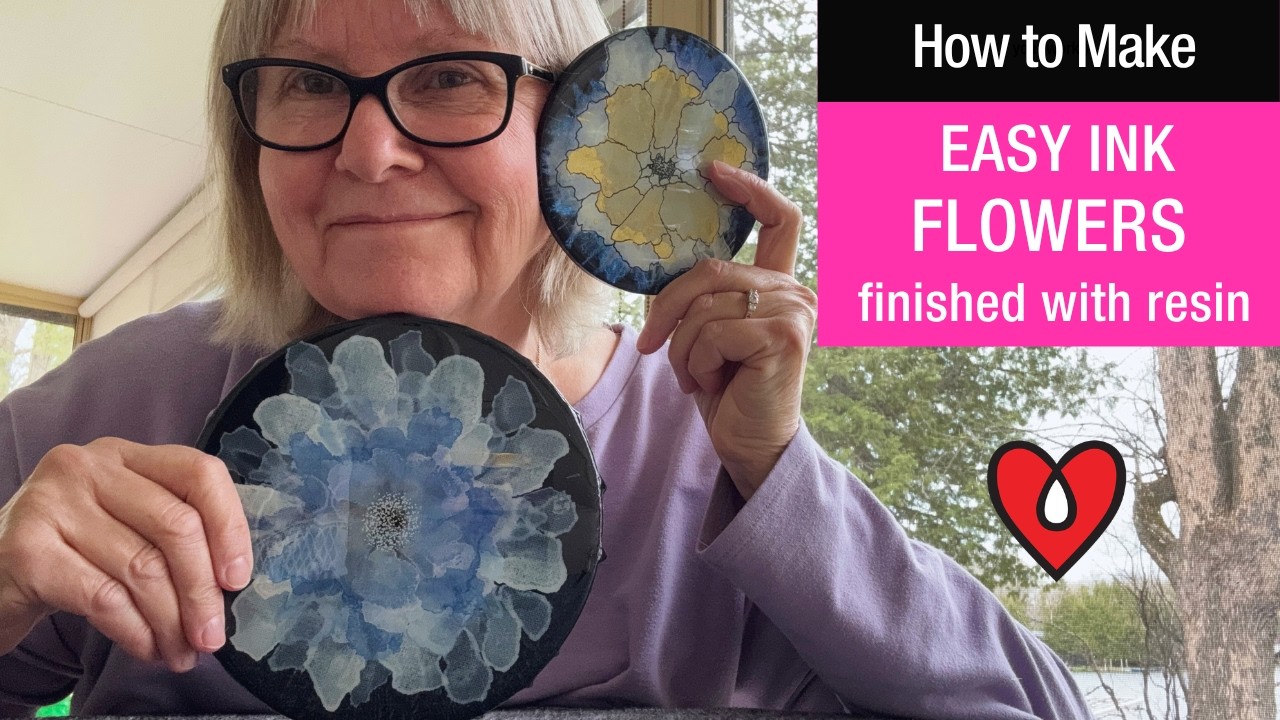
In this beginner-friendly tutorial, artist Susan demonstrates how to create vibrant alcohol ink flowers on canvas before sealing them with resin. She begins by preparing her workspace, which includes taping the back of the canvas and using a lazy Susan stand to ensure it can be tilted for even ink distribution without sticking to the table. The essential supplies she highlights include gloves, brushes, soft body acrylics for a base coat, Jacquard Piñata alcohol inks, spray bottles containing both water and isopropyl alcohol for cleanup, Krylon Kamar Varnish for protection before resin application, and proper ventilation equipment like respirators to ensure safety during the process.
The core of the demonstration involves layering colors using specific techniques such as outlining petals with a pigment liner pen after the ink has dried, though she notes this is optional depending on personal preference. Susan starts by applying thin coats of acrylic paint that must dry completely before adding drops of alcohol ink to form each petal. She works from the outer edges toward the center, alternating between different shades like Snow Cap, Celestial Pearl, and Smolder Pearl to build depth and dimension. Throughout the process, she emphasizes a relaxed approach where mistakes are simply spread out or covered with additional layers, allowing artists to experiment freely until they achieve their desired look.
Once the ink design is complete and fully cured for several days, Susan prepares the piece for resin coating by first spraying it with varnish to protect the artwork from moisture. She then lightly sands the surface using a 100-grit medium sandpaper to create texture that helps the resin adhere properly before pouring. The final result showcases glossy, durable flowers that combine the fluid beauty of alcohol ink with the protective qualities of epoxy resin. Susan concludes by encouraging viewers to subscribe for more content and follow her on social media platforms like Instagram and her website, inviting them to try these techniques themselves while reminding everyone about the importance of safety gear and good airflow when working with chemicals.
Read the full video transcript
Hello.
My name is Susan.
I've been an artist since I was very
young.
I work in watercolor, acrylic, pastels,
and of course [music] alcohol ink,
which I'm going to be demonstrating
today. I'm going to be making
something similar
to these,
a flower in alcohol ink on a canvas, and
then I'll be resin-ing it at [music] the
end. So, I'll bring the camera down and
I'll show you all the supplies that I'm
using today. Okay, I'll be doing
something similar to this, these flowers
here. These are all alcohol ink flowers.
I'll be showing you how I do the uh ones
where I outline the petal
after I do the uh this one here.
So, you'll need a canvas. I tape the
back of my canvas.
I'm using a lazy lazy Susan
when I um
start spreading the ink.
I spread the ink with
This is called a rocket pump.
I got gloves.
Brush to brush on the paint. I paint my
canvas before I uh
do my flower.
And I'm be using black on this one here.
It's a soft body acrylic. [music]
You'll need some alcohol in a spray
bottle for when you resin to in case you
get anything on your hands or on your uh
any of your items. This is some water in
a spray bottle. Of course, here's the
ink.
It's Jacquard Piñata Ink.
I also have a different kind
>> [music]
>> as well, a little bit of alcohol
in one of the containers. You'll need
resin, of course, when I do resin it,
and I'm using Art Resin.
Before you resin it, you have to spray
with some kind of varnish to protect the
ink. So, this is what I use, Krylon
Kamar Varnish.
I have a paper cup that I'm going to mix
my resin in.
I use a respirator when I'm painting as
well as um resin-ing.
You'll need some good ventilation in
your room. I'll be mixing my resin with
this
and spreading [music] it with this.
Okay, let's begin.
Okay, I am ready to put my base coat on
the canvas. I have taped the back.
Um
I didn't mention earlier
when you do resin it, you need to find
some kind of
stands like these
or whatever you have that will raise the
canvas above the
um table.
So, that the resin will drip down,
straight down, and your canvas will not
stick to the table.
So, they're very handy.
Also, you will need lots of uh
paper towels.
Okay, so I am just putting a thin coat
on.
Okay, I'm ready to begin.
My uh canvas is dry.
Paint is all dry.
I'm using snow cap
the colors. I'm using celestial pearl
and a little bit of white.
And also Smolder Pearl I'm using maybe
for the inside, the middle of the
flower.
So what I usually do is I start on the
edge and I work my way in
and I go all the way around and after I
get around one one
layer, then I [music] go
to the next layer and I keep going till
I get into the middle.
And um that's basically it.
So I'm going to put my mask on and I'm
going to begin.
I add two or three drops of ink [music]
and then two or three pumps to make each
petal.
Sometimes you only have to pump once.
Sometimes you have to pump two or three
times. [music]
>> I'm going to let this first layer dry a
little bit and then I'll continue.
Okay, I'm doing the next layer with just
[music] the
snow cap and the celestial pearl
and I'm going to be going in between
these
first layer.
So, I put about
So, that was about five drops.
And I'm only going to use maybe one of
these, one or two.
And I already put one down.
I don't know why.
Okay, next one.
And one drop.
Next one.
So, maybe what I'll do is I'll just go
around with the snow cap and white
[music] for my next layer.
And then after that, I'll go around
again with the celestial pearl and snow
cap.
So, here I'm going in between
in between the
the last layer.
Oops.
Jesus.
Sometimes like that you make a little
mistake and put a drop where you don't
want it to go, but you just go with it.
I'm adding a little snow cap and that's
fine.
Oops. Oh, yeah.
white
Looks like I had a drop there by
accident.
So, I just spread it out.
I'm just taking a look at it.
I'm not fussy on how it's looking around
the outside, so I think
I'm going to just use snow cap and put
one in between each petal on the
outside.
Just to fill it.
Just using two drops.
And you can angle the uh pump however
you wherever you want it to
blow.
If you want it to go straight, you just
go straight. If you want to go over a
little bit, you just
turn it
turn the canvas [music] a bit and then
uh
go.
I just I don't want to put
a little bit on there. Just want it to
get rid of that little dot that I had.
All right, I like the looks of it
better.
I'm going to continue on in the middle.
I'm kind of wondering whether I should
just do use pearl.
And then I'm only using one drop here.
So I don't want [music] it to be
overpowering.
It wasn't quite enough.
>> [laughter]
[snorts]
>> Okay, I kind of like that.
And I think I'm just going to do one
drop of snow cap
and then I'm going to do [music] the
middle.
I am just going to add
um
a couple of more drops of the
just the celestial pearl
in a couple [music] of spots.
And
Okay, one more.
You can do as many layers as you like
and if you don't like something you can
just go over it.
I'm going to go back over it with the um
snow cap.
Two drops.
Okay.
I'm just going to add a little bit of
smolder pearl in the middle.
And just very lightly
blowing it out.
All right, I'm going to let this dry.
I decided to instead of adding the snow
cap around here, I'm going to add the
white
and just blow that out.
Just one drop.
And drop that.
>> [music]
>> Okay, it's completely dry now and I'm
going to do the center of the flower. I
have a white acrylic uh
acrylic
>> [music]
>> uh paint marker.
And I am just going to
add dots
all the way around.
I'm going to add something underneath
the canvas
so that
so that when I do the dots
>> [snorts]
[clears throat]
>> uh they will be a little bit darker.
It's a little bit more difficult on a
canvas to do these.
>> [music]
>> Okay, the next thing I will do is I will
resin it, but I have to let it cure for
a few days first.
Um and then what I'm going to do is I'm
going to spray it
with some varnish first.
Let that sit for a few more days
and let that um
cure [music]
and then I'll resin it. So, it probably
will be a week before I can [music]
actually resin it.
Okay.
This is one of my previous paintings
and [music] I'm using
a pigment liner pen to outline some of
the petals
and I'll show you how I do it.
I don't usually outline the petals on
every painting that I do, just the ones
that I think um needed
something else.
I just pick certain petals that I'd like
to outline.
I don't outline all of them
and whatever looks good to me.
Before I resin
I need to
give my
paintings a little bit of a sand
with some very fine grit. This is a 100
medium.
Um it's pretty fine.
Just uh lightly over the top just so
that the resin has a grip
um on the canvas.
>> [music]
>> Thanks for joining me today.
Here's the final results.
I hope you enjoyed my tutorial
>> [music]
>> and would like to try it yourself. If
you would like to see more of my work,
please consider subscribing to my
channel.
>> [music]
>> You can also leave me a comment below my
video. You can also see my work on
Instagram and as well on my website.
Both links are going to be in my
description below my video. So, thanks
again for watching and have a great day.
See you next time. Bye for now.
>> Hey.