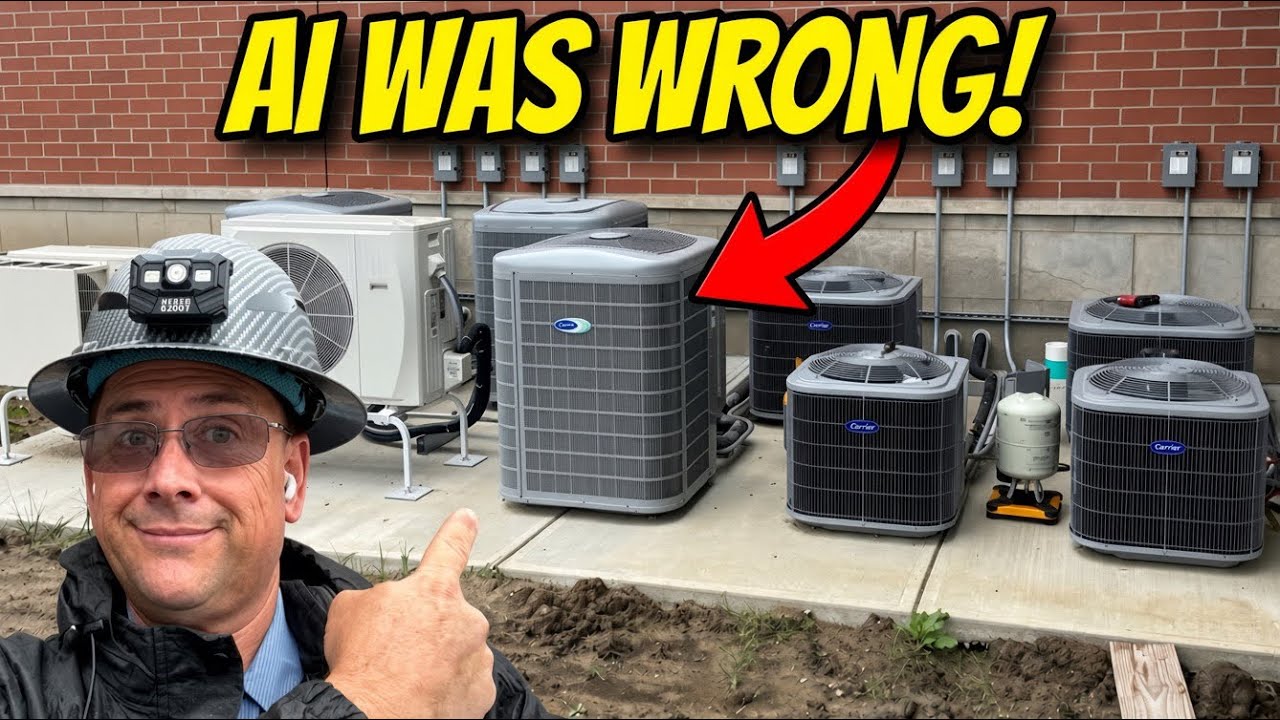
Video summary
The video provides a detailed walkthrough of an HVAC startup project involving seven split systems in a building that is still under construction, highlighting the critical balance between adhering to architectural specifications and maintaining technical integrity. The technician notes that while the installer has done an excellent job measuring line sets and labeling components, the project faces challenges such as incomplete ductwork and varying weather conditions that affect system performance. A significant portion of the discussion focuses on the complexities of charging refrigerant in 410A systems, where the technician had to manually calculate additional charge requirements based on long line set lengths, ultimately adding over five pounds to the factory charge to achieve proper subcooling and superheat levels.
A central theme of the video is a strong warning against relying on AI for technical HVAC calculations, as demonstrated by an instance where an AI tool incorrectly suggested adding extra refrigerant weight that was not theoretically necessary according to standard charts. The technician explains how he had to verify the AI's output through manual calculations involving line length, insulation thickness, and vapor density, eventually realizing that the AI's advice would have led to an overcharged system. This experience serves as a cautionary tale about the potential for AI to make significant mistakes in specialized fields, emphasizing that human expertise and double-checking are essential to avoid costly errors and callbacks later on.
Throughout the startup process, the technician emphasizes the importance of meticulous documentation and verification to ensure long-term reliability and ease of repair. He carefully marks the unit with the total refrigerant charge required, including any adjustments made for line sets, so that future technicians can easily identify the correct amount without confusion. Additionally, he performs thorough checks on electrical connections, static pressures, and temperature drops across different zones, ensuring that the system operates within ideal ranges despite the imperfect conditions of a construction site. The video concludes by reinforcing the idea that taking the time to do things right during the startup phase is far more cost-effective than dealing with expensive repairs and customer complaints down the road.
Read the full video transcript
This video is brought to you in part by
True Tech Tools. Quality Tools essential
support.
All right, guys. So, we're doing a
startup today and we have seven units to
do. Building's not done and the duck
work's not completely tied in yet. We've
got runs that are not completely filled
in. We've got zoning on some of it.
We've got an exhaust system start up.
Got, like I said, seven split systems.
And they're wanting this done so that
they can get the ceiling tiles in.
They're worried that they'll have
condensation and stuff. We are at 63°.
We've got lines ran all over. Now, one
nice thing is the installer is on top of
his game. He completely measured the
line sets and he does a really nice job
labeling things, which is awesome and
greatly appreciated. This building's
pretty good size. All the lines come
down through here. Most of it's all hard
piped and clamped. And then the mini
splits. There's two mini splits that we
got to do. Most everything in here is
410A. Only one of them's a 454. Uh they
started this project over a year and
something ago and so the equipment was
available.
Uh so we went with Fortna.
So this area out here is going to be
done within floor radiant heat which we
got radiant heat coming down through
there. And up here is our room for our
mechanical. We have a welding
department. They welded in this header
here for the boilers.
So they did a loop, primary loop right
there with that.
And these guys actually weld this stuff
up at our shop. I didn't bring it in. I
don't know how they do it.
If I had to do this, I'd probably get my
measurements all screwed up, but as you
can see, it all goes across to there.
Then we got some makeup air units. We've
got three splits here. Then we've got
four of them here.
So, the unit I'm starting up is right
here. Because the line set, like this
one here, is at 90 ft. We have solenoids
in there. So, I've got a magnet on it
for right now. And I've got my supply
and return. I've already went through
double checked my static pressure,
which is pretty low. It's only 38 right
now. Uh filter's not in there. So, at
least I know my basics are handled. I
got my other probe up here at the top.
I've got fresh intake here, which goes
to a CO sensor or CO2 probably. And that
will open up whenever the CO2 gets too
high. That's what I'm working with
today. These startups that I'm doing are
eating into my repairs. It's going to
make it very difficult to make videos if
I ain't got repairs. Um, I can show the
right way to start stuff, but
let's go downstairs. That's RBI. Never
worked on one before. Have to figure
that out. Uh, a lot of times architect
specs everything, including the design,
and then you just do it the way they
want. You got to do it the way they want
it or you don't get paid. So, let's go
downstairs. As you can see, a lot of the
stuff is not quite ready yet,
but here's my spot I'm at. So, I
calculated it up. He said we had a total
of 90 foot, which we've got that written
in there.
This is a Infinity system that we're
using as a two-stage unit.
And so we're not going to be doing that
much more than that. What I ended up
doing was calculating since the liquid
line is uh 3/8 38 liquid and they didn't
require it to be upsided upsized, but
the suction line was uh it's inch and
eighth, which is big. and they wanted
some monstrous 1- in insulation on
there. So, what I ended up doing, I
figured it was 10T, end up double
checking online, it's actually 15T. So,
theoretically, I took my ounces, which
is 6 oz for each additional foot, and
took that time the feet of the line set,
which I came in at 3 lb originally. So
now the vapor density depending on what
it is according to AI cuz sometimes
you've got the sheets sometimes you
don't set it to need an extra pound.
Well right now we are right at 19.5
subcooling took a little while. Super
heat's right at 10. If we look at our
chart right here we've got 16 anywhere
from about 16 maybe 15 at 65°. And like
I said, we're right in that area. So, I
might have went one degree or one degree
or so over, which I'm going to watch it
for a bit. I may have to take that extra
pound back out that the suction uh I
added for the suction, which was
something that AI did, which is another
reason why you can't trust AI. It makes
mistakes so much. It's It's just
ridiculous how many mistakes it makes.
Now, this unit here, we are going to
only run it in two- stage. Uh, as far as
traps and stuff like that, 20 foot is
what they wanted. Didn't say much more
after that. Um, our temperature drop
right now going with the factory speeds
is right at 13, but the problem is
that's going to change when we get the
ducks on there. And then some of the
stuff zoned. Right now, all the zones
are open. By default, they're honey
wells. And like I said, indoor return
67°. We're just barely, you know, in the
range where we need to be at.
Unfortunately, sometimes the weather
doesn't always cooperate. Last week it
was hot. This week it's not. So, let's
just say
16. So, 17, 18, 19. Yeah, we may have to
yank that pound back out. Now, look at
that. You think I was going to actually
use my recovery bucket? Of course not.
I'm all about protecting the environment
and people's pockets. We required
somewhere right in there between 15.8.
We're right at 15.5. I only took out
about 9 ounces. I didn't go the full
pound, but you know, according to this,
and it's measuring temperature right
here, we're 68 degrees out here. We're
probably pretty good right now. So, what
I'm going to do, I'm going mark that
inside there that I added 3 12 lbs to
this to the factory charge. And so if
anybody comes back and say a line's
busted or whatever and they need to make
a repair, they look at the outside of
the unit and it says, "Okay, we need a
total of 8.3 lb." But you're like, "Oh
my gosh, what do I need here?" They
don't have to think. They just know 8.3
+ 3.5. Boom. I have what I need. I can
make my repair and I can go home. Also,
the guy even labeled everything. He put
it on the door, which I mentioned
sometimes these doors can get mixed up.
So, they are marked inside of the box,
the electrical box, and I went ahead and
marked it here. That way, if the cover
does get messed up, those are some
things that you may want to look out
for. Of course, one of the things I'm
doing is I'm, like I mentioned before,
I'm going through and I'm double
checking the tightness of all of my
conductors. Uh, whether it be low
voltage, high voltage, whatever. I did
that with power off. Same thing over
there on the disconnects. And then I'll
do the same thing up there at the
furnace and stuff. So, those are some of
the things that I do on the startup.
Startups can be pretty easy, but they're
really important. If you don't do it
right, you could cost a lot of money
later for callbacks. I like doing things
right. So, I don't get in a humongo
hurry. It's one of them things where
it's kind of important to me to make
sure you document everything, double
check everything, and that way there's
no real excuses of why you didn't do it
right. There's really never a good
excuse unless, you know, it's lightning
out and the boat was sinking and you
only had 15 minutes to do it. So, I
suppose if you're not on a sinking boat
and you only have 15 minutes to do it,
then you should probably just do it
right. So, I've got my factory
charge mount there cuz sometimes those
stickers get damaged. I've got my
outdoor temperatures, my date, the unit
number, the date it was started,
subcooling superheat numbers along with
my low and high side pressure. All those
things combined can help you out
massively later if you're doing a
repair. So, those are some of the things
that I'm doing. Now I want to check my
temperature drop. I went with the
default settings. Told it was five tons.
So according to this, we're in the
green. The supply dry bulbs 53. Ideal
range 48 to 54. Target 51. So if I
wanted 51, I'd do what? Slow it down. As
you can see there, we're just jumping it
out for right now because the stats
ain't mounted yet. Still under
construction. And like I said, they got
pushed pushed
pushed to get this done quicker. Yeah.
So, we got 15 degree split. I mean, we
could drop it one speed,
but that could change with the duck
work. So, I'm going to double check with
the person, the project manager, see if
he wants me to mess with that right now.
Otherwise, we're in range. It just ain't
perfect. I like to be in the middle. You
can see what we got there. And that is
with me going off of the trunk line
there. You can see it's off the radiant
side there. So, when I do the furnace
startup, which I can't do yet because
they don't have gas to the building.
They just got permanent power just uh
within the week. So, there is no gas
just yet. Yeah. Here's one of those
honey wells. I've done these. They're
pretty common, basic. Nothing super
fancy. I mean,
it's pretty simplistic. Nothing like an
Infinity or something like that. Also,
the solenoid here is not for pump down.
It's just to stop the flow so you don't
migrate the refrigerant back to the
compressor on shutdown. So like I said,
I don't know if I mentioned it earlier,
they are going to have that wired on
with and they already do with uh wide in
common.
Boom, boom, boom, and boom. And we'll
stop the flow like that. And the fan is
I lowered it down to 30 seconds of
continuous run after the fact.
Um that uh transformer there is for the
uh zones. So that's what that's separate
for. Anyhow, that's the first one down.
We're doing the next one here. Checking
static pressure
and not a whole lot of anything to brag
about because we have no back pressure
from the supply side. So let's go ahead
and already programmed it and so on and
so on. Same thing again. 90 ft subtract
15 75 75.6 six divide it by uh that
comes up to 45 oz
got 2.8 lb. When you divide the 45 oz,
which is how many feet we got, 2.8
and8 * 16 gives you 12 oz. So 2 lb 12
oz.
We're going to go exactly like they said
originally with just the liquid line
only and let it stabilize and see where
we're at. Temperature probes right here.
Making it really easy. See our
temperature drop. Taking a quick brief
look here. We're at 6 of cooling. Not
very exciting. We'll give her a minute
like I said and we'll see how she does.
Okay, this one here is at 115 ft.
And so
supposedly Carrier said they only needed
the solenoids on the 5-tonon units.
I don't know.
Migration's migration. But for whatever
reason, whatever,
whatever. Just kind of like writing that
on the inside so we can find it for
later. Outdoor temperature 65. It's
really cool. We're in September. Today's
September, Monday, September the 21st.
So we want to take 15 minus the 100 or
let's just go 100 foot. the 100 *6 going
to be about 60 oz. So*6 60 oz divide
that by 16 that's 3.75 lbs. We got
almost as much refrigerant in this unit
as we do uh in the line set as we do in
the other half. Another 10° sub cooling.
Again, this kind of makes it braid and
dead. I mean, we're basically just going
to add, like I said, 3 lb 12 oz to it.
Just do it over and over. So, if this in
the middle of the winter, this is the
way that they recommend doing it. Uh
makes it really simple.
um get you dog on close and
theoretically it should be dead on but
that's assuming that they've charged it
exactly properly like they're supposed
to do. We're just slowly adding I mean
we ain't going 100 mph but you know
we're not flooding our compressor. Subco
is going to fluctuate. We just kicked it
on. We'll slowly get it in there. As
long as I don't hear the compressor
chugging away we're kind of like you
know slowly giving it to it. For those
out there that don't really understand
sub superheating and sub cooling very
well or the way the the chart works.
Look where our liquid line temperature
is right now. We're at 73.9. We're
undercharged. We have no sub cooling.
That liquid line temperature will start
to drop when it's on the right side of
the curve. So, as you're adding, that
temperature is going to start going up
and eventually it's going to come down.
When you're subtracting your liquid line
temperature minus your saturated
temperature on your liquid gauge, that's
when you go to the number that they're
giving you. That was something I didn't
catch right away. We'll just keep an
eyeball on that. 75.5
70. So, look, see the temperature's
going up. If you add some refrigerant to
it and temperature continues to go up,
you're on the wrong side of it.
Convenience of the wireless scale
showing right up here. We've got the
convenience of the probes. I've been
really happy with the way these have
been. I mean, I think these are day and
night difference compared to what they
used to be. Since we just added that
refrigerant, we'll go ahead and start
the stopwatch. Kind of give it some time
to to run for a bit. Like we're at 78,
so that temperature has gone up.
Subcooling's jack. This sucker will
eventually change. Just the thing I've
always hated about 410A took forever. I
haven't noticed if 454 is quite the same
or not. Like I said, eventually this
sucker is going to start to drop. That's
going to start going up and we'll have
the 10° subcooling that we need. It's
all right. So, we're at 13 minutes.
Hasn't changed a lot. Still only at8 for
the sub cooling. Temperature hasn't
dropped much. This is about where I
ended up adding some, which I'm about
ready to add some anyway. Then we went a
little bit over. still holding in there
just to wait for the whole 15 minutes
just to kind of see see if it changes
cuz they kind of did it at the very last
minute. Okay, we're at 17 minutes. This
ain't getting it. Obviously, it wasn't
most the most accurate thing is like not
uncommon. We're dog on close. We got 16°
superheat. Obviously, we got work
getting done our temperature here. We're
just neck and neck here. So, let's go
ahead and add maybe 4 ounces. See what
we get. Okay. See what happens at
temperature 79.1.
Eventually, it'll start to go up and
it'll start to drop. You can keep track
of as I'm adding here. I'm stopping and
starting the camera. There's that
temperature coming down like I said it
would. As that's coming down, your
pressure will tend to build, which means
that temperature is going up, which
they're getting a separation away from
each other. And that's your sub cooling.
It's hehauling around because the super
heats being screwed with with the TXV
inside. If you look up here, you can see
we've added some refrigerant right at
11. It's rated for 10, one degree, one
and a half degrees, even two. Not
horribly worried about it. Look at that
temperature there. 72.3. Remember we was
at 80 and then 79 and then 78. That came
down. This temperature went up. There
you go. The difference between this
temperature and that temperature. This
is the actual temperature of the liquid
line. This is the saturated temperature
of the liquid line. That's the
conversion temperature.
Subtract it from it. Boom. 10. That's
your subcooling you need right there.
10. Now, what bothers me? 4 lb factory
charge and I had to add 5 lb 7 ounces to
it. That kind of worries me. I think if
there's any of them that needs a a
selenoid would be this one. I could see
us having problems. I'm going to say
something to the estimator. They should
probably consider putting one on it.
There's no way I can pump it down. I
tell you that. No way that's going to
hold it. Not at all. Like I said, the
line set should have been right at that,
but I screwed up. So, anyhow, 4 lb
factory, 5 lb, 7 oz, total, 9 lb, 7 oz.
It's written in there, double scratched.
That way, they know what we're doing.
Kind of looks a little crappy, but you
know what? Nobody's going to look inside
the cover. Uh, like I said, we marked
this number five, and uh, this one
started today. So, that one's going to
be finished, and we're good to go on
this one. So, here's the one we're
working on. And we have a 19.5° split at
the factory recommended speed. Our uh
supply dry bulb is 48 and our return is
68. So we're in the colder side. But uh
when you look at our design drop boom
calculate 17, we got 19. So that's it
for that. I don't think the the job link
does that.
Yeah. So you just don't have nothing.
So anyhow, all right guys, that wraps it
up. Till next time, we'll catch you on
the next one. Thanks for watching.
Later.