Video summary
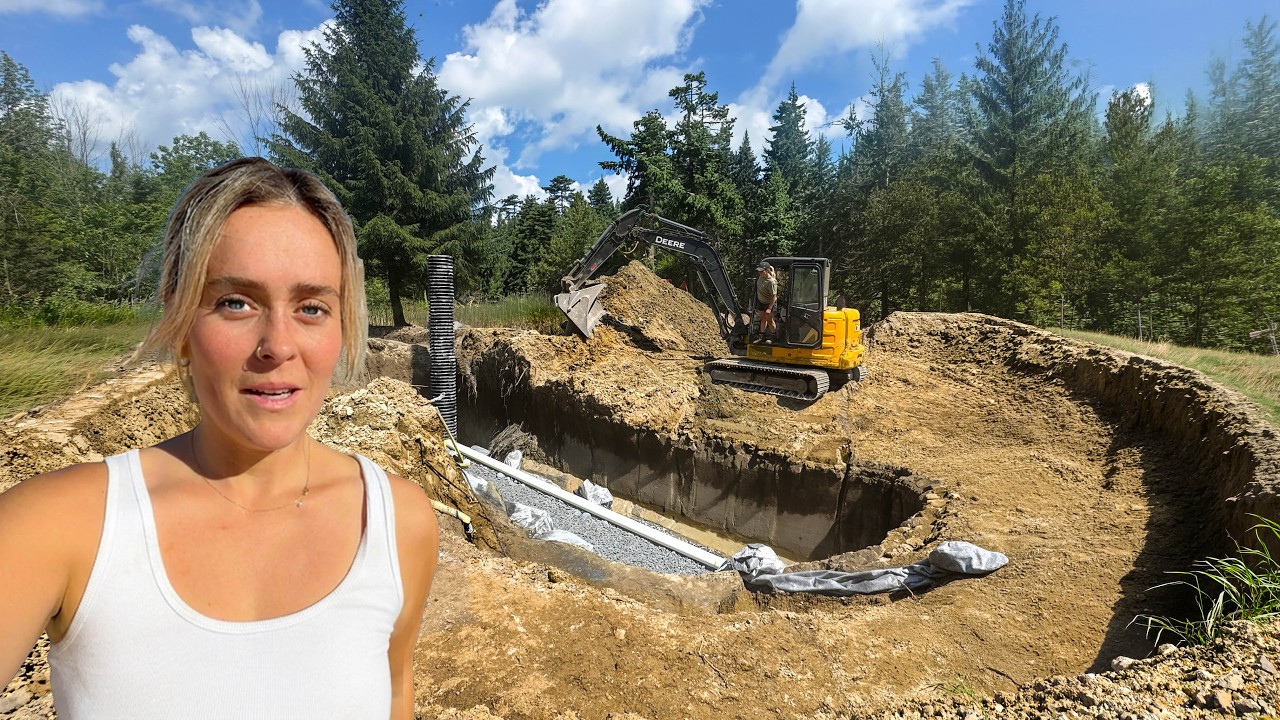
The video documents the challenging yet optimistic process of excavating a natural swimming pool in a backyard with limited equipment. The builders begin by addressing muddy conditions left from previous work, taking advantage of two consecutive dry days to turn wet clay into manageable dust before digging the deep end. To safely operate their smaller excavator on soft ground, they construct a temporary bridge using logs across the site. Throughout this phase, precise measurements are taken and adjusted repeatedly to ensure the pool walls form a perfect kidney-bean shape with consistent levels, demonstrating that even amateur builders can achieve professional results through careful planning and patience.
As excavation progresses, the team focuses on creating proper slopes for safety and functionality, transitioning from using heavy machinery to manual adjustments where necessary due to equipment limitations like arm reach. A significant portion of the project involves installing a critical drainage system beneath the liner to prevent groundwater pressure from causing failure; this requires digging trenches that are prone to collapsing in wet clay. The builders face numerous setbacks, including trench walls caving in and water filling up their work area overnight, forcing them to repeatedly re-dig sections by hand or with smaller tools. Despite these difficulties and moments of frustration where they feel defeated by the muddy conditions, they persistently adapt their plans, such as switching from a large pipe to Schedule 40 piping for better stability, ensuring the foundation is solid before moving forward.
Once the trenching is complete, the team installs a vertical culvert housing a sump pump system designed to continuously remove water and keep it away from the pool area. The installation proves difficult due to tight spaces and slippery conditions, leading to humorous struggles with fitting watertight caps onto large pipes using lubricants like motor oil and creative leverage techniques involving tractors and tires. After successfully sealing the drainage pipe and installing a check valve to prevent backflow, they fill in the trench around the system. The video concludes by highlighting how 3D printing technology from Bamboo Lab has been instrumental in solving specific problems, such as creating custom fake rocks for skimmer caps and designing unique accessories like drink holders and window cushions for their dogs, showcasing both the physical labor of earthmoving and the innovative solutions provided by modern tools.
Read the full video transcript
Welcome back to our hole in the ground.
We're building a natural swimming pool
in our backyard, but it could fail
before we even installed the liner. Last
week, we started excavation and got very
stuck. Ow. So, let's hope we can fix our
natural swim pond. But first, we need to
fix all that muddy mess from last week.
An Earth pool is more than a place to
swim. It's a carefully designed natural
environment where crystal clear water is
maintained through filtration,
beneficial bacteria, and aquatic plants.
Today, we are digging the deep end of
our pond.
And we are doing it with optimism
because we're making another bridge out
of logs to hold the weight of the
excavator on top of the very soft earth.
And it is the driest it's ever been
because we had two backtoback dry days
here. And the clay is turned to dust.
Clay is either wet and mucky or dusty.
So, it's pretty dry and I'm feeling
good. Jazz is taking these logs and
putting them in the pond.
>> It's time to activate.
So,
>> we need to get from the logs all the way
across and dig out this deep end.
>> [music]
>> I'd say we made it.
>> So, cross your fingers. We're feeling
optimistic. I think it's going to be
good. We hope it's going to be good. If
not, we're going to have to bring in a
bigger excavator
before we get into the deep end. We're
just shaping all of this part that we
just reached this wall from our bridge
just like to the very inch we need.
Really so difficult to do this last week
because the entire wall just wanted to
fall down. It was so wet. And now we're
getting that perfect pond circle.
Come on [screaming]
[music] people,
there's a feast going on. [music]
[music]
Got a first load of material here on the
side of the pond. We're building up the
outer burm or the ledge of the pool. And
good thing is we've got our dump truck.
We can just keep loading it with
material and bringing it all in.
Okay. So, this side is the side we
started with. So, it's all at the height
we need it to be. Right now, we got to
work on this side. We have all of our
piles of dirt here now. So, I'm going to
take a bunch of readings all the way
along and see how much we need to build
it up. This needs to go down
by 1.5
inches.9.
This has to be really up. Well, an inch
actually. We were doing pretty good
actually for like eyesight and just our
post that we did last week. We did a lot
of measuring last week. If you didn't
see episode one of the Earth pool build,
we spent a lot of time in there. We let
it dry for 5 days. So now we're just
going to retake measurements and do you
want to bucket it in on and I can just
go around with this?
>> Mhm.
>> Then we'll compact with the machine.
>> Mhm.
[music]
>> [music]
[music]
>> I don't even know if the camera can pick
up all the work we just did,
but we've been in there all day.
It looks so good. You can really see the
shape of the kidney bean in the deeper
end. The walls are all chiseled out.
That's what we kind of started with this
morning. And obviously the bridge. Wow.
And from that
marker all the way around to
basically that marker is 100% all the
same level. That's amazing. That was the
goal today and we succeeded. We're
keeping this end open right here because
there's going to be a lot more that we
dig out within the deep end and probably
the shallow. But also, we need a way in
and out. So, no point to making this all
nice because it's probably just going to
get a little gross after. But wow, I
also can't believe we did this all with
our own soil. Look at this, everyone. I
have to just show off your work. That's
beautiful.
>> Hi. Summer has joined us. It's
officially a trillion degrees. That's
Canada for you. Cold and rainy, hot as
heck. Can't complain, but I would be a
lot happier if I was in my pond. We are
slowly removing logs from the deep end
and working our way backwards. I'm
really happy with our plan. Everything
is drying out. Okay, time to measure the
other side of the deep end. Okay, so
from there, yeah, I enjoy this one.
6 ft.
>> Nice.
>> That's the deep end.
>> All right. I'll try to dig that to the
best of my ability.
>> You can make it a bit bigger. It's fine.
>> I'll just make it however my bucket does
it.
Dig a river. Perfect. Need a good old
friend set up again
to help us with the shallow end.
She's on. So, we have this measurement,
which is the one we want everything to
be like. Crystal's going to go around
with the pole, and then I'm going to be
in the excavator, and we're going to
make it all perfect
down. [music]
>> [music]
>> Hi.
Okay,
the pool has been rigged. It has been
leveled.
It has
>> Let me tell you, rigged by Crystal. It's
been a day. # Christa. She raked the
entire pool.
>> The day is done. Like, it's it's almost
over. It's so crazy how much work and
effort we put into this today. But it is
been nothing but progress. The deep end
was dug, the logs were removed, the hole
was raked, the slope is perfect, the
brim is amazing. We've had our last
loads.
I'm ready for whatever's next. Also,
these walls like everything.
Now we have a mess to clean up. All of
these logs aka the bridge needs to go to
the field.
Thank you to Bamboo Labs for sponsoring
this week's video. I genuinely had no
idea how useful a 3D printer was until I
started using one. And now when I'm
midway through a project or a rena and I
have an idea or I need something
specific, I can make anything my mind
thinks of. Because when you're
constantly working on things or tackling
new projects, you're always running into
these tiny problems where you think, I
wish there was something for this or
where could I buy something like this?
But now you can just make the thing.
We've been using the Bamboo Lab P2S with
the AMS2. And the thing I love the most
about 3D printing is it's not as
complicated as it seems. You open your
phone, you go to the app Bamboo Handy,
and you scroll through Maker World, and
you can print anything with the click of
a button. I know it's hard to believe.
You don't have to sit there and figure
out a million settings. It's not hard.
Click of a button, you can print
something useful. We were chatting to
Dererick and Derek had a great idea for
our Earth pool. He was saying that to
cover the pool skimmer caps, we could
get a fake rock. And then we were
thinking and we were like, we can print
a rock. And so we did. This is the
biggest thing I've ever printed.
This is going to be perfect on top of
it. It's like a natural rock but light.
We printed a prop rock that is the
perfect size to go on top of the pool
skimmer lid. It's going to blend in
seamlessly with the landscape and you'll
never know it's there. So, this is the
perfect example of printing something
that would be so hard to find but is
just so extremely useful. I love this
rock so much. And then naturally, I
started thinking about all the different
things that I could print for the pool.
In just a few weeks, we will have water
and we'll be able to swim and there's
going to be plants and lily pads. And
lily pads don't always have blooms, but
ours are always going to be flowering.
So, I started printing these in pink and
white. And obviously, floating custom
drink holders because if we're going to
spend hours floating away in this pond
on sunny days, our beverages need
somewhere to go. These machines are so
impressive. I love 3D printing. I've
made so many useful things and it's so
approachable. If you've ever been
interested in trying 3D printing, click
on the link in our description, check
out Bamboo Lab, and see what you can
make. That's not good. It didn't even
rain last night. The deep end is ready
to be swam and it's full of water. So,
for that reason, we are using our
trenching bucket for the first ever
time. We've been waiting to use this. We
got it last year. and we are going to
dig our very first trench out of this
pond and we're going to install a sump
pump system. So, we're going to handle
the water situation, make sure it has
somewhere to go and that is out of the
pool far away from where we will be
working and then everything's going to
have a chance to dry up real nicely down
here and we can move on to the next
steps. Okay, so here's the plan. We're
digging a trench from the deepest point
to [music] the outside of the pool on a
slight angle because water only flows
down. bucket swap.
>> Then we're going to build something like
a French drain, okay? Which is then
going to flow into a massive culvert
that's vertical with a sump pump inside.
Never done anything like this. So, let's
see how it goes.
[music]
Bucket looks so new compared to the
machine right now, especially after what
it's been through lately. Will it reach
>> [music]
>> Yay!
[music]
This bucket is incredible. It's the
perfect width. You're not messing up the
earth anywhere else except exactly where
you want to be excavating. It gives you
a perfect trench. And you can see the
water is already starting to flow down
the trench.
>> How nice is that?
>> So nice.
>> Cuz now we kind of have to make the
trench perfect by hand. But I definitely
need to clean it out a little bit more
because obviously the trench has fallen
in as I'm speaking and you kind of got
to get that away or at least smooth it
out, you know?
>> Yep. The reason why it's so important to
dig out this trench and put a below
liner sump pump in and all of this
piping is because if we don't do that,
our pool will fail. Because you can't
have water above Did it cave in? You
can't have water above your pool and
beneath it. Your trench cave in. Oh no.
I think it's from you driving on it.
>> So much for our trenching bucket. The
walls keep caving in on our trench and
it's because we've already disturbed the
earth. We've created up these banks all
the way around, especially on that side.
They were very built up and so it's not
strong earth, right? So, our trench is
getting a lot bigger, but it's okay.
STILL GOT A HAND. I THINK we both got so
excited to use that little trenching
bucket that we forgot about a lot of
things. Most important thing was the
deep end had to be dug another 8 in
because the big O pipe's going to go in
there and gravel into a textile and
everything. That means our trench was
flowing upwards because deep end had to
go deeper. So, we're fixing it right
now. If you can believe it, we had the
nerve to bring that 12,000lb machine
back in this Earth pool after it got
stuck. You can literally see the
indents.
Boom. We dug the deep end down with the
machine. And now we're starting the
trench over again. And we're not using
the trenching bucket anymore. We need
more space to work in that trench. I
think that little trenching bucket would
be good if you were doing something a
lot smaller, maybe with your ground that
wasn't all disturbed. But here we are.
Deep end. New trench.
Never try to save money in building. You
just do it right. Cuz you'll never save
yourself money by cheaping out. Cuz if
we didn't do this and it was ground
water, guess what we'd have to do? Rip
up the whole earth pool. Now we need to
measure how big of a culvert we need.
I'd go for 12.
10 would probably be fine, but get 15.
Is that 25? That's it.
>> So,
>> somewhere between 25.
>> Yeah, 50. Probably
>> 30 probably. Fine.
>> Okay.
Great.
And then that piece and that piece and
that piece is all going to fall down and
we're going to come back to a fully
filledin pond.
We have all the materials to get going
on our below the liner sump pump.
However, our trench has filled up with
water from the rainclouds and from the
groundwater. So, we're working on
getting that out today and then we're
going to get in there and install our
system. It's very simple. I think you're
all going to love it and it's going to
give us lots of peace of mind as we move
on to the next steps with the pool. All
of this needs to go and so I'm not doing
nothing. I'm going to work on making the
deep end a bit bigger, but also
driving around all the edges in the
pool, compacting it all with this big
12,000lb machine. We got to get
everything nice and hard. And to be
honest, we're doing like five steps and
then it rains and then we're doing the
five steps again. So,
let's all hope there's no rain this
week. How's the snack crew break?
>> Great.
Okay, as you can see on the left hand
side here in the deep end, we have a 3:1
slope. So, it's a little bit more steep.
Right hand side, we're sitting at a two
to one. And that's because we're making
it like any other pool you've ever seen
or been in before. You're coming in on
the shallow end. It's a nice gradual
slope to the deep end. Nice and safe,
nice and fun for everyone. [laughter]
And I have to say, a massive shout out
to my high school math teachers. I
highly doubt you're watching this. If
you are, hello. But honestly,
they worked hard with me. Real hard.
because math was always very challenging
for me and I have to say I went way back
way back and started with the basics
before I decided to take anything harder
and I slowly worked my way up and it
took a long time and a lot of effort but
I can say now it was very worth it
because we have been using all different
kinds of math since we started working
construction but more specifically on
this pond. We started with triangle math
when we were marking out this the pond.
We're working with slopes right now.
There's all kinds of things that have
just come handy. So, math is good, kids.
Really good.
All right. Well, we're back filling our
trench, and that's because we are going
to only dig as far as we can reach
because we are amateurs doing this. This
is the hardest thing we've ever
excavated before, and we have a smaller
machine in terms of excavators.
[laughter]
So, we have spent many hours digging out
this deep end and trying to get the
perfect slope to get the water now out
of the deep end. And our arm only
reaches so far. So, we're getting
crafty.
We're back filling and redigging.
I've excavated a lot, but this is by far
probably the hardest thing I have
excavated and the biggest thing only
because everything needs to be like not
100% precise, but pretty precise.
Do you know what I mean? And I feel like
I'm dealing with a little baby machine.
Even though I know it's a six ton, it's
the biggest machine I've ever driven. I
still feel like I could do with a 12
ton. And this is the problem with
machines. You got one, then you want a
bigger one, and then you want 20
attachments. Anyways, we figured it out.
Just thought I should let you know. This
is like pretty hard.
You got a knife on you.
Just can you fold the ends like a hot
dog?
Just got really hot.
Fold.
as far as you can go. I can dig there
more.
Good
>> morning. I'm sure you can guess.
Yep. Do the same thing again for the
third time. This is exactly why we need
that sump pump underneath the liner. So
much water. Oh my god, I hate
everything is stuck. Should have done
this last night.
It's stagnant
>> until I started walking through it cuz
you can't see the bottom of this trench
cuz it's clay.
I can't even pull my boot up unless I
use my arm.
No, my our legs are crossed. Oh
no.
Oh my god.
Here we go. No. No. No. No. No.
No. No. No.
Come on.
I can't get out.
Oh my god.
>> [snorts]
>> What? How you going to put it flat?
Note to self, no matter how hungry or
tired you are at 7:00 p.m.,
work until the trench is done cuz we
just did everything again. Okay, so this
is where we're at. We've dug the trench,
laid the geoexile fabric, rock, and the
pipe. And now for the fun part.
This is a 20 foot 18inch HPDE
polyethylene pipe that is typically used
for fields, road drainage, construction
site drainage. And normally
you don't need caps because you want it
open because you want the water to flow
out. But we're putting this pipe
vertically in the ground. And so
wish us luck because it's not easy to
put on. So we're lubricating it and we
have obviously never done this before.
So hopefully all our gaskets are on
correctly cuz this information isn't
readily available. No, no one used ends
cap end caps. We had to special order
them. So basically because our deep end
French drain or big O pipe goes into
culvert. Car culvert is standing up.
Water will fill up in here. The sump
pump will then remove it. And this is
all under the liner.
>> So, we'll go to here because it's 10
inches. Is this on?
>> Very nice. Okay, it's on. Now is the
hard part.
>> It's already on. That's 10.
>> But it's not actually on.
>> It is cuz I just counted. It should hit
this one.
>> No. Oh,
>> cuz if it can come off, it's not on.
>> Okay.
>> It's a watertight cap.
>> I don't think I'm going to get it on
ever. It doesn't feel like it's going
anywhere. We need like three machines.
One to hold it down there, the excavator
bucket. One to prop it up, which would
be the tractor forks, and then one to
give it a whack.
Hang on. Hang on.
The tractor. I got to prop it up.
This should work. There's no way you can
push the
tractor over.
>> No, I don't get that.
>> So, your key there, yeah, to make sure
it's a plane end by cutting off that
spigot.
>> Gotcha. Thank you so much. That helps
immensely. Thank you.
>> Yeah, no worries. But, yeah, keep the
green line away from the end of the pipe
and that's the right direction. Then you
should be good to go. For all of you
that have done this before, that was
probably very painful to watch. But
guess what? Never make that mistake
again. Now I can teach someone.
So, makes a lot of sense. Going to cut
right here.
>> Okay. Who would have known? Not me. Not
you. Okay. Now, we need a pry bar. Or
just kidding. Empty.
Oh my god.
You don't just put your whole might in
these things, dog.
>> You know what would have been better to
keep it on that.
>> I agree. I know.
>> And then flip it over.
>> What?
>> You keep it on the part we just cut.
>> Yeah. And then use that to
>> And then you pry it.
>> No.
Little bit. We need way more oil. That's
my
What?
>> To do little bits at a time and then I
need to I just pried too far over.
>> Just try from the middle, please.
>> Sure.
>> You're right. I'm wrong.
>> I love those words. [laughter]
OKAY.
>> YAY. Let's celebrate something little.
We haven't been Our trench is also
working. Always add more oil and soap
and water or whatever the heck you're
using. Just add it. Yeah, we weren't
messing around. I think we're out of
WD40, so I just went straight to the
engine oil. Cross your fingers, folks.
Wow. Another job well done, kids. The
pipe chronicles.
The excavator and tractor actually just
like slid that on.
>> How about the motor oil?
>> Yeah, the motor oil too. And we'll be
like cutting it. And maybe us too.
>> And CLM always a part of the show.
>> Yeah, we used the side of her tire cuz
there's no way this is going to push the
tractor over that way. That was really
good actually.
>> Yeah, it's on good. Like that's logs.
>> That's a water tight end cap. And that
matters cuz this is going in the ground
where all the water and the mud and the
chaos is. So now nothing can get in.
Kind of put it in the bottom of the
trench. Here we go.
>> [music]
>> Mission, get Culvert in the trench.
Mission, get Jazz and Crystal out of the
trench.
>> Okay, well done.
>> Good job.
>> Why is it so big?
>> We have a level. And that's how I would
hold it with the bucket. You have to get
this back more. I'm going to push it
back. You just reversed a tiny bit.
Okay, let's do this trench.
>> I can tell you right now, this project
is testing my limits.
[music]
>> It's going to be worth it.
>> I know. [laughter]
>> Okay, I got to be honest for a second. A
second of time.
I almost admit defeated for a second,
but we're now changing the plan. We have
been in this trench for too many days,
but we're amateurs, so
got to live with it. This
big O, from my experience, doesn't do
well in stressful situations. It needs
the perfect conditions. It's not that
strong. And we have very heavy clay
material that we will be excavating back
into this trench. And unfortunately,
we're having a really hard time getting
things
good in here because the conditions are
so wet, as you know. So, we're being
very cautious with the excavator. We al
also have this open trench with very
tall walls. So,
we don't want to have the machine down
here. One, it won't even get down here.
to we're just having a hard time getting
material even in here like stone for
example. So I'm making a base currently.
Jasmine's going to get schedule 40.
We're taking this bigo out and we are
going to redo the trench entirely and
I'm feeling much better about this
decision because it was just so mucky
and it was getting very hard to work
with something like this. So, for our
circumstances and our conditions, say
goodbye to the big hole.
Okay, I've officially taken the pipe
out,
redug the bottom.
It's really muddy. Feeling much more
optimistic. Just taking out and
restarting. Jasmine's back with the pipe
now. Perfect timing.
Nice. [music]
>> There you go. Okay.
[music]
The walls are just going in. So, we need
to close it up.
And then we have our full run that we're
going to do, too. Obviously, the best
course of action would be to do the
entire trench with
gravel, but clearly we don't have any
time.
>> We don't have time.
>> HOLY it's done.
>> That was resilient.
>> That was
crazy behavior.
>> Come here. Give me a hug. You're sweaty
and I'm sweaty and I have pants on.
>> I love you, buddy.
>> I love you, too.
>> I'm proud of you.
>> I'm proud of you, too.
>> That was hard work.
[music]
We don't want that in there.
>> [music]
[music]
>> We did it. Supervisor,
do you need to inspect?
No, you trust us. Okay. Thanks,
supervisor.
Yeah. [snorts] Yeah, Bella. I know. You
know what's so funny about these type of
jobs? Well, you never see it. All the
hard work gets covered up. Feel like
that's a running thing over here. We
always love these type of jobs. And you
might not see it, but you will enjoy the
benefits of it.
>> It's time.
>> It is. It is.
>> I will sleep soundly tonight.
>> What?
>> There is certainly water in there.
That's water
in our pipe. That's a job well done,
ladies. That means we are doing it
perfect and it's going in here.
>> Oh my god, I'm eager.
>> Oh, nice.
>> Cool.
>> Great muscles. Also, let me just add,
you will not see this pipe out of the
ground in this beautiful earth pool.
Everyone,
>> it's going to get cut to size. We're And
then there's a fake rock that you put
over top of it. So, let me just be
clear.
>> You're never going to see this or know
it's even here.
>> Well, you are cuz you watched the video,
but don't tell your friends.
>> Yeah, don't tell.
Not in the pond. Okay, that worked out
well.
>> Not in the pond.
>> Now you have to carry it out. They're
heavy. How's the water?
>> It's dripping. This is our half
horsepower pump. This is kind of like
what basements have. And also what we
did down there is kind of what is at the
bottom of the footer of your house. It's
kind of cool. This is only 10 ft deep.
So,
>> we might have to cut this more, eh?
>> What's a check valve?
>> Not sure
>> why.
>> It says install a full flow swing type
check valve sold separately either
directly into the pump discharge or on
the discharge pipe.
>> When the sump pump turns on, the valve
swings open and lets water flow out.
When the pump turns off, gravity tries
to pull the water in the discharge pipe
back down. The valve swings close and it
prevents that water from returning to
the pit. I think we need it.
>> We got our check valve. Check valve. Our
check valve. We have our check valve.
We're going to install it now.
No, we don't.
>> Beautiful. Most beautiful thing I've
ever seen.
>> Do you see how it has to go down like
that much? Oh, no.
>> I think it's fine. No,
>> cuz you tighten this ring.
>> Is that upside down?
>> I just put it on the old markings. Okay.
Now remember, we're going to turn this
around. So you're actually going to come
to me cuz this float is going to go this
way. Whoa, whoa, whoa, whoa.
There you go. Amazing.
>> It's working.
WOOHOO.
That's crazy.
We got the water out of our pond.
That's it. It's official, everyone. We
can move on to the next step of our
pond. The water situation is managed. We
have a below the liner subp pump
installation complete. It's filling up
again. Now, our Earth pool will not
fail. Woo! I'm so proud.
>> Same.
>> Maker World has thousands and thousands
of ready to print models. So, you don't
need to learn 3D modeling from scratch.
You just find what you want, choose your
filament, and then print. With the AMS2,
you can do multicolor printing. So, it
just makes projects that much more fun.
We've also made these little window
cushions for the dogs because despite
being 12 and 13, they still think they
need to hang out the window, which makes
me very happy that they do. but it also
gives them a nice little place to rest
their head while they're driving. Beyond
useful. This is a rake and shovel holder
organizer for the garage. We have about
1 million things that need a home. So,
I'm going to be printing a ton more of
these and putting them all up in the
garage to hold everything on the wall. I
did this with the tough filament, so
it's extra strong and sturdy. Check this
out. This is my 3D printed vase that I
made with translucent filament. I've
always wanted to use that. And the best
part is it will never break. And the P2S
is actually quiet enough that it can
live in our space. It also has autoflow
calibration, which helps take a lot of
the guesswork out of getting smooth and
consistent prints. It is true that
Bamboo Lab makes everything as easy as
can be. The instructions were the best
I've ever seen. And when you introduce a
new filament to your printer, it can
automatically recognize what it is
because it has an RFID,
which is basically like a barcode. And
so you spend less time worrying about
settings and more time printing and
enjoying