Video summary
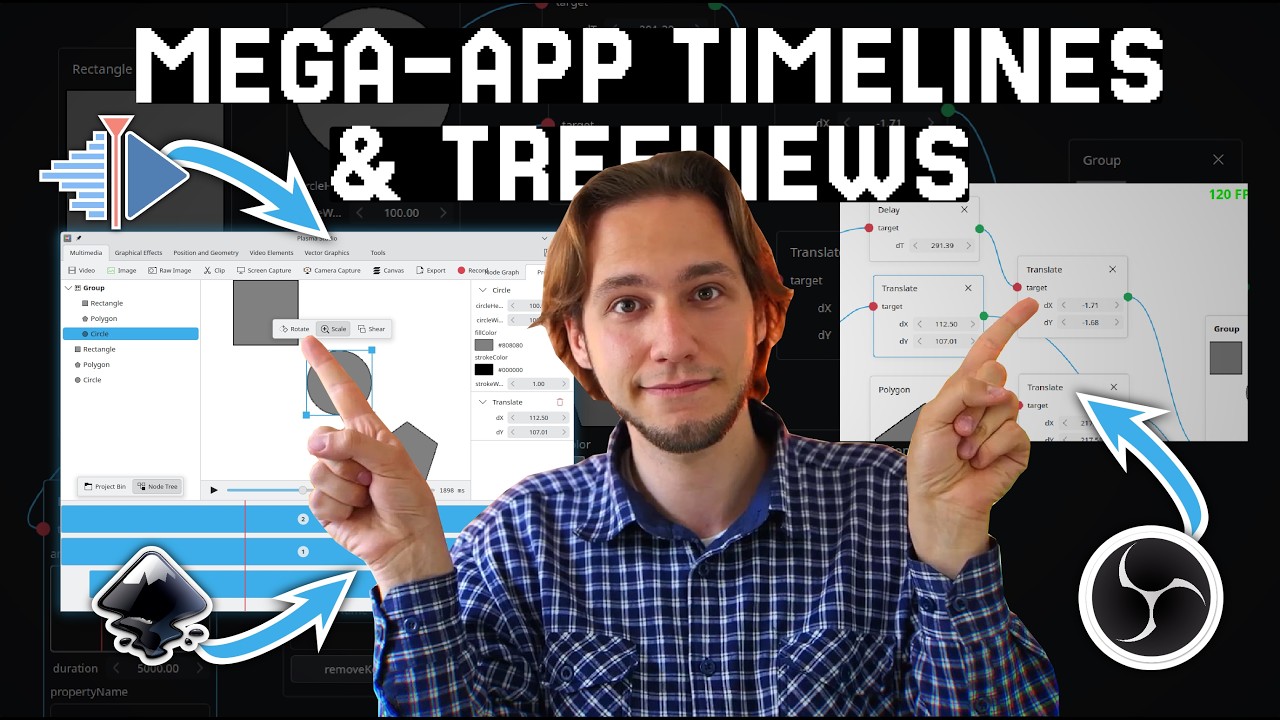
The developer is showcasing significant progress on a free, open-source all-in-one creative application that combines video editing, vector graphics, and OBS-like streaming capabilities. This update marks the fourth week of development and introduces a completely redesigned user interface with a focus on usability and aesthetics. A major improvement is the ability to drag and drop media files directly into the node graph, where they are automatically embedded as nodes; this functionality now supports videos, images, and raw camera files, with audio support planned for the future. The interaction model has also been refined to allow users to activate nodes by double-clicking them, which makes their titles bold in the tree view, while a new preview section enables real-time playback and direct parameter adjustment within a right-hand sidebar.
The core of the application revolves around its node-based architecture, which has been enhanced with powerful transformation tools and compositing features. Users can now manipulate elements by moving, scaling, rotating, and shearing them directly in the preview window, with these changes automatically reflected as matrix transform nodes in the graph. The system supports advanced masking techniques, allowing users to apply effects to specific parts of an image using polygon masks or other geometric shapes without needing to group every element. Additionally, the interface includes a project bin similar to Kdenlive for managing unused assets and a timeline that syncs with the node graph; while the current timeline lacks multi-track support, future updates will allow for vertical stacking of clips and more sophisticated editing workflows.
Despite the rapid development pace, the application is not without its growing pains, as the developer openly discusses several bugs encountered during testing. One notable issue involves the order of operations in transform nodes, where applying a rotation can inadvertently break subsequent scaling or positioning actions because the matrix transformation occurs before the rotation rather than after. The developer also highlights instances where low-resolution assets appear pixelated due to texture size passing errors in specific composite nodes, emphasizing that while the codebase contains some AI-generated sections and known flaws, it remains functional for experimentation. To address these limitations and move forward with robust video rendering capabilities, the creator is actively seeking assistance from the community, specifically inviting users with expertise in QML and video rendering to help solve the challenges of exporting rendered content within the application's framework.
Looking ahead, the project team plans to shift focus toward thorough testing and bug fixing rather than adding new features in the immediate future. The developer intends to refactor underlying code structures to ensure stability before releasing a more polished version, potentially aiming for an alpha release that could open up formal fundraising opportunities. Community involvement is crucial at this stage, with a call for logo design submissions and feature requests via a survey link provided in the video description. Ultimately, the goal is to evolve this prototype into a fully functional, professional-grade tool that rivals existing software while maintaining its open-source roots, relying on community support to overcome technical hurdles and refine the rendering engine.
Read the full video transcript
I am building a new free and open source
video editing vector graphics OBS like
the everything creatives application and
this is week four of development and
I've got a lot to show since last uh
two weeks ago. So, let's see. This is
how the application is coming along
along. This is the UI
and well, there's many changes. Firstly,
now previously you added nodes like this
and you can still do that obviously, but
now you can actually take videos and
files and just drag and drop them and it
will automatically embed them. So,
that's cool and it works for videos, it
works for images and it works for video
camera raw images as well. So,
everything is supported and in the
future we're going to have, you know,
um audio files as well, but audio I
still don't have that. And uh you can
now select nodes like this and when you
select them and go into graphical
effects or anything really, you can now
actually apply a node by just clicking
on it and it's going to automatically
create it for anything just like this,
which is much easier. Also,
uh not only you can select node,
but you can activate node by double
clicking them and you can see that the
title gets uh bold and well, how does
that work? Well, basically there's a new
preview section that allows you to
actually see what's going on and uh
well, you've got the preview, you can
play it, you can stop it
and you've got a right sidebar with all
of the nice settings that you can change
directly within the same sidebar and you
can go ahead and apply more effects like
vibrance and they're going to
automatically be added into this sidebar
and vibrance is also a new node uh in
the sense that night works much better
and it also has a protect skin tones
option,
which is extremely useful when you're
editing photos with people. And
let's add something like local contrast,
which is also a new new node since last
um
couple of weeks and you can see that
uh it's a node, it does things as you
would expect. So, I think that's pretty
cool. And on this side of things, you've
got a tree view. And I'm going to show
you that it's a tree view. Actually,
first let me say that
you can see that the UI here for all of
the options has been completely
redesigned and I think that now it's
much prettier.
I think the design is much cooler and
you can move them like this and uh
uh you can double-click to insert an
exact value. And also for exposure
nodes, I was almost forgetting that. Uh
you got uh show color wheel that allows
you to actually change the color of the
image like this.
And you have it here and you also have
it in the tone equalizer.
Uh it's so-called that you can just
click and it's going to be added. And
you can change black levels, highlights
levels, mid tones, everything as you
would expect. But also, you have the
color wheel to change the color of just
one specific uh you know
uh how do you say? Like brightness level
or something. And of course, you can
just
collapse all the nodes if you only want
to to see something. And it's also going
to give you the settings of the parent
node, which is the video that we're
actually seeing. And as always, the the
playback is going to go super fast
because all of this is hardware
accelerated.
And then we've got a tree view on the
left and I'm going to show it to you by
adding a polygon on top of the video,
and I can do that just by drag and
dropping it here. And you can see the
polygon. It's really small, but
we can actually edit it. And you can
also see that we've got now a timeline
in the bottom because
what happened by drag and dropping the
polygon is that
a group was created, and we see both the
video and the polygon within that group.
And the group is selected, so we got a
preview that. Here we can select video,
select a polygon, which is synced with
selection here on the node graph. And
you can also double-click elements just
like in the node graph to preview them
specifically. And everything that you
select, you're going to see all the
options on the right. So, you can like
click on the polygon to see
the the specific settings of the
polygon, and click on the video to
change the
stuff on the video. And um
another very cool thing, now you've got
a UI to actually move things around, and
you can scale them, you can rotate them,
and you can even shear them. And
everything is going to be added as a
matrix transform node. In the future, I
would like this node to actually be
rotate, scale, and shear separately, so
you can, you know, edit them and animate
them easier, but right now it's just
that matrix transform.
And, you know, you can apply effects to
this as well just by clicking on them.
As an example, we can blur things just
like this. And you know, it just works.
And the cool thing is that everything
that we do in this preview
is automatically also synced in the node
graph. Now, it's not exactly sorted in a
nice way. Let me clean this up. So, the
nodes do overlap a bit, but if you move
them around, here we are. Everything
that we applied in the preview is now in
the node graph, just like that. And you
can do some pretty cool stuff in here.
As an example, let's give us some more
horizontal space.
Uh
what if we want to edit in a image just
part of the image? This is extremely
common in photography, as you well know.
Well,
you can do that because we have in
position and geometry a mask element,
and we can use this element instead of
putting it inside a group. Double-click
to remove the link. We can use it as a
mask overlay, and we can use the base
picture as a background. Like this, and
then we can put this back into the
group, and that's just going to work.
And we If we go back to the preview, we
see that the node tree actually tells us
the relations between the elements.
We've got the group with a video and a
mask with a polygon and the video, which
is the same video. If you select one,
the other one is automatically selected
because it's the same video. And if we
select the mask, well, now we can
actually apply some effects just to this
place.
Like I I don't know, let's um put
something that goes completely crazy.
Actually, let's maybe I don't know.
Uh
where is saturation? Let's make it
gray. Okay, like this. And you can see
that it only applied where the polygon
is. Then, again, we can just take it and
drag and drop things around, and the
effect that we are applying is going to
move as we move things around.
Isn't this lovely?
Like sure, it's something that all photo
editing applications have, but
this was done in a couple of weeks.
And
I do particularly like,
in my opinion, the fact that you can
switch between a lot of transform
settings. We've got rotate, scale, and
shear. In the future, you you're also
going to get perspective, which I didn't
have the time to fully
add. It was giving me issues, but you're
going to get that as well. And you can
just sort of do everything that you
would expect. Now,
there are so many things to show you
that I got a list. Let me see if I'm
forgetting something. Um so, I did show
you that and then different views. Okay,
transforms, blur, tree view approach.
Ah, the project bin. Sure, I was
forgetting that. So, uh we've got not
only a node tree,
but also a project bin. A project bin is
like the project bin in Kdenlive, if
you're accustomed to that workflow. And
basically, it tells you all of the input
elements that you're going to use in
your project, like the video and like
the polygon.
Now, the cool thing is that
let's get Actually, let's stick to this.
If I add a video, another one, I can
just drag and drop it to the project bin
and it's going to be added to the
project bin. And as always, I can click
to select it and double click to preview
it. And we can play it and it looks like
this.
This is all from an article on my
website.
And if we go back to to my group here,
like this, well, now I can actually
Well, right now we have the video, we've
got the polygon, and the timeline. And I
can just drag and drop this to be also
on the timeline.
And you can move it around like this.
And you can also take uh on the sides to
clip just one portion of the video.
And now, we did that. And again, we can
just select it in the preview. We can
move it around if you want. Now, we're
going to have both videos one on the
side of the other. And if you want
something that's even cooler, Let's me
add another video to the project bin.
There's also a filter button that tells
you all of the elements that are
currently in not used in any group. So,
all unused um
setting assets that that you have.
So, I think that's also
uh a new useful view to have. And
basically, what this does is is just
tell you all of the nodes in the node
graph that are input nodes like this and
that
uh you can use or maybe that you don't
use.
So, okay. I showed you that. The
timeline, I just showed you the
timeline. And by the way, as always, the
timeline doesn't magically change
things, but um the timeline also changes
the
node graph, which gets busy pretty
quickly, as you can see.
And uh what we got here is that it added
a clip node that selects just part of
the video. And then a delay node that
moves the clip around. So, all editing
that you do in the timeline view
uh is reflected in the node graph. And
in the future, I promise that the node
graph is going to try to stay cleaner as
you do this. It gets pretty busy pretty
quickly right now.
Um
Node groups, by the way, as you can see
here, right now we have got three
elements.
And you can add how many as you would
like. Uh you can even add the same
element multiple times, but as you can
see, every time you connect something,
it creates a new uh target for you to
add even more things. And as always,
it's going to be added on the previous
one. You can move things around, and
it's just going to work like this.
Um
Yeah. Whoa. I need a more space to see
all the other ones. Okay, like this.
Right now, uh the timeline thing doesn't
have like timeline tracks uh as you
would expect from Kdenlive, like uh
right now they're just all one above
each other.
But in the future, you will be able to
have different tracks. And I was all
also like experimenting with the idea of
being able to take a clip in the
timeline and drag it up and down to
change the X index so that something is
shown above something else if needed.
And
also in the future,
you will be able to click on a clip and
see the settings as well. Right now, you
just have to click on the uh
clip in the
in the preview and you've got all the
settings here. And you can also like
remove them like this. And you can
remove the video itself from the node
graph entirely like this and it's gone.
So that works.
What else? Uh blah blah blah blah blah
blah.
Okay, so I think that was everything
that
I changed. It's a lot of stuff. I went
through it very quickly, but
um I think it's pretty cool. Like it's a
lot of development for 2 weeks' worth of
development. You can go see my previous
devlog if you haven't. Um
And one thing that I want to say a
couple of things on the project as a
whole. Firstly, if you want to help,
thank you.
Uh there should be a link in the video
description with a form for you to
submit like ideas, mock-ups, things that
I should implement, logo ideas. I I
really need a new logo. Currently, I I
did make one, which you're seeing here,
but
uh don't quite like it. I've got
proposals from a few few friends that
I've conducted. Some are interesting.
We're in the brainstorming phase, so
just go ahead and submit some proposals.
Um
But yeah, everything that you think
should do, should implement, thing
just because I got so many comments in
my last video with cool ideas that I'm
going to forget about. So, if you just
put them all in the survey, at least I
know that I'm not going to forget about
them.
Um also, if you want to try this out,
well, it's it's there's a repo uh
repository also linked in the video
description.
Um and
well, you can build it. You can try it
out.
It doesn't work great as in it has a few
bugs that you should be aware of. I'll
show you one just for, you know,
funsies. But uh basically,
uh let's um
add Let's go into preview. By the way,
you can just drag and drop things
pretty much everywhere and it's
supported. Like I just dragged something
in the preview and it loaded it
automatically. And let's also load a
polygon. You can even like take the
project bin and drag and drop a polygon
into the project bin and that's going to
work. Everything just works. But let's
stick to the node there.
So,
um
well, we've got the matrix transform
that allows you to move things around,
right? Well, if you apply a rotate um
thing, you can rotate the thing just
like this.
And uh let's put 90.
And the thing is that now the matrix
transform that the drag and dropping
things changes is before the rotation,
which means that uh
everything breaks. It should be after.
Uh as an example, if I try to scale
things,
uh yeah, this is not how it's supposed
to be scaling things. So, this is a bug.
Probably I should move the matrix
transform after the rotate somehow or
add a new matrix transform after the
rotate. But, you know,
yeah.
And everything is not very clean.
But But, you know,
again, I I would say this is moving
pretty quickly. And uh so, if you want
to try it out, there's the repo.
Code-wise, it's okay.
There are some good parts of the code,
some bad parts of the code, some parts
that are entirely AI-generated. Uh
hopefully, that's going to go away soon.
And there's also uh
Fedora uh COPR, I think it's called,
build uh that, if I manage to uh I'll
still put in the video description. If
it's not there, just come back to the
video in a couple of hours and it's
going to be there, I think.
And lastly, donations. Um I received a
couple of donations for the project uh
when I uh published the last video,
which is cool. Thanks.
Um but also, I do want to run a proper
fundraiser for this as soon as it's like
an alpha or something.
And uh
that's not yet the case. So, if you
wanted to donate to this project
specifically, well,
you can always just send me some
donation to the channel. That's always
appreciated. But, for this project
specifically, you can just wait and
there's going to be a proper moment to
do that if the project is actually
successful.
Fingers crossed.
I so I think that was everything.
16 minutes. I've been very quick. What
else? I mean,
uh
I do want to show you some some cool
stuff. But,
what else I can show you?
Uh well, if I I don't want to show you
any compromising picture or something.
Uh
let's load this
in the preview.
Yeah, you double-click to get to
preview. And I mean,
this I would
Oh, yes. If you click on circle, it's
going to create a new circle and it's
going to select the circle. So,
here's your circle. Thanks.
Um
Double click to to preview. Let's drag
and drop the circle here. One cool thing
is that this circle
is 100 pixels by 100 pixels, and I can
actually change that to like 10 by 10.
And as you can see
and this is the cool part. Last week or
2 weeks ago, I told you that I made some
funky code to make sure that even
low pixel things after resizes would
show as full resolution. And so, it's
not pixelated. And that's cool.
And
we can put another, I don't know,
rectangle. Again, same mistake. Drag and
drop the rectangle. I'm going to change
that, I think.
And then I go can go back to to the node
graph. And we've got rectangle, we've
got the circle.
And let's actually
um the exclusion.
Actually, let's not do that because I
broke it. My bad.
Let me show you something else then.
That's what happens when you develop too
quickly and you miss things that are
breaking from your changes.
Um
let let me do the same trick as before
with um
uh
mask, but
I can also do compositing.
That's
that's the other thing.
Like this.
And like this.
And here.
As you can see, I can
do anything kind of compositing. You've
got the setting here, so you can just
select what you want.
Uh
soft light, hard light, hue, like this.
And you can still drag and drop things
around.
Now,
as before, lot of bugs. As you can see
now, it's pixelated before because
probably there are some like um
mistake in how I pass the texture size
in this specific composite node. It
happens.
So, what I do want to you to do is
actually go ahead and try some things
out, and I completely forgot one thing
that I was meant to show you. Sorry.
Last important thing, and then I I
end this video.
Uh let's select the group. I can I now
have an export node.
And export node does not have any
texture, but it allows you to select an
export path. Let's do test.png.
Yes.
And you can save the image. So, now
your group,
which is this one, should be saved as
test.png
in pictures.
test.png, and it is.
So, now you can actually save images.
Now,
you probably also want to record and
render videos that you edit in these
applications.
And here's the final thing that I just
have to tell you.
Please help me out here. If you have any
skill on like uh handling video, if you
have any idea of how I would render QML
item within a QML application, hit me
up. Send me a message.
I still haven't figured it out. I do
have a proof of concept, but I kind of
hate it. It's entirely AI generated. I
don't want to completely rely on some
code that I don't understand at all. So,
if you have that particular set of
skills,
this is a good time to help me out.
But everything else
works and I understand the code, so
that's good.
So thanks everybody for following and I
guess that we'll see in again a couple
of weeks with more development. I do not
expect to like have a lot new in the
next couple of weeks, but that's just
that's just because I'm going to focus a
lot on like
rendering and making sure that I don't
mess up
little bugs here and there. So I'm going
to test thoroughly and change a bit of
how things work under the hood. So less
cool things, but still I'm going to work
it work on this application a lot. So
thanks everybody for following this
dialogue and hopefully
this project continues.