Video summary
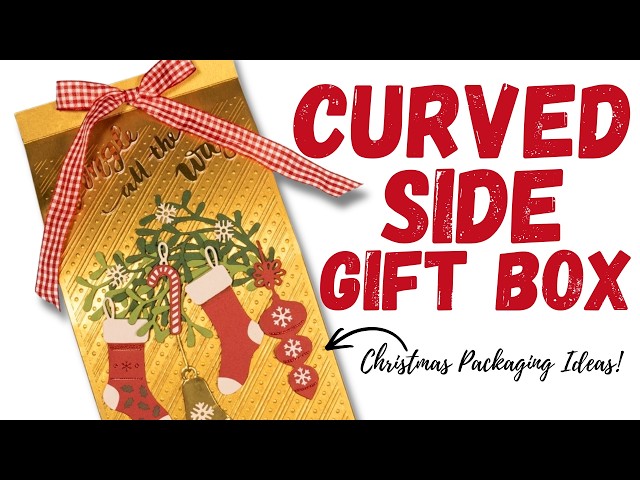
The video provides a detailed tutorial on constructing a curved side gift box using a standard A4 sheet of cardstock. The creator begins by explaining the precise scoring measurements required along both the short and long sides of the paper to create the necessary folds for the box structure. After marking these lines, the viewer is instructed to fold and burnish them before proceeding with specific cuts that transform flat sections into functional tabs and remove excess material to achieve the desired shape. A key step involves creating a curve at the top edge by cutting along the scored lines and removing small wedges from the sides, which gives the box its elegant, rolled appearance once assembled.
Once the base structure is prepared, the tutorial addresses how to incorporate decorative layers that fit within the curved design. The creator trims embossed cardstock pieces to specific dimensions so they can sit neatly inside the box without distorting the curve. To maintain this shape permanently, construction glue is recommended for attaching these internal layers, as it dries hard enough to hold the slight curvature in place. The assembly process then moves to joining the sides of the box using red tape or additional adhesive on the coated cardstock, ensuring that all flaps fold securely over the base to conceal the glue lines and create a clean finish.
The final stages of the project focus on decoration and finishing touches to elevate the gift's presentation. The creator demonstrates how to arrange embellishments like "Jingle All the Way" tags along the curved top section using hot glue, followed by punching holes in the lid to attach a ribbon handle for carrying. To prevent fraying, the edges of the ribbon are sealed with heat from a lighter or similar tool. Additionally, the video showcases the use of Snow-Tex, a product that creates a realistic snow effect and dries rock hard, allowing it to be stained for custom colors. The presenter concludes by displaying the finished box alongside previous designs, highlighting how these techniques result in an opulent and versatile packaging solution suitable for various gift sizes.
Read the full video transcript
I'm keeping it the size that it is. It's
a piece of A4, so 8 and 1/4 by 11 and
3/4.
Along that short side, you're going to
score at 5 and 7 and 3/4.
And then rotate so that 1/2 in tab is at
the bottom, and you're going to score at
2 and 3/4. But you want to now lay it
down along the long side so the 1/2 in
tabs at the top, and you want to do a
score line at 5 in just in that 1/2 in
section. Ignore this one. And then you
also want to do the same marker at 5 in.
Just a little notch on this section
here. You're going to cut down to these
points here. So if I lay this one down,
you can see where I've cut down to the 5
in.
That's all the scoring. Fold and burnish
all your score lines. Okay, I'll just
bring this one in as a reference. So you
want the base facing you, and you're
going to cut up just to the first score
line.
So, and then again on this one.
Just [snorts] the first score line, and
then remove that. Go on a slight angle
just to remove that piece there. We want
to turn this into a tab.
And then I'm also just going to cut
away. It's mainly the rest of the score
line that I'm removing.
Just take a little little wedge off of
the sides there. And then along the tab
here, you want to cut down that 5 in
score
score line.
And then cut all the way down and just
remove
Cut away the score line.
Okay? And then this one here you're
going to cut again down to where you
just put that little marker
at 5 in. And
And then again, I'm just going to remove
the score line.
I want to keep this nice and straight.
And then you just want to find the
middle here. I think it was 1 and 3/8.
Just mark the middle, and then you're
going to cut from that point. You might
want to draw a line to follow. If you've
got long scissors, it's it's pretty
easy. But again, don't worry if If not
perfect. It's going to fold in the
sides, you're not really going to see
this.
And then again
And then I just need to take again a
little wedge off of that. So, yours now
should look like this. Ignore, like I
said, my little marks there, you're not
going to see them, I'm going to cover
them. Put it back in your scoreboard.
You just want to score at Did I do 11
in?
Let me just double-check.
Yeah, scored at 11 in. You've got 3/4 of
an inch little tab there at the top. So,
then just fold that both ways.
And then before we stick it together,
you just add
a curve onto these
sections here, just to where you've cut
it.
Okay,
like so.
Now, you might want to stick your mats
and layers down
whilst it's like this.
I'm going to stick these down when
they're together, but I've cut myself
here two pieces, and these are the ones
I've embossed. I'm going to trim mine
down cuz I
obviously I use my 8 by 8 embossing
folder, and the cardstock's bigger than
that. So, I'm going to trim it so that
it ends up being 7 and 1/2 by [snorts]
4 and 3/4, and they're going to sit in
this section. So, I've done tone on tone
because I think all of this, the greens
and the reds built up on top of that
texture, will look really nice, very
opulent. So, I'm just going to trim
those down, stick them on, again add a
little bit of shape into them.
You want it to kind of stay in that
curved shape. So, if you're going to use
like a construction glue,
>> [snorts]
>> when that dries hard, it will keep the
box with that slight curve at the top.
Okay, so that's all stuck down. So, now
I'm ready to assemble. So, we want to
add some glue onto the sides here. Now,
because it's a coated cardstock, I'm
going to use my red tape to stick down
the sides. I use the construction glue
on the base.
It would just take a little bit longer
to dry, but that's okay. But for the
side bits and for the video, I'm just
going to
pop a couple of layers.
Line up your base score line.
And just run that along the side.
Like so. And then again, add some glue
or tape to the next tab.
And then fold that over.
And fold this one over.
And now you you've got your box coming
together. So decide what you want to be
the front or the back. Yeah, keep this
one as the front. So I'm going to fold
in the back one.
I've my glue all onto the base.
Fold in the sides and then again, add
your glue.
And it should all nicely conceal under
there. And then flip it over.
And
just go in there. Just spread out that
glue. Make sure
that's all
secure.
So whilst that's drying, I'm going to
then get straight into the decoration.
So I just want to arrange
I think I might have the Jingle All the
Way
maybe on the top, on the curve. Yeah, I
think along the top section. Maybe down
there. I don't know. Maybe this might
look better.
Or hanging down.
I'm going to try. I'm going to have a
play around. I'm going to use my hot
glue.
Um just so I can build that all up as
well. Um and then once I've done that,
I'll just show you how to add the
ribbon. That's everything stuck down. I
think it looks lovely. So next I want to
punch my holes
in the top here. I'm just going to mark
roughly where I want them. Looks like
what that is. 1 and 7/8. So I need to do
the same. I'll do 1 and 3/4 or 2.
Squeeze together there. Oops.
Okay. Now I've just had a play around
with this and I've actually cut away
um 2 in.
And then I've just done a you know, that
triangle again. I mean, depending on the
size of the gift that you end up putting
in here.
I'm going to take that right out. Just
to put this in. You might not want yours
to be this short, but basically you just
want to pop
your hook and loop.
Trying to get mine in.
Pop it in in there. And then just bring
this across.
Okay? So, you've got something like
that.
And then just from the side, just just
having that kind of
rolled side just gives it
I said that kind of more elegant look.
And I like quite a long bow. And then if
you've got a lighter or anything, just
seal the edges there.
Just so it doesn't fray.
And there is the finished gift box, gift
bag, depending on whether you add the
handle. I have used some of the
Snow-Tex.
This stuff's really cool. And what it
does, it gives you this lovely, really
realistic snow look, but it dries rock
hard. You can stain it. I've used it in
lots of videos now. I think I do it that
way. There you go. You can see it
better. All the dimension, the embossing
folder there.
Get the shine from the sentiment and
some of the decorations.
I think it's a gorgeous. And I just
thought I'd bring back in
last week's one.
You can see that one again.
And the
first one I did.
So, for anybody maybe that's just
joining
the videos now.
There's three.
Oop. Trying to hold them all.
Lovely gift box ideas
with those toppers. And uh yeah, I hope
you like it. And as always, I hope
you've enjoyed what I've shared today.
And until next time.