Video summary
The speaker presents a project demonstrating how to construct an MRI scanner for under £5,000 by debunking common misconceptions about their complexity and cost. Contrary to popular belief, hospital-grade scanners do not require spinning magnets, extremely strong magnetic fields like those found in medical facilities (1.5 to 3 Tesla), or superconductors; instead, they rely on stationary solenoid coils that can operate with much weaker fields while still producing usable images. The core requirements for a functional MRI system are actually quite specific: a uniform main magnetic field, gradients capable of creating small variations in that field to locate signals spatially, and an RF transmitter/receiver chain tuned to the amateur radio frequency band (52–58 MHz). This last point is crucial because it allows builders to utilize inexpensive off-the-shelf components rather than expensive specialized equipment.
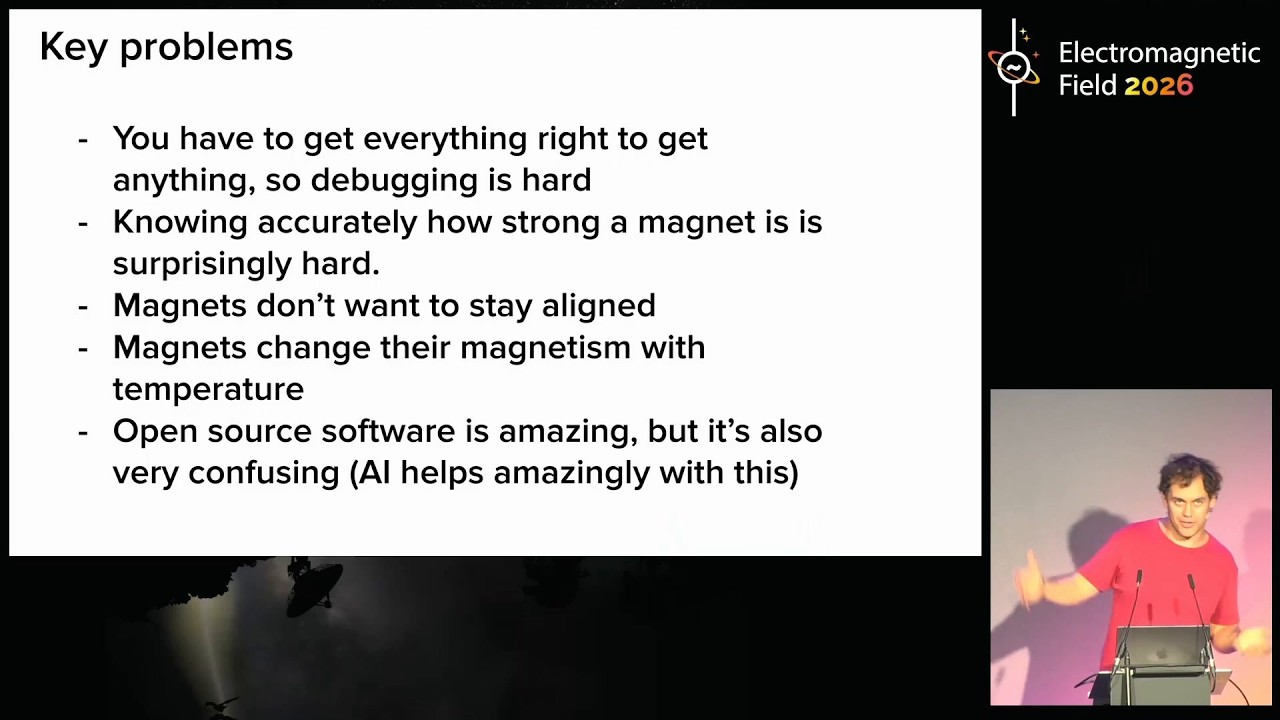
The technical process involves five fundamental steps: aligning hydrogen isotopes in a magnetic field so they spin at a specific resonant frequency, applying an RF pulse to resonate them and increase their signal strength, using gradient fields to encode spatial information through frequency and phase encoding, listening for the returning signals which decay at different rates (T2 relaxation) based on tissue type, and repeating this cycle many times to improve the Signal-to-Noise Ratio. The speaker explains that while the physics is elegant, building a working system is incredibly difficult because any break in the signal chain results in no output, making debugging nearly impossible without precise knowledge of magnetic field strength and uniformity. Furthermore, practical challenges such as magnets drifting due to temperature changes or mechanical creep in 3D-printed parts require constant retuning and compensation during operation.
To overcome these hurdles, the team iterated through several designs, starting with a simple horseshoe magnet array that eventually proved unstable, leading them to develop circular Halbach arrays made from 3D-printed forms filled with magnets for better flux containment. They also had to build custom battery-powered supplies and coils because standard power sources introduced too much electrical noise at the nanovolt levels required for MRI detection. The final system integrates these components into a rack-mounted unit featuring FPGA signal generation, RF amplifiers borrowed from amateur radio equipment, gradient drivers, and a Faraday cage enclosure to minimize external interference. Ultimately, this project aims not just as a hobbyist achievement but as a step toward democratizing medical imaging; by drastically reducing costs, cheaper scanners could enable widespread early cancer detection through frequent screening of large populations, potentially saving lives that are currently lost due to late-stage diagnosis caused by the prohibitive expense of traditional MRI technology.
Read the full video transcript
[applause]
Thanks guys. Uh yeah, so here's my talk
which is building an MRI scanner for
under 5K. And I thought uh the the best
way to start this would be by taking uh
a little 3D printed bit uh of plastic
and putting a bit of butter in it of the
EMF logo. And then you see the thing on
the right is our MRI scan of that 3D
printed uh part. So you can see there
we're getting nice small details. Um you
can see that sweepy line thing is about
0.5 mm which doesn't sound that good,
but for an MRI scanner that's the sort
of resolution you'd be getting if you go
into a hospital to get one. Obviously,
we're not built a hospital grade MRI
scanner for under 5K. Uh, but we have
got something which is getting decent
images out. And this is the hardware we
used to do it. I'll talk in a bit more
detail about exactly what's involved in
those different parts. We kind of got a
journey of like stage one, we're getting
an MRI signal to like better and better
resolution and better pixels. So, by the
end, we're scanning things like eggs and
you can see quite a lot of detail on
them. So, um, like how is this possible?
Like I think when you talk to most
people at MRIs, they're like, "How could
you make an MRI for under 5K?" The ones
in hospitals definitely don't cost under
5K. And I think this leads to a number
of misconceptions about MRI, which makes
sense why people have them, but they
aren't fundamental to having a working
MRI scanner. So, the first is you need a
spinning magnet. Now, this kind of makes
sense. If you go into a hospital, you
see this like donut thing and you're
like, "Oh, there must be something
spinning inside it." There isn't
anything spinning inside it. It's just a
solenoid coil. There is a device which
spins. It's called a CT scanner and that
like spins a uh X-ray rounds and makes a
bunch of different images. But MRI
scanner doesn't need a spinning magnet.
Perfectly stationary. Um the second one
is you need a really strong magnet. So,
if you know anything about MRI scanners,
you'd be like, "Oh, if I have any metal
on me, it'll like fly into the scanner
and crush me." And that is true in a
hospital one. Um, they normally have
about 1.5 Tesla to three Tesla scanners,
which is a big strong magnetic field,
which could be dangerous, but you don't
need a strong magnet. Strong magnets
help. So, the stronger the magnetic
field you have, the more signal you get,
and so the better images you get. But it
works for any magnetic field, regardless
of how strong it is. In fact, people
have done MRI on the earth's magnetic
field. Uh but that's a story for another
time. The final thing uh the final
misconception is that you need
superconductors.
So uh there are certain things where you
do need superconductors. So if you ever
seen those cool things where you put a
magnet on a floating track, that needs a
superconductor to work. MRIs don't need
superconducting. There's no kind of
superconducting effect that's happening
with them. It's just the only way that
you can make a strong magnet is by
having a coil of wire and putting a lot
of current through it. And unless you've
got a superconductor that gets really
hot and would melt. So if you don't need
these three things, what three things do
you need? So you need three things. One
is a uniform magnetic field. So the
scanner we built was about 100 mila
which is approximately 6% of the field
strength of those um ones that you get
in a hospital. And then you need
something which makes small changes in
that field. So the one we built, you've
got 100 mila main field and then you
change that field by about one millla
from one part to the other. And if you
ever been an MRI scanner, you'll know
they're really noisy. That's that
changing magnetic field. It's
essentially MRI scanner kind of shaking
itself. Um because when you change those
magnetic fields, they're not infinitely
rigid. So they will ride bait and that's
what you hear as noise. And then the
final thing you need is an RF
transmitter and receive chain. And
luckily for the thing that we're
building about 100 milliter that hits
you right into the amateur radio band
van. So between five two to five mehz.
So that's great because it means you've
got lots of cheap radio amplifiers that
you can use which is one of the reasons
why you can make this so cheaply. It
doesn't mean you have to do anything
everything in a far cage because you've
got all of the amateur radio stuff
coming in uh and causing you noise and
interference and you don't want to be
causing noise and interference to all of
the amateur radios around. So uh that's
the three things you need. Um and I
think before going into a bit more of
what we've done, I'll give you like a
very brief overview about how MRI works.
So how to do MRI in five steps. Now
before I say this, this is going to it's
very hard to pitch it to all of you
guys. Some of you guys will totally
understand this and I will be explaining
things you totally know. Some of you
this will be too complicated and too
detailed, but hopefully about 80% of you
will be will be pitching it to the right
level.
come and find me afterwards if anything
doesn't make sense or I've made a
mistake or simplified something and we
can talk a bit more about it. So the
five steps. So you need to align, you
need to resonate, you need to locate,
you need to listen, and then you need to
repeat. So let's start with align. We've
got these nice little diagrams
you can see. So if I go here. So the key
fundamental physics reason why MRI works
is if you put isotopes in a magnetic
field, they will start um like imagine
you've got a bunch of little tiny
compasses. Uh they'll align with that
magnetic field and start spinning and
they'll start spinning at a certain
frequency and the frequency is dependent
on the isotope. So what we do with an
MRI scan and what we've done with our
scanner is we use hydrogen because in
your body you have a lot of hydrogen
because you have lots of water. So
everywhere you've got fat, you've got
bone, you've got muscle, it all has
hydrogen isotopes in it. So you can pick
up the resonant frequency of hydrogen
for that. So what you do, you put a
uniform magnetic field, they'll all
start spinning or at least and not all
of them. That's kind of like some of
them will, some of them won't, but on
average they'll all start spinning in
the same direction.
So the second thing you need to do is
you need to resonate them. So this is
kind of the magic trick of MRI is if you
go too low a frequency and you put it
in, nothing really happens. If you go
too fast, you see the one at the bottom.
I realize these diagrams are probably
quite hard to see in this room in this
light, but take it from me. Uh nothing
really happens. But if you hear the
right frequency, you'll get these like
spinning compasses which will slowly get
wider and wider. And what that means is
like how magnetic fields are
electromagnetic fields the two are
linked hence this camp's name uh you can
isolate that frequency and that means
that it gets bigger and it will keep
spinning which means you transmit
something and then you can listen back
at the same frequency.
So then what you need to do is you need
to locate. There are two ways to do this
frequency and phase. So we'll start with
frequency because I think it's the
easiest to understand. So what you do is
you've got let's have a really simple
example. You've got three positions.
Then what you do is you put what's
called a readout gradient. So you'll
have a weaker magnetic field on one side
and a stronger magnetic field on the
other side. Again the small numbers I
was talking about. So your bulk field
was about 100 milites. This is about
like 1 mila difference from either side.
But what that means is they will have
different resonant frequencies. So the
top we going slightly slower than the
middle average and then the top one
slightly faster. and you read out this
sample at the bottom which is putting
them all together. So you've got a bunch
of signals of different frequencies
coming down together. How do you
separate them? Well, if you are uh an
engineer of any form, you will have
thought of fur transforms. So you can
just do a simple f transform and that
means everything from the first column
you can get a f transform of the first
frequency. Everything in the second
column, second frequency, everything in
the third column, third frequency. So
that's frequency encoding. That's one of
your axes. But images with like
one-dimensional images aren't
interesting. You want to have a
two-dimensional image. So you have to do
something for the different uh for the
second axis. And what that is is phase
encoding. Phase encoding is a bit more
complicated. So bear with me. Hopefully
I will explain it to at least some of
you.
So
what we have with phase encoding is
imagine you've got your top path and
then your second path. You apply a
gradient and you can offset it slightly.
So what's going on here is imagine we're
all on one frequency. All of that kind
of frequency encoding thing is done
which gives you your one vertical slice.
Then what you can do is as I said your
the the frequency at which it spins is
proportion of magnetic field strength.
So if you slightly increase it the one
at the bottom you can make that one spin
a little bit faster for a bit and then
go back to the same frequency. And what
that essentially does is it changes your
phase. So if you can see you've got
these two nice little diagrams here. So
with one, they're both in sequence with
each other. So you've got A plus B. The
second one, we've moved B 180 degrees.
So then you've got A minus B. And then
it's pretty simple maths. You add the
two together, the A's will add, the B's
will cancel, you get A. Um, you subtract
the two from each other. The A will
cancel with the A and the B will cancel,
the B will add with the minus B, which
will give you B. So that's a really toy
example for two lines, but you can
extend it to get as many lines as you
want. And it's kind of one of those
things you had in school, kind of many
equations, many unknowns.
And then the fourth step, bear with me
here, is you need to listen for it. So
this wouldn't be particularly useful if
you're getting the same signal back from
different parts of the image. But
luckily, different types of tissue have
what a different what's called a T2
time. So they decay at different rates.
So like you've got bone and you've got
fat and you've got muscle. they will all
kind of you know how was it was spinning
around and it resonated it slowly goes
back up so you don't get that signal
forever but you get it back at different
rates and those different rates mean
that you can see different tissues
so that's kind of the basic steps of MRI
which is align resonate locate and
listen but the final thing you need to
do is repeat now I won't go through the
math of this because I promise I won't
go through the math of this but
basically uh SNR is proportional to the
square root of the number of repeats so
it takes quite a a long time to like get
really nice images if you're doing this
in kind of a naive way because you have
to keep doubling the amount of time that
you're getting. And the reason why it
works like this um is basically your
signal adds up but your noise cancels
itself. Um but it doesn't cancel itself
perfectly. It cancels itself as a square
root. So basically your signal is
growing linearly, your noise is growing
as a square root. So combine the two
together and your SNR which is the
amount of signal to noise ratio um grows
with the square root of the number of
repeats.
So I'll go back to that slide I haven't
been the one that we made for 5K and the
various different parts that we had for
it. So this is kind of like a fun
journey of experimentation. Uh the one
on the first is uh on the floor we had a
bunch of different components. You've
got like a RF radio amplifier. You've
got a bunch of power supplies for things
and the first magnet array we've got
with a sample in it. And then with
playing around a little bit, we managed
to get our first MRI signal out of it,
which was very exciting. Now, this was
ignoring all of that gradient things I
was talking about. It's literally just
trying to find a resonant peak and get
it back. And then we gradually went with
more complicated designs. So, the first
one we've got, we put it in this uh tool
case kind of Faraday cage sort of thing.
We got this first image which looking at
now was pretty terrible but we were
really excited about it because it
showed that we got an image of something
there. Um we then decided that magnet
array wasn't working very well. So we
built a new magnet array. I'll show you
some pictures of that later. We got this
nice V which is a nice image of things.
And then we were like okay let's think
about it. Let's try and refine our noise
chain. Try and like make things better.
And we made this nice rack mounted
system. And then we've got like this
picture of egg you can see here which
isn't a chicken's egg. It's a quail's
egg, which is much smaller. If you've
never seen a quail's egg, just think of
a very large mini egg, which I think is
what they were based on. Um,
the cool thing about it is you can see
the egg yolk and the egg white pretty
clearly. And also this little bit in the
center, which I didn't really know eggs
had beforehand, but apparently they've
got a little bit of um going in the
center to help feed the egg essentially.
So, what made this so difficult? Well,
the first thing is you kind of have to
get everything right to get anything.
So, when I was doing this project, there
were lots of times where I'm like, it's
amazing that anyone ever managed to make
MRI work because you're kind of
exploring the world of sorry, you're
exploring the world of potential signals
and uh if one part of your chain is
broken, you just don't know it. You just
don't get any signal. So you could be
really close and then something was
broken and you'll just debug something
else and then that wasn't something you
needed to debug. So once you've got like
a working chain working, you can kind of
hill climb from it. But until you get to
that point, it's really hard to get
there. And one of the reasons why it was
quite hard to get there is actually
really hard to know how strong a magnet
is. So you can know approximately if you
buy a magnetometer off the shelf or you
do some simulations on your magnets. But
knowing approximately how good it is
isn't actually good enough for getting
the spin escode sequences that you need
for an MRI scanner. In fact, the
magnetometers that you buy, the way they
calibrate them is by putting them in
like an NMR or an MRI scanner because
that's the way that you can work out a
magnetic field the most precisely.
Um, you also have the problem that when
you put your magnets together, they
don't want to stay aligned. Um, so you
might get a nice welltuned magnet and
then it's kind of everything has
slightly shifted, which means the
magnetic field strength has changed
because it has to be so precise. That's
annoying. And the final thing is your
magnets change magnetism with
temperature, which is something that I
didn't really know about beforehand, but
like you run a scan and then everything
will slightly heat up because you've got
heat from your amplifier and things like
that. And that will mean that you then
get a slightly different magnetic field,
which means when you're trying to get
nice images and you're doing lots of
repeats, you'll slowly drift off
resonance and you have to compensate for
that. So we had to do a lot of work to
make sure that we were retuning uh as we
went along to try and keep uh
compensating for that change in
temperature. And then the final thing is
open source software is amazing. Like
there were loads of open source packages
we use. There's this big open source MRI
project which we base lots of our stuff
off, but it's also really confusing and
difficult to debug and some of it's
written in some languages that no one
has used for ages. um or just kind of in
a Python package that doesn't install.
And this is one of the things where um I
don't know if you're in the previous
talk, AI is actually really great at
this. So you can point AI at one of
these repos and help um it'll help you
debug it and like put it into a system
that works for you. So this isn't like
this isn't like saying anything bad
about the open source software that we
used. It was amazing and really grateful
to people doing it, but also thanks like
open a anthropic or the people who
making AI to help that kind of
distribute that kind of scientific
knowledge into new projects. Um, so if
you've ever had a kind of you found a
GitHub repo that didn't work for
something, it's actually really quite
good to just throw AI at it and be like,
can you rewrite this? Can you explain
it? They generally can understand it
quite well. So, uh, let's go through
some photos of things we did. So, this
is our first magnet array. You can see
what we've got here is a h howback array
of permanent magnets that we've printed
into some 3D printed formers and then
you've got a various coils and you've
got a bit in the middle for hanging our
sample. So the way that this works is
you've got one magnet here and then
you've got the other magnets that are
rotating around. Basically the sideways
parts cancel out and then you get a nice
vertical field because of that. Uh,
unfortunately, as I was saying, the
magnets like twisting and 3D printed
stuff is creeps slowly. So, you might
get a nice magnet at first, but slowly
it will get worse and worse as you go
along with it. And the bit in the
center, what we did was we printed these
uh 3D printed things and put uh some
jelly inside them. And that was where
you got those first images out. You just
kind of hang it in the center. Um, but
this was kind of working, but we're
like, "Oh, we need to redesign a new
magnet array." So what we ended up with
is we're like we'll print some magnetic
discs. So 3D printers great thing if you
want to make anything cheaply but
including an MRI scanner. Maybe I made
the talk we 3D printed an MRI scanner.
Um so you here we've got our discs. So
you have a disc of magnets. You print it
out and then you push magnets into that
and then you've got uh two plates here
and you stick it on the plates and then
this is our kind of magnet scanning rig
to work out how uniform it is. So, uh,
the nice thing about those Hback arrays,
um, the circular ones, why people use
them, is because they're nice and light
because all of the flux is stored inside
that loop. If you're using this, which
is like more of a horseshoe magnet, you
need some way of returning the flux from
one side to the other. So, we've got
these nice steel plates at the back of
the front. And that's good and bad. It
gives you a nice homogeneous field. It's
a lot harder to simulate because if
you've got a series of magnets, you can
just add them up. Uh whereas if you've
got something which isn't a magnet, it's
a an iron yolk, you kind of have to do
FEA simulation to work out how things
are going through that. So we did that.
We just kept adding steel until we
weren't um saturating our yolk. Uh and
then we mapped it. So what we did is we
bought a cheap CNC machine off eBay. Uh
and then we strapped a magnet to it. And
then what we could do is we could get
these nice nice little plots of our
magnet homogeneity which I realize you
won't be able to read any of the numbers
on them. But essentially uh even color
means that it's homogeneous. And by the
one at the right we're about 250 ppm. So
250 parts per million of homogeneity
which is what you need effectively to
scan something. So it really is you need
a very homogeneous field to get a nice
nice image out.
Um, the other thing we discovered was
that if you get a power supply off the
shelf, it's quite noisy. So, they're
quite good for most applications.
They're not good for when you need the
nano volts coming out of an MRI scanner.
So, we had to build our own battery
power supply that could run the gradient
cores and run the RF system um to uh
make that work. And this was a fun like
safety challenge to make sure that we
were not going to set fire to anything,
which we haven't, which is good.
But this is the other thing. If you're
building one of these systems, it's
actually easier to run it off batteries
than it is off the mains, just cuz you
really want to reduce noise as many
different sources as you can as
possible.
Uh these are the coils that we made. So
this uh coil on the left, this is what
an MRI scanner coil looks like. uh it's
essentially just a solenoid, but you
want it to be as thick as possible so
that you reduce your resistance as much
as possible so you get as much signal as
possible. And then you've also got this
shield that we used uh for some
experiments which is to try and like
you're in a Faraday cage but you've also
got your gradients which will give you a
bit of ant noise in antenna. So if you
put a shield around your coil you'll
also reduce the amount of noise that's
there. Um, and these coils, one of the
reasons we can make them work is we need
a tuning circuit. So, we there's this
thing in um RF called a Q factor, which
is essentially a quality factor, and
it's how much you amplify your signal.
And what we really want to do is we run
a really sharp Q factor, which amplifies
the signal right at that frequency we
care about and knocks out all of the
noise apart from uh in different places.
And so, we had to make up these fun
little boards uh where you have to use
your tuning and matching capacitors. One
of the problems is for the tolerances
you're talking about here, capacitors
off the shelf don't work that well. So,
um, well, they don't they work fine.
It's just they're not the number they
said. Like the tolerances are so large.
So, you'll have to get a bunch of
capacitors, try them, solder them on,
get another one, solder them on, and
then we've got these nice little turning
things that you can rotate to get it
really tuned on. It's one of the reasons
why it was painful beforehand was
because if you were off if you were off
tuning, you just won't get signal. you
have to make sure you're tuned at the
right frequency, but until you know your
actual magnetic field strength, you
don't know what frequency to tune to.
So, there's lots of like things where
you have to get one thing right and get
another thing right. Um, and yeah, we
pushed this all together finally into a
nice rack mounted system. So, you can
see at the bottom we've got our battery
pack. Then you've got uh what are our
gradients and an uh AM uh amateur radio
transmission set that uh
basically the system that you've got is
you've got a nice FTBA board which is
generating your signals. Then you put
that through a pre-amplifier. So we got
some cheap mini circuit ones offline.
Then we bought like a 300 uh radio
amplifier which is doing your power
amplification that goes into your
transmit coils. You then have a switch
uh which is a fun circuit which
essentially means you can use one coil
to transmit and receive and it switches
between the two of them quickly. And the
reason why you need to do that you can't
just have one transmit and one receive
is because your transmit power is so
much greater than your receive power.
You'd blow up your receive chain when
you're transmitting. So you we use this
uh open source project which was a
transmit switch which essentially said
now I'm transmitting now I'm receiving.
So, which means that you can plug this
uh this uh amateur radio amplifier into
it. Um it will push it into the coil and
then switch over and you hear the
receive chain. Then what we had was a
bunch of again relatively cheap mini
circuit amplifiers giving about 60 to 80
dB of gain before we bent back into the
FGPA to get the signal we needed. Um
also in this box you had our gradient
amplifier. So the things I was talking
about earlier where you need to change a
magnetic field, you need to have a very
fast acting amplifier. So audio
amplifiers are at roughly the sort of
frequency you need to do it at, but it
needs to be very clean. Uh so we used an
open source project to use that. We kind
of got one off the shelf and built it.
Um and that lived in that box. And then
the top box is the FTPA and the
amplifiers and all of our clean power
supplies, uh power sources. So we had a
24volt battery for our gradients and
then a 12volt battery for all of our
offchain. And then we split that down to
all the various different voltages
because electrical engineers like
everything being at different voltages.
So we had 12 volts and 5 volts and 3.3
volts. And then finally we've got our
box at the top which is where you
actually put the samples inside. Um and
that's a far cage. We've sealed around
the outside of it. And so you open it,
you put your sample in and you scan it
and then you repeat lots of times. And
the more you repeat it, the better
signal you get. That kind of thing I
said earlier, the theoretical is
proportional to the square number of
repeats. We found that is the case in
what we're doing, which means our noise
is not from external sources are coming
in. It's usually from like your
amplifier being bad or um the thermal
noise which is just something existing
at the temperature will have a certain
amount of noise. Normally you wouldn't
notice it but again at nano volts you do
definitely notice that. So why did we do
this? Um, so this is a graphic that I
stole from cancer research UK and I
don't know if you know this um but for
lots of cancers really early diagnosis
really improves your chances of
survival. So here are three different
cancers and you can see on the left
that's if you diagnose at the earliest
stage your chance of surviving and on
the right if you uh catch it late your
chances of surviving are much lower. So
for lots of um cancers really it's a
timing question. If you can catch it
early enough you can provide good
treatments. I mean you can also treat
people who didn't need to be treated
which is another problem but um that is
one of the key reasons why early
diagnosis is good. If you catch it early
enough you can treat it and MRI is one
of the better ways of uh treating it uh
detecting it. Sorry. So for here here's
a bunch of common uh cancers and you can
see that MRI picks them up more
accurately than the existing methods and
these are kind of like this isn't breast
cancer normally. This is if breast
cancer if you've got dense tissue. Um so
it's not saying mamograms are bad or
anything. This is always kind of a
trade-off. But the reason why we don't
use MRI isn't because it's a worse
technology. It's because it's too
expensive. So that brings us to what
we're trying to do which is make MRIs
much cheaper. Um, and our idea behind
this is if we can make cheaper and more
pleasant scans, and the scanner we built
at the moment for 5K, you can't fit a
person in, but we're hoping to scale it
up and use the same sort of technology
to make one that you could fit a person
in. You can uh give people cheaper
scans, which means you can get more
data, which means you can start to
collect models, which means you don't
overdiagnose people. So, you can scan
them early enough to work out when
seeing something in someone is going to
be a cancer or going to be a problem and
when it isn't. And then you that means
that you can scan more people because
insurers will start paying for these
scans which means you get more data. We
need more better models. And I think the
vision is just scanning everyone
frequently enough that you you know what
these cancers look like. Um so in a
hospital at the moment MRI scan would
cost about 1.5 million. I don't think
you can make them for 5k but I think you
can make them much cheaper than that.
And that's one of the things that we
kind of set out to demonstrate is you
couldn't can make these things much
cheaper. Um, so, uh, I, the reason why
I'm doing this talk is because I'm
working at a startup trying to make MRI
scanners. Um, which is kind of how we
got started with these things. So, if
you want to get involved, email me at
john@flux.cl clinic. Um, also come and
chat to me afterwards if you're
interested. I can explain all of this
stuff in much more detail. This has been
a very kind of like whistle stop tour of
a lot of different things. And I thought
also I would at the end give a bunch of
acknowledgements to a bunch of different
people. So um the gradient board was the
the GPA FHDO
um board. Um if you Google that you'll
find it. Um and the TR switch we got
from another open source project which
is the AIM for II OSI project and in
general there's this uh community called
the OSI or open source imaging project
and they've done a bunch of this stuff
already. We're not we weren't like
designing from scratch um but we were
building on what other people had built
and people there were really helpful and
they gave us advice and guidance on all
the various different things that we
did. So shout out to them. They were
really great. Um and yeah if you've got
any questions I think I will be at the
FQ or just grab me afterwards as well.
Thanks
[applause]