Video summary
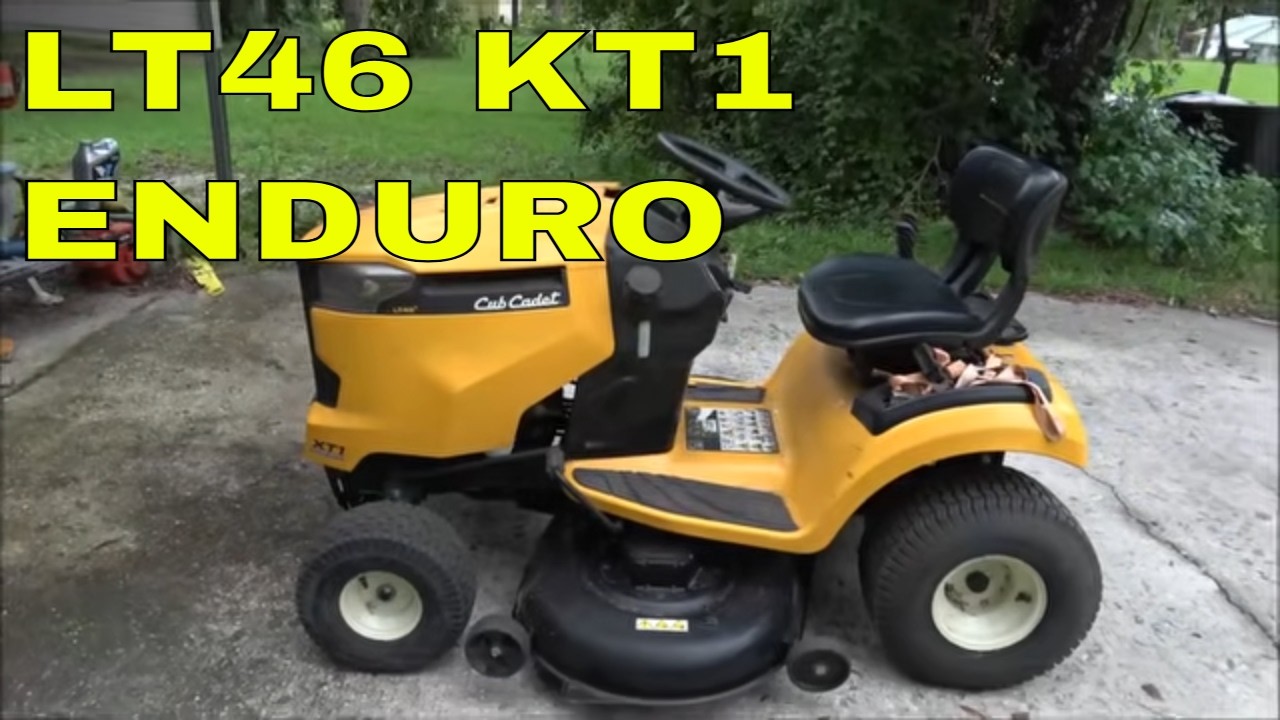
In this instructional video, the host demonstrates the process of replacing both the cutting blades and the drive belt on a Cub Cadet LT46 XT1 Enduro series tractor. Although it is possible to change the blades without removing the deck, the creator chooses to lift the entire deck assembly off the tractor to provide viewers with a clearer view of the internal components and the specific steps involved in the replacement. Before beginning the removal process, he emphasizes the importance of disconnecting the PTO brake cable, which acts as a safety mechanism to stop the blades from spinning once the power take-off is disengaged, noting that on this particular unit, the existing brakes are worn and less effective than when they were new.
The core of the repair involves swapping out the old mulching blades for new ones, as the previous set had become severely damaged with jagged edges that would not cut properly if merely sharpened. The host carefully explains the correct orientation for installing the blades, ensuring they spin in the direction that throws grass upward for a second cut rather than flinging it onto the deck. He utilizes an electric impact gun to remove and install the bolts, highlighting the importance of following the specific rotation pattern to ensure the blades function correctly as mulching units. After securing the new blades, he proceeds to replace the drive belt, using heat from a heat gun to make the rubber pliable for easier installation around the pulleys.
Once the new parts are installed and the deck is reattached, the host addresses a common concern regarding rust on mower decks caused by grass buildup. He demonstrates his preferred method of maintenance, which involves attaching a garden hose directly to the underside of the deck to blow out wet grass clippings while the blades are spinning. He argues that this practice prevents rust rather than causing it, provided the owner services the deck at least once a year and keeps it clean. The video concludes with a brief test run in the rain to verify that the new belt stays on and the mulching blades perform well without bogging down, offering practical advice for maintaining lawn equipment effectively throughout the season.
Read the full video transcript
Hey everyone, Shaurn 1000 here. Today
we're going to be putting new blades and
a new belt on this CubCadet LT46.
It is the XT1 Enduro series.
Uh, now normally
I could change them blades without
taking the deck off, but I'm going to
take the deck off so that way you guys
will get a better idea of
what I'm showing you about the blades.
So, all right. Let me go get some tools
and get my blades and belt and stuff and
we'll go ahead and drop that deck and
then we'll uh
we'll replace the belt and blades and
maybe try it out. I am putting mulching
blades on it. So, I'll show you why I
need to change the blades instead of
just sharpen them here in just a minute
once we get this off.
Okay, we're going to start
by lowering this deck all the way down
as far as it'll go.
Now, like I said, you won't have to do
this if you can reach your hand up under
there, which I can, but you can see this
belt came off again. Uh
there's a hair pin right there we got to
pull out.
And
there's one there and one on the other
side. No big deal. And then
you have to take your belt off, which
will involve me taking this this bolt
out here off. And there's one on the
other side and getting this out of the
way. But this is not really how to take
the belt off or I mean how to uh it's
not really how to uh
take your deck off because
uh normally you can do this without
taking the deck off. You just there's a
bolt there, a bolt there, and a bolt
there. Same with on the other side on
them guards. And that'll let you get
your bolt off. But let me go ahead and
I'll speed you up. Let me get a pair of
pliers. We'll drop this deck and then
I'll just back the tractor up over top
of the deck. So, let me get you set up
here.
All right. So, this belt keeper only has
one bolt holds it on on this side and on
the other side it just goes through a
hole.
right there.
So, one more thing I forgot to mention.
Right down in there is a cable.
I got to unhook it.
It goes into that spring. What that does
is when you
uh
When you
take your PTO off, it's a brake that's
supposed to stop help stop the bl the
blades from keeping on spinning. So, let
me get that unhooked,
which it should unhook pretty easy now.
Uh, so I'm gonna unhook that and then
we'll get the tractor up off of there or
the the deck over the
the tractor over the deck.
This is where that spring hooks on to.
And as you can see, these are the brakes
that'll
supposed to stop these belts from
spinning.
But as you can see, they don't work that
great. They do when they're new, but
So,
let's go ahead and flip this over and
let's put the blades on
first.
Okay. So, this is why I got new blades.
See that? Should not be like that. I
just poked my finger on it. So,
let me get a socket
and my
air gun. We'll get them off of there.
as always,
man.
No matter what I want to do,
it's got to rain.
All right, hang on a minute, guys. Okay,
guys. Sorry about the audio.
All right, let me find my more powerful
impact gun. All right, let's try this
one here. It's not the one I'm looking
for. All
right.
See if I can find another one. Well, I
got an electric one. And I just didn't
feel like pulling out an extension cord.
I know it'll do it.
This thing is powerful
for being electric.
All right.
Now,
grab one of my blades.
They go a certain way.
If you put them on backwards,
well, upside down,
they won't cut right.
So,
It's going to go like that cuz these
spin that way. The straightest way
always goes towards the shoot.
So,
what it does,
it's upside down, but it chops the it
throws the grass up on top and these cut
it again. But you have to have a block
off plate, which I have one around here
somewhere, but I don't know where it is.
I could just grab both blades.
Now
you can see
these head protectors off here.
I don't know.
See how that one's kind of straight
across? Look at that one. Look at the
difference.
Yeah. So, let's go ahead. Let me back
you out.
I said out. Okay. Let's go ahead and
tighten these up.
This doesn't have a switch. It works on
the trigger.
And the blades are done. Now I'll get it
flipped over. We'll change the belt. All
right. Now I'm going to take three
screws out of here and three screws out
of that other side.
That comes off like that.
And I dropped that one down underneath.
I'll have to get it when I get this put
together.
So, there's usually a sticker. This one
still has the sticker on it right down
there
down here that show you how the belts
go. But I know how this one goes.
So, I'm going to go and take this off.
This one. And this one. There's a nut
here, a bolt there we have to take off
to get the belt out of there. So, let me
get a socket for that. All right, guys.
There's another way
you can get that belt off and on.
Take a screwdriver,
bend that out a little bit. Just a
little bit. Okay.
We'll put the new one on the same way.
Again, sorry about the ring, but I am in
a metal shed.
Uh,
I hope you
There's the belt.
All right,
another pair of work gloves
that are probably way too small to fit.
And they are, but I'll give them a
monkey. They'll fit monkey.
Now, usually what I do is set these out
in the sun while I'm doing other things
and let them get warmed up, pliable. But
since I can't do that, I won't have to
fight with this thing.
All right,
I'm going to go heat this up a little
bit with my heat gun.
And you guys didn't see did you?
Damn it.
I'll show you when I go to put this back
on. Okay,
put this on here. This one
goes around here and back around
just like that.
this one.
Uh, let me see.
No, I got that wrong.
Straight around.
Then it goes in like this.
That's the way this one goes. And then
this end out here will go onto your
pulley.
And just take this,
give it a couple little
whacks. There you go. This keeps the
belt from coming off. Now, what keeps
the belts from coming off here is those
guards we just took off. So, let's put
them back on.
have to be super tight to break off real
easy.
This one, remember, we dropped one down
underneath
on this side. So, I'll have to lift that
up and see if I can find it.
And I got to do that before I tighten
them cuz if you don't
you tighten these two, you might not be
able to move this where you need it to
be.
All
right,
let me flip that over and see if I can
find it. I'm not going to bore you with
that. Did you guys see it laying under
there?
Soon as I lifted that up, I seen it.
Must just been a different angle.
I normally spray a coat of paint
underneath this, but as you can see, it
got soaked. So,
I'm not going to do it this time, but
I'll do it next year when I uh sharpen
the blades.
All right.
Now, I got to hook everything back up.
Uh,
still raining. I got to lay out here in
the rain.
Sometimes you got to do what you got to
do, right?
So,
yeah. Let me hook that back up. I'm not
going to bore you with that. Like I
said, it's not really how to take that
deck off and replace it. So,
let me get that back on there. Okay,
guys. Let's start this up and try it
out. Make sure the belt stays on. I
can't cut anything cuz it's soaking wet
out here.
Heat.
All right, I'm going to take it over
here
and I'll just give it a couple little
passes.
And let's just see how it does.
Heat. Heat.
Okay, guys. Yeah, it does pretty well.
Didn't even bog down. Uh, so yeah, those
mulching blades are awesome. Now,
once I find there's a guard,
plastic guard that goes on in there, and
I'm not sure where it is, and I know I
bought it cuz I bought it with the other
blades that didn't fit. And
right here's the knob
that you pull that little rubber piece
off there. And the knob screws on there
and holds that plastic piece in there.
So, I don't know where it went, but I'm
going to move all this stuff. get this
thing back under shelter and I'm done
for the day. So, thanks for watching,
guys. I appreciate it. Sha Bear, the
myth, the man legend. I'm gone for now.
I also have
one of these.
You screw on your garden hose.
You put that on there, turn your garden
hose on, turn your mower blades on,
and it wores the grass
out from underneath your mower deck. So,
a lot of guys say, "Don't use that. Your
mower deck will rust." Look, it's not
going to rust. Okay? If you service it
at least once a year, clean the grass
out of it, that won't happen. That's
what causes decks to rust. Cuz the
grass, you mow wet grass, it gets up
under there, it can't dry. With that, it
blows all the grass out. You seen how
clean it was. There was a couple little
pieces and that was it. Uh, and that's
because the last time monkey mowed with
it, we didn't rinse it out. Had I have
done that, you've seen how nice and
clean that deck is under there. So, all
right. I'll see you guys in the next
one. Thanks for watching everyone. I
appreciate it. Uh, sorry about the bad
camera work, but you know, rain and all
that and you're trying to get something
done, you got to get in a hurry, and
that's when you make mistakes. Nobody's
perfect, and neither am I. So, we'll see
you in the next one, guys. Weekend's
almost here, so have a good one. Stay
safe, everybody.