Video summary
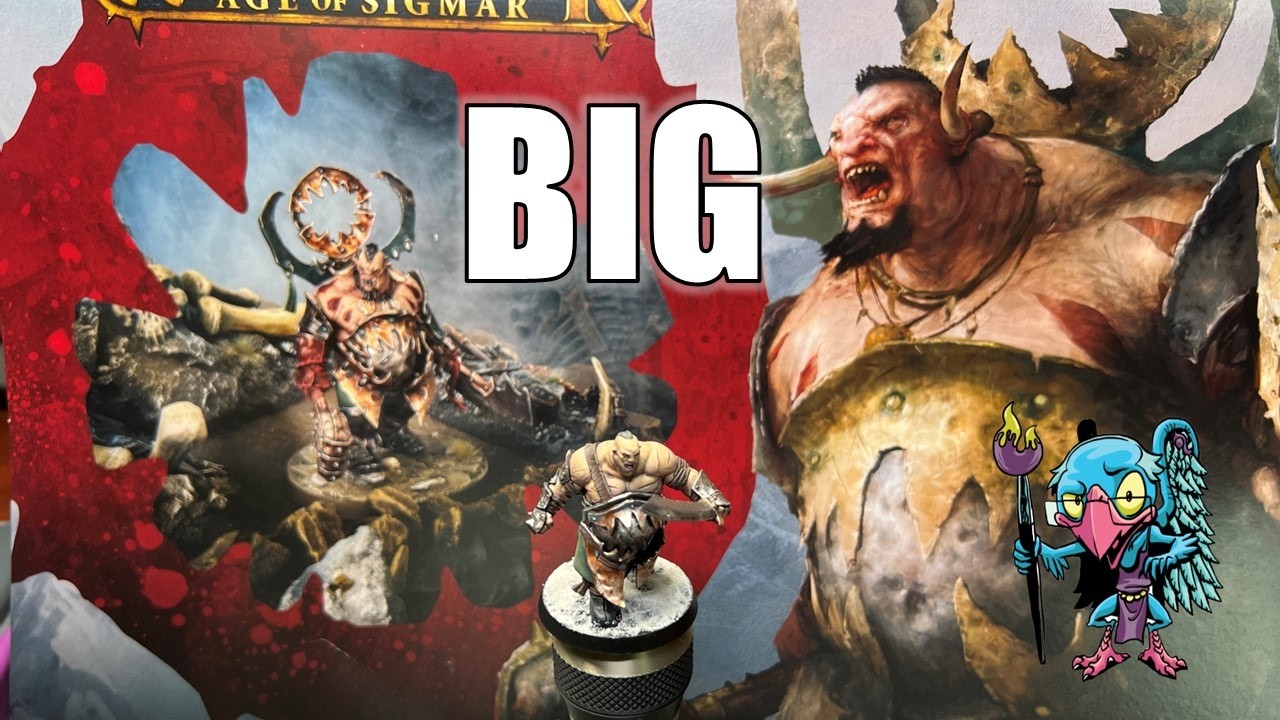
In this episode of Hobby Cheating, the host introduces a new wave of Ogre Mawtribes models from Games Workshop while bidding farewell to his long-time tutorial companion, Larry, who is humorously retired and replaced by a test subject named Gary. The video begins with a detailed comparison between the old and new figures, highlighting improvements in proportion such as better head-to-body ratios, more accurately sized hands, and pants that extend further down. Despite these upgrades, the host praises the models for maintaining their signature lack of excessive detail clutter, noting that they are not overly decorated with unnecessary elements while featuring high-quality weapons. The primary focus of this session is to demonstrate painting techniques specifically tailored to the skin and armor, which serve as the main visual focal points for these characters.
The tutorial on rendering the Ogre's skin emphasizes a unique approach designed to convey toughness rather than softness. Instead of using traditional pink tones that suggest fresh or delicate flesh, the artist employs warm yellow-browns and reds to create an appearance akin to thick tire rubber or tractor treads capable of withstanding heavy combat. The process involves applying dark blue under-shadows followed by a light dry brush with yellow to enhance readability for older eyes, before layering multiple shades from deep red through brown-yellow up to peachy highlights. A key technique demonstrated is the use of black lines around edges where different volumes meet, such as between flesh and armor or straps, which helps define the figure's structure without needing perfect precision; any mistakes can be easily corrected with a quick touch-up using flesh tones.
Further detailing includes addressing the extensive scarring found on the models by tracing deep cuts with thinned dark red paint to create instant contrast and narrative depth, while larger scars receive highlights at their deepest points to indicate exposed tissue. The artist also adds realistic stubble along the jawline using a Payne's gray mix applied only in recessed areas to avoid washing out under direct light, followed by creating tribal tattoos on the back that mimic imperfect prison-style ink rather than professional artwork. To prevent these dark tattoos from looking too fresh and monochromatic against the varied skin tones, subtle glazes of flesh-colored paint are dragged upward into highlight areas to simulate fading and allow underlying skin values to show through naturally.
The final segment focuses on painting the metallic gut plate armor using a method that blends Non-Metallic Material (NMM) principles with traditional metal paints like Vallejo Metal Color Steel. The artist starts with an opaque steel base coat, then uses thinned black paint in downward-facing shadows and lighter silver highlights to create texture and depth without losing the metallic sheen. To age the armor realistically, a very thin wash of brown is swept over the surface to simulate rust accumulation around rivets and grime gathering in crevices. A special bronze mix for the maw section incorporates turquoise accents into shadow areas to add visual interest and vibrancy, ensuring that even simple tabletop models look credible and dynamic despite limited painting time.
Read the full video transcript
Hello everybody and welcome to another
Hobby Cheating video. And today it's
time to get big with the new
Ogor Mawtribes.
Let's get into it.
>> The the strict technomancer that is
Vincey V. Let us get to the technique
and learn it Vincey V.
>> Thank you to GW for sending me the box
and I'm excited to paint up the new
Ogors. But of course, if we're going to
paint some new Ogors, then it's time to
retire an old friend. Yes,
if you've been with this channel for a
long time, you know our good friend
Larry, who has taken us through so many
tutorials. And now finally, it's time
for him to retire and go to that great
Ogor Maw pit in the sky. So thank you
Larry for your service.
And of course, if we're going to get rid
of Larry, we've got to have a new one.
Now I don't know exactly which Ogor I'm
going to use, but today we'll call our
Ogor Gary. Maybe he'll show up in some
future videos as well. Maybe I'll pick a
different one out of the box.
But Gary and Larry, here they are.
Uh as you can see, there's some
differences.
So let's head over to desk and let's get
to mention in the comparison between the
two. Here they are again.
Uh you can see that with the new Ogors,
their heads are a little more correctly
proportionally sized, same with their
hands. Their pants go down a little
farther, but I love these models.
They're still not overly detailed. They
don't have like a bunch of garbage on
them for no reason. The weapons are
really nice.
>> [music]
>> Everything's great. So just all in all,
A+ design on these.
Uh and so we're going to paint him up.
Uh Gary is going to become uh
our little test subject. And today we're
going to focus on the skin and the
armor. The areas that matter.
So let's start with the skin. Uh I begin
by just doing a nice under shade all
over the model. So, this is a nice dark
blue to begin with. Uh Uh this will be
just a good universal shadow. I probably
won't leave much of this showing, but
it's valuable to be there.
And then I'm going once that under
shade's down, I'm going to take a nice
yellow. It's warm, but not incredibly
bright and do a very light dry brush
over everything. This is just as much
about learning the model and being able
to see all the detail and pick it out.
My eyes
>> [music]
>> are getting, you know, I I am old. Uh
so, it's just nice to be able to make
the fig a little more readable.
Once that's uh
done and I've got the fig kind of ready
to go, now we turn to the skin proper.
I'm going to use these three paints you
see here.
Now, the skin on these models is
exceptionally good. It's detailed. It's
got scars and nicks and dings showing
that it's like their flesh is thick,
like tire rubber. I love it. And so, I
want to take full advantage of that.
We're going to do the skin. I'm going to
show you all the details. We're going to
do tattoos. We're going to do it all.
All right. But to begin, we're going to
work big. So, we start by just coating
everything in this red. You'll notice
there's quite a lot of step in between
the red and my middle brown yellow and
then my actual highlight. There's a wide
variance of value. And that's
intentional.
That's so we can make a lot of mixes in
between. And you can see how I'm just
layering up the flesh, slowly
integrating more and more of the yellow
brown
as I layer up and then eventually some
of the peachy flesh will bring that into
work the highlight. But I want to talk
about my theory of the case here.
By having a more yellow brown as our mid
tone, it makes the skin seem a little
more dry, a little more dead, a little
more rough.
When skin has a lot of very pink tones
to it, it tends to feel a little more
soft and, you know, just like a little
more fresh, like baby skin, right? It's
very pink. If you're dealing with this
like thick tractor tire skin that can
get hit by a sword and just kind of
shake it off, you want it to seem a
little more rough and dry and tough. And
so, hence the brown yellows.
Now, uh as I continue to work my way up,
you'll notice that sometimes there are
some pretty significant layer lines
here. That's okay, don't worry. You'll
see also intermittently that I come and
just glaze back down working the small
line in between those.
I do spend a lot of time working the
face.
Um there are lots of great areas on this
model worth exploring. The face is
definitely one of them. They did such a
great job within the sculpting of like
these little, you know, their double
triple chins, the folds, the ridges and
scars and their flattened, you know,
busted noses and on their cheeks and
stuff like that. There's just a lot to
explore.
>> [music]
>> My recommendation as ever is when you're
highlighting up like this, remember that
when you're working from the shadow to
the like upper midtone, you're ignoring
all of that micro detail. Remember, we
start broad and thick and as we work, we
work thinner [music] and more targeted.
Now, the reality is is that as I get
into my specific highlights, you know,
pushing more and more into the peachy
flesh,
that is when I start pushing a lot lot
more of the little details. Finding the
nuance like you know, the top of the
nose, the bridge of the nose, the little
scars on his face, right?
All of those more little details, the
knuckles, things like that. That's when
I really start pushing all of that
stuff.
And
>> [music]
>> the reason for that is because you don't
want, especially on these guys where
you've got some really defined ridges,
>> [music]
>> in those upward facing areas
where they're exposed to the light, none
of my shadow should be present.
There's going to be a whole video on
this in the future, but in quick
summary,
when you're dealing with an
upward-facing plane, your shadow is at
darkest your midtone. None of that
actual shade color should be showing.
Okay? It's a band of light, and even
though the whole figure might run 1
through 10 or brightest through darkest,
not every single area has to have that.
And that's what you see me doing here as
I work the skin.
The upward-facing areas have very
minimal shadows. I'm using my midtones
as shadows.
Whereas on the more hidden areas, down
below the arms, where they're tucked in
and stuff like that, there I'm using the
midtone as my highest highlight. Same as
the back curves away and stuff like
that. I decrease
the actual highlights as we move down
the figure.
Okay.
So, I've pushed that skin a lot, right?
Trying to Trying to make I've pushed
that skin a lot. Trying to make sure
that we get up to an appropriate
highlight, and then we have all the
details picked out. And I'll openly
admit I did do some more work off
camera, especially on the smaller
details, lips, teeth, very small things,
stuff like that, right?
But, there's a lot more to do because
this skin, as I said, is so rich. So,
let's start with something fun.
Now, next up, the most important thing I
do is I we go Let's go back to that uh
to that uh blue black uh one-step.
And let's go ahead and [music]
let's blackline everything around the
model. Okay?
The value of putting in This is a great
trick for blacklining. We want to
separate the flesh from the armor, from
the pants, from straps and belts,
anywhere where two volumes meet. I take
a thinned version of that. It's like 1:1
with water.
And I'm just going to go ahead and
[music]
shh just give that a nice little black
line. It doesn't need to be perfect. I
can clean it up back with a flesh. Takes
2 seconds if I get a little too fat.
But it really does make a difference for
for making the figure read as clean.
The combination of those darker black
lines plus some edge highlight in some
later steps really will make a big
difference
uh for helping the figure stay readable
and making your paint job look great for
the tabletop even if you're not spending
a ton of time on it.
Now,
the next thing we're going to do is look
at all of the scars on these guys.
And these guys are just like covered in
really cool scarification and like
weapon strikes and stuff like that.
So, I go back to my Blanche Berry, my
original
dark red. This is one of the reasons I
started here.
I thin it way down. Again, probably two
three drops of water to one drop of
paint, if not four or five. Like it's
very thin.
And what I'm going to do is just drop
that little
thin paint into each little scar. Just
trace it out. It's not actually that
hard. It's a pretty fast process, right?
And by dropping it in there,
I am able to then make sure each one of
those is pronounced. And you see how it
acts as like instant contrast and tells
a story.
I also take some of my lighter
highlights for my skin tone. And on the
bigger scars, I trace the bottom of that
line where it's scarred. Not every one.
Where it's very thin shallow cuts, we
don't need to push it that far.
Okay?
But where it's an actual like cut that's
meant to be a little more it's thicker
it's exposed. It's obvious they got into
some real meat there.
There you want to hit that bottom of the
line with just a little bit of a action.
Okay?
All right.
He's an ogre. He's got a big pronounced
jaw. Let's give him some stubble, right?
I think stubble on these big masculine
figures like this just looks really
cool.
So, I'm going to take some of the uh one
step blue black. And if you're
interested in doing beard stubble, this
stuff
perfect for [music] it. I take it and I
thin it down about two three to one
water to paint.
And I with that just like thin dirty
paint water, I start coating the edge of
his cheeks pulling toward the chin. I
leave the actual chin itself where it's
very bulbous a little more clean of it.
Let it settle into the recesses because
that brighter poked out chin that's in
the light area would not show as much of
the stubble cuz it would be directly in
the light.
And I just do about two or three passes
of it. You'll also see me a little bit
kind of put it on a little thicker and
then smooth it feather it out as I wipe
it down.
And you can see like two three passes,
boom.
Instantly, you have this beard stubble.
That blue black tone, that sort of
Payne's gray adjacent tone is perfect
for doing that beard stubble. Great
trick for these new ogres, for your
space marines, for anything you want to
show that kind of effect. So, next up
what we're going to do is we're going to
do a little bit of tattoos, right? What
would an ogre be without tattoos? They
love tattoos and big open areas of flesh
are great for it. I'm going to do a nice
simple tattoo. Yet again, that blue
black one step is coming in. It's like
our perfect uh
it's it's slightly thinner than an ink.
I can really control it. I love working
with this stuff. Um so, we're going to
take that and I'm going to do some
simple free and we're going to do a maw
on his back or a version of it.
Now, things like these sorts of teeth
are easy. Remember, again, when I see
people try to draw a simple shape like
this, I see them always draw the outside
of the thing first. That's the wrong way
to go. Drawing the outside of the thing
is the easiest way to screw it up
because you draw the shape imperfectly.
Instead, find the core of the shape. And
in this case, each little tooth is just
a cross.
So, I draw a straight line, then I cross
that at the top, and then you see me
trace around and fill it in slowly,
building it out so that each one I can
get to about the same size. Now, notably
with tattoos on sort of monstrous
creatures like this, you don't have to
actually be perfect. Assuming someone
else in the tribe gave them these
tattoos, [music] and they're big ogres,
they're probably not too focused on
absolutely perfect tattoos. They're like
not professional tattoo artists, is what
I mean. It's probably a little more like
a prison tat kind of situation, where
it's kind of whoever's around.
But, I work my way through, get all of
those tattoos in place, just fill out
the teeth. I do a six across the top,
kind of a couple across the bottom. Good
to go. He's got a nice maw on his back.
One of the challenges though, when you
do this, is that the tattoo, with being
this dark, will seem really, really
fresh. Now, these guys are assuming the
outside a lot, roaming around in the sun
or the whatever the Haitian light. And
so, assuming the you know, their tattoos
might have a little fade to them, and we
want them to respond to the overall
lighting scheme. When you lay something
down like this on top, and then you have
it be monochromatic, I eat all one
color, but you're at the skin underneath
it has a lot of value change, that's
going to feel weird.
So, instead, we just grab some of our
near highlight flesh tone, just a little
bit of the yellow, the the ochre from
earlier with a with mostly the peachy
flesh. I thin that way down, and I
glaze, pulling up, right? Especially
focusing on the top teeth that are more
in the bright exposed area. And you can
see how I just give two passes over the
teeth, press the brush down, drag up
into the highlight where it will have no
effect. Press the brush down, drag up
into the highlight.
>> [music]
>> Some very soft, quick, subtle glazes
over the tattoos make them feel a little
faded and like some of that flesh is
shining through. [music]
It's a super easy trick, takes all of,
you know, 20-30 seconds, and yet it will
add so much credibility to [music] the
tattoos overall.
Okay?
All right. With that, our skin is done.
But there was one more big element I
wanted to talk about. I did stuff like
the pants and the leather straps and all
of that off camera because they're
frankly not that interesting as parts of
the model. Like they're fine. They're
not bad, but they're not the big show.
The skin and the armor, especially the
gut plate, is the big show on this guy.
So, what are we going to do? Well, we're
going to start with it with a steel. I
grab my old friends Vallejo metal color,
the gold standard, ironically.
The steel standard? I don't know. You
get it. Of true metal paints. I'm going
to start with the steel over everything,
>> [music]
>> and uh just kind of give that a nice
base coat, nothing complicated there.
What I then do is go back yet again to
my old friend, that uh that blue black
one-step, and I use that to just lightly
sweep in some shadows on the
downward-facing sides, pull out some of
that texture that's in the metal. I'm
not washing it. I'm target I'm applying
this in a targeted way into areas that
should be shadows or recessed or hidden
from the light, but it naturally creates
that matte variance we'd want to see, so
it gives us a little bit of the
non-metallic principles on our true
metallic metals.
From there, what I do is grab some of my
brighter silver color. This is like a
pale burnt metal,
and I just do some little textures and
scratches and scratches and fade it out.
I then go back into the steel and smooth
that transition.
So, I kind of mix it just literally wet
on the brush as I've still got the pale
burnt metal in there. You see me grab
the steel, kind of let them work
together, wet blend it out and just
until they look like they're blending
into one another. You'll notice I work
rough and sketchy, especially with
beaten metals like this where there's a
lot of texture on it,
you can take your brush and just work in
a stipple stabby fashion very roughly,
work that until the bristles are
basically dry, and it's a great way to
make sure that those metals blend into
each other naturally so you get a nice
smooth transition across all of the
model.
Uh now, once those steels are good, I've
got one more step. These are meant to
feel a little old.
So, I grab a little bit of brown,
basically a brown I used earlier for,
you know, things like straps and stuff
off camera.
And what I'm going to do is just thin
this way down. Again, dirty paint water,
three to five drops of water to one
little drop of paint, very thin.
And I'm just going to swoosh it all over
the model but focusing or sorry, not all
the model, all over the steel, but
especially in focusing on the shadow
areas where there's rivets, where rust
would naturally collect or dirt or grime
or whatever.
And you'll see how I just kind of sweep
it around there and it changes the tone
of the metal. It makes it feel older, a
little more worn. It will gather into
those spaces like around a rivet and
feel like a natural rust build-up. It's
a simple trick, again takes a few
seconds and really does add to the
overall impact.
Next up, we're going to do the sort of
bronze elements. So, specifically this
is like the part of with gut plate
itself that represents the maw.
And what I do here is this is going to
be my own little special mix. You can
see this is what I'm grabbing.
And I mix these together. Nice little
speed paint, and then popping it up with
a little more intensity with a little
bronze pigment. I'm going to take some
of the same pale burnt metal from the
last step. That'll be my highlight. I'm
going to take some of the brown from the
previous steps with belt and stuff, and
that'll be my shadow.
Okay.
I start by just base coating it down.
Just laying it over that area, getting a
nice full opaque base coat. The pigment
added to this really does help its
opacity even as a speed paint, and make
sure that you get a nice intense opaque
layer.
Once that's there, I then grab my brown
and start knocking in some shadows.
Where are those downward facing angles?
Where does it turn away from the light?
And I want to create again those basic
principles of NMM on my TMM.
Right?
And I just work it in there. Subtle
glazes. Again, working very thin.
Probably like not as thin as the dirty
paint water. More like two drops of
water to one small drop of paint,
something like that. But working very
thin, and then feathering it out.
Once that shade is in place, I then go
to the highlight. And
uh I just start mixing in a little bit
of the pale burnt metal into my existing
uh recipe. Hit all of those upward
facing areas, the highlight spots, and
of course, add in then a little more
pale burnt steel or pale burnt metal,
whatever the bright silver color
to do all my edge highlights.
Okay?
So, after all of that, all the skin
work, all the metal work, here's how he
looks.
And I was looking at him in the in the
screen, and I was like, man, he's
missing something. He's still missing
something. And I realized I had put the
brown as a nice wash over the steel, and
that really I think brings it to life,
adds some color, makes it more vibrant,
credible, and interesting.
But, I didn't do anything with the
bronze. So, I went back and grabbed some
thin turquoise.
And I just thin it way down, and I'm
going to go ahead and trace that into
around the rivets on the bronze, into
some of the shadow areas, the same as
before. Just letting that really play in
there, and adding a very subtle soft
touch of that turquoise into the bronze.
And I think it adds a lot of life and
visual interest. So, now with that
little touch, here's how he came out.
I think these new ogres look absolutely
fantastic. This guy was super fun to
paint. I am excited to have a chance to
paint more of them. I got to go through
the whole box and figure out who my
perfect Gary will be going forward that
I want to use for tutorials uh when I
don't when I'm just trying to show a
technique off.
But, this guy was just great fun.
Uh so, if you like this, give it a like.
Subscribe for additional hobby cheating.
We've got new videos here every
Saturday. If you've got questions about
anything you saw in this video,
including where Larry will actually go,
or what will become of the new Gary,
drop it down below. I always answer
every question asked. Uh do please give
me a comment. It really does help
engagement, even if it's just talking
about Larry or your favorite video with
Larry in it.
Uh if you want to support the channel,
help us keep making content. Lots of
ways you can do so. There's affiliate
links down there that save you money,
and uh really do help the channel.
Please pick up all your hobby supplies
using those. There is, of course, the
new games uh the new game that Uncle
Adam and I made, all the games we make,
including Repent, Ye Foolish Gods, uh
the uh dark fantasy skirmish game
focused on taking revenge on the gods
and killing them and their followers.
There's also, of course, our Patreon
focused on reviewing feedback and taking
your next step on your hobby journey.
Elsewhere in the Vincey Cinematic
Universe, of course, I've got Fireball
the Gazebo, my RPG podcast with Ninjon,
and Snalcast, to indie wargaming podcast
with Uncle Adam. Check it all out. It's
really appreciated. I thank you so much
though for watching this one, and as
always,
we'll see you next time.
>> [music]
[music]