Video summary
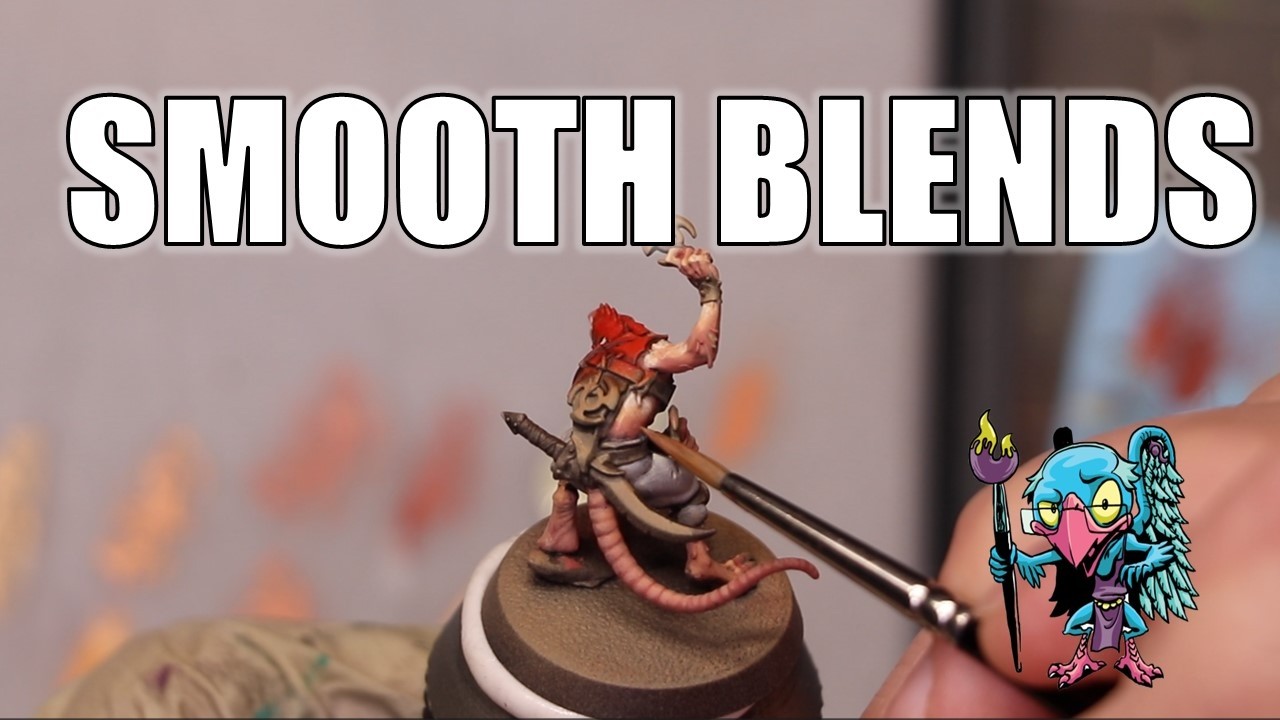
The video introduces four distinct techniques designed to help miniature painters achieve smoother blends with acrylic paints, starting with the fundamental method of good old-fashioned layering. The host explains that instead of attempting a direct transition between two contrasting colors, which often results in visible harsh lines, painters should create numerous intermediate steps between their base and highlight colors. By increasing the number of layers and minimizing the value change between each step, the eye is tricked into perceiving a smooth gradient. This approach aligns with the "pyramid of painting" principle, where artists start with thick, broad applications for foundations and progressively work thinner and more targeted as they move toward highlights, ensuring that layer lines become less apparent without relying on complex blending tools.
The second technique discussed is wet blending, which serves as an excellent method for establishing initial color sketches and covering large areas quickly. The host emphasizes that this process should be performed over a base tone rather than pure black to avoid muddy results, using thick paint straight from the pot with only slight moisture on the brush. The painter applies one color, then immediately follows it with a darker shade, working them together while the paint is still wet to create a seamless transition in the middle. A crucial aspect of this method is understanding that dark colors will inevitably pollute lighter ones more than vice versa, so artists must work quickly within a short window of time—ranging from thirty seconds to two minutes depending on humidity—and may need to repeat the process multiple times as the paint dries to achieve full opacity and tonal purity.
To further refine the blend and address specific value jumps that wet blending might leave behind, the third technique involves feathering and smudging. This precise method requires using thick paint applied in tiny dots that are then slowly drawn out and thinned using a slightly damp brush. The host notes that while acrylics are not naturally designed for blending, artists can use their properties against them by treating the act of spreading thin paint on a wet palette as a model of this technique. Rather than trying to complete a highlight in one go, painters should repeatedly place small dots and feather them out slowly, allowing natural osmosis and brush motion to smooth the transition. This approach is particularly effective for finishing specular highlights or deepening shadows without creating hard edges, effectively utilizing the durability and toughness of acrylics rather than fighting their limitations.
The final and most critical technique for achieving professional-level smoothness is glazing, which is specifically used to hide remaining layer lines between different color zones. Unlike a wash that covers an entire surface, glazing involves creating a separate, highly diluted puddle of paint applied only to the specific lines where transitions need smoothing. The host advises applying the glaze by pulling the brush toward the value currently in the brush—pulling dark glazes into dark areas and light glazes into light areas—to deposit the most pigment exactly where needed. Because glazes dry quickly, artists should work around the model in passes, returning to previously glazed areas once they have dried to apply subsequent coats; typically, at least three applications are required for a truly smooth result. Ultimately, these four methods—layering, wet blending, feathering and smudging, and glazing—are not mutually exclusive but can be used interchangeably or in combination depending on the project, allowing painters to tailor their workflow to specific areas like skin versus cloth to achieve the desired level of detail and smoothness.
Read the full video transcript
Hello everybody and welcome to another
Hobby Cheating video. And this week
we're going to talk all about getting
those creamy smooth blends. Let's get
into it.
>> The the strict technomancer that is
Vincey V. Let us get into the technique
in learned Vincey V style.
>> We're going to do something a little
different this week. We're going to go
straight over the desk and start
painting right away cuz we got a lot of
blending to talk about. So I'm working
on this clan rat from uh or not a clan
rat, I guess he's a night runner,
whatever. I'm working on a little Skaven
guy.
This was some extra figs I had from the
City of Ash that I didn't manage to get
painted up. I'm going to use these
paints for the skin. And we're going to
start out with our first first method of
achieving a smooth blend, good
old-fashioned layering. [music] You know
it, you love it, it's how most of us
paint every day.
And the first thing I'm going to tell
you when we're using these paints is one
of the ways you can get smoother blends
is [music] by kind of not blending.
Instead, you just create more steps in
between your different paints. So here
I've taken these three paints and I've
mixed in seven or so different
progressions. If you count the two
paints on the outside, that's sort of
nine steps.
And in working in this way, where you
minimize the value change between each
layer and you can see me sort of [music]
painting up on the screen now. This is
going to run as I'm talking.
You then both minimize the the the
visible layer line because each step in
your layer progression is less of a
value change, is less obvious, is less
apparent.
And then as well, as we proceed up into
the higher values, we also work thinner
and thinner.
But by increasing those number of
layers, you basically trick the eye into
smoothing things out. Now you have to be
a little careful to make sure that
you're, you know, not just covering the
same space over again. This is shingles
on a roof, so each one covers a little
bit less than the other.
But it does allow you to get something
relatively smooth using an extremely
simple process and one we're all
probably fairly comfortable with.
So, if you're having trouble using
layering and getting things smooth, my
first advice would be just create more
steps. Instead of just trying to mix
black and then go into a bright blue,
let's make five, seven, nine steps in
between there, different mixes, slightly
more, slightly more.
And then when you layer up, which will
take more time, but it will be naturally
smoother.
Remember, we're adhering to the pyramid
of painting here. So, when we start with
our base coats and our initial layers,
we work thick and we work broad, like
the base of the pyramid, right? It's got
to be strong as a foundation.
However, as we get up higher and higher
and we work smaller and smaller details,
we work thinner and we work more
targeted. And you can see how as I
progress on the skin, each time I'm
covering less and less and my paint is
getting progressively thinner.
And that's because as we get closer to
white, as we start integrating those
white adjacent tones, [music]
we're going to have more pronounced
layer lines and things of that nature.
So,
by staying thin and working more subtle
jumps in the value,
we're able to get something that looks
relatively smooth without needing to
worry about any other kind of blending
technique.
This is a great method for things like
army painting or something like that
where you're going to have a lot of guys
on the table, but you don't want to
spend infinite amount of time doing
other things we'll talk about later on,
like glazing. [music]
Okay.
So, all in all, I think the skin came
out to decently nice. It's obviously not
smooth, you can still see certain areas
where there's jumps. We'll come back to
it.
Next up, I want to talk about wet
blending. [music]
Now, wet blending is one of my favorite
ways to start any given area. When
you're going to wet blend, don't try to
do it over pure black. That is a recipe
for sadness. Instead, you want to do it
over something like a zenithal or just
have a base tone of the color down. Like
if the pants are purple and you're going
to create some progression, just base
like throw a contrast paint down or
something and turn them purple,
whatever.
But, to do the wet blend, what we're
going to do is we're going to work
thick. Thick and creamy. Uh so,
>> [music]
>> you can see here I've got his pants. And
what I'm going to do is I place in just
a very thick straight out. This is not
thin at all. I'm relying there is no
water in this. It is straight out of the
pot. There's a little bit of moisture in
my brush and that is it.
I apply a nice thick uh layer of that
onto the um
onto the model. Then I dip the brush,
switch the brush, wipe the brush, uh you
know, wipe wipe wipe on a on my paper
towel, on my mechanics towel, right into
the darker color, slap it on there next.
And then, [music] wipe wipe wipe. And
now, with that clean slightly moist
brush, just slightly, make sure you get
all that liquid out, we then start
[music]
fuzzing them together.
If you pull the light towards the dark,
you will increase the value. If you pull
the dark towards the light, you will
decrease the value. You will make it
darker.
Now,
a note. Your darker colors will pollute
and be more impactful on your lighter
colors than your lighter colors will be
on your darker colors.
But, what you're effectively doing is
just smoothing them together and
creating a wet area in the middle where
the two interact.
Here I'm using a relatively normal size
brush, but I will say when you work
bigger models or have more space, wet
blending becomes easier. It's also
easier to use a bigger brush. So, if you
get out like a size two [music] or four
or six or 10, depending on how big your
model is, wet blending can become a lot
easier because you can tilt it sideways
and work the side of the brush to smooth
a lot more paint together more quickly
[music]
without creating sort of a wake behind
your brush where you're trying to stab
into it.
So, the wet blend, we just go ahead and
work it together. Work it, work it, work
it. You have, I would say, roughly about
a minute, depending on your local
humidity. It could be as short as 20 or
30 seconds or as long as 2 minutes,
depending on exactly, you know, what
it's like around you. If you're in
Wisconsin, [music]
longer. If you're in Nevada, shorter. I
don't know. There you go.
And
so, you got to work fast.
But, it's a really great technique for
establishing a sketch, for getting your
initial colors down.
Now,
one of the keys of wet blending is it
will almost never be perfect after the
first shot. Once all that paint dries
and after that time, you just need to
let it dry. Let it rest. If it's not
perfect in the blend, it's fine. Let it
rest. Let it cure completely
>> [music]
>> and go work on something else, right? I
flip around to his front leg and we go
from [music] there.
You need to apply it, work it, smooth it
together. You can still be intentional
about You notice like on the folds on
his pants, I still drag my brush in very
specific ways.
So, you can still get those highlights.
And you just kind of push back and
forth, bringing the light into the dark,
bringing a little bit of the dark up
into the light. Decide which way you
want to work uh in majority.
But, once that's done, you repeat it. A
good wet blend is actually done multiple
times. And each time you repeat it, it
[music] gets easier because the paint is
already there underneath, so you can
just stretch it out even thinner [music]
and you just smooth out the parts that
are there
and you you reach that full opacity and
tonal purity all throughout.
You kind of have to fight the
translucent nature of acrylic paints.
So, multiple wet blends are a great way
to sort of start any project.
>> [music]
>> When you're trying to establish a
sketch, when you have something like,
"Oh, my goodness, like a big cloak." Ah,
perfect time for a big wet blend, right?
Just start slapping paint down with a
big brush and start drawing it together
like you saw me do here.
Okay?
Now, the problem with the end of a wet
blend is that you usually don't have the
entire value spectrum that you need.
That is to say, because we're drawing a
lot of the paint together, our darks
tend not to stay as dark as we might
want, and our lights [music] tend to get
polluted and not be as light as we might
want. Remember, when you're wet
blending, dark colors will pollute light
colors more effectively and make them
darker than light colors will lighten
dark colors. So, as you pull stuff up
into the light, you're really going to
pull the value down of those light
tones.
So, one of the next things to achieve a
nice smooth blend is what we call the
feather and smudge.
Now, the feather and smudge is a very,
very precise, careful technique. This is
something that like our good buddy Sam
Lenz uses quite a bit in his style.
And it really can get you to an
impressive place very fast, and it
stacks on top of a wet blend really
well. Sometimes the key to achieving
these smooth blends [music] is to put
multiple of them together.
All right, so let's go back to the the
night runner. Here we've got him. We've
got that progression on his pants, but
it's not quite where I want it as far as
the light [music] goes. So, what I'm
going to do is take some progressively
higher value mixes, and I get just a
tiny amount on the end of my brush. And
this is the secret. Again, this is thick
paint. Has to be thick [music] paint.
Work with thick paints. Any kind of like
thin,
crappy paint will not do this well.
>> [music]
>> Something like Monument or Fanatic or uh
AK, all those are fine. P3, those are
all thick enough to pull this off.
You place a teeny tiny little dot of it
on the miniature where you want the main
color to be. So, [music] you can see me
placing here the highlight and then what
I do is I just smudge it down. I just
literally place that dot, wipe the
brush,
and then feather it out. I'm just using
the slightly slightly damp brush to
start pulling that paint out and thin it
using the natural osmosis and motion of
spreading it thin.
With both this technique and wet
blending, there's nothing too tricky
about this.
What I mean is
you do this stuff all the time on your
wet palette.
You have put two colors together and
mixed them on your wet palette. That's
wet blending. You just don't think
anything of it.
You have put a drop of paint on your wet
palette and drawn it out thin to get the
excess off.
That's just feathering and smudging.
We don't think about it because when
it's on our wet palette, it doesn't
count. We can't mess anything up, or so
we perceive it to be. But, you can't
mess anything up here, either.
The reality is is that on your
miniature, you can always just keep
painting. No brush stroke has to be the
last.
So, we then keep placing these little
dots and we just feather them, feather
them, feather them out.
And the key here with the feather and
smudge is to make sure that you just
kind of draw it out. Remember, acrylic
paint's
not really made for [music] blending.
They were made in an earlier time where
the goal was to turn blue pants blue.
They're meant to be durable, tough, and
non-toxic, not blend.
So, by using these techniques like the
wet blend and the feather and smudge,
we work we use their properties against
them,
right? To in our favor.
You got to jujitsu this. Kind of flip it
over. All Sun Tzu stuff, right? The Art
of War and Painting.
And the cool thing about the little
feather and smudge is
>> [music]
>> you don't have to do it all at once. I
think this is where a lot of people go
wrong. They think, "Oh, I'm highlighting
this area. I need to get the whole
highlight in one shot."
No, as you can see here, I place
multiple different little paint dots,
tiny [music] tiny amounts of paint, and
then feather it out very very very
slowly and repeatedly. Just working it
out and smoothing it out.
You can do this both with like an
extreme highlight. It's a great way to
finish those final [music] specular
bright highlights.
But you can also do it with just a
little bit of um
uh a little bit of a midtone. You can
place deeper shadows in there. All of
that is possible.
Okay?
All right.
>> [snorts]
>> So, we've gone through the layers. We've
gone through the wet blend. We've done a
little feather and smudge. But, of
course,
we've got one more critical technique
that we need to cover.
Our additional critical technique is the
road of the end of almost all roads
[music] when it comes
to to getting things smooth. And that is
glazing. I know. Relax. Don't be scared.
It's fine. First off, I have some videos
that can go very deep on glazing. That's
linked up above.
But I want to talk to you about just the
key core secrets of it right here
because it's almost always what you're
going to end up doing.
So, let's go to the palette first.
When we're glazing, we start by making a
separate puddle of paint from our
initial puddle.
One of the things I almost always see
people do is they stretch out some of
their one puddle and then just start
trying to put water into that. Never
works.
This is all liquid, folks. Osmosis is a
thing.
If you thin it out here, the thicker
paint is rushing in that and the thinner
water is running into that one. Like
it's going to try to equal create an
equilibrium.
We create a new little dot of paint, new
little pallet of paint.
Then we're going to start applying the
water to it. We just build it up slowly
by dipping into our paint water,
bringing it in, [music] dipping into our
paint water, bringing it in, swishing it
around.
Usually it's about two to three,
you know, brushes of water
for your one dollop of paint.
Again, it will vary some, but that's
roughly what it is.
Different brands, different tones will
have different ratios. Experiment.
Once you've got it mixed and you've got
enough of it there,
we then are going to rinse the brush,
clean the brush off, get the water out
of there, get all that liquid out on
your on your towel.
And we then go back into the paint.
We touch a paper towel to let the excess
water bloom out. We don't need all that
extra liquid, we just want the thin
paint,
>> [music]
>> not all that extra water.
We touch the paper towel and let it
bloom out. And then we test on
something. Like the back of the our
finger, our hand, our thumb to see the
consistency.
And if it's very translucent and I can
see the paint underneath, I know I've
got the right thickness.
Then and only then do we go over to the
model.
Now, when you're glazing on the model,
we are glazing specifically on the lines
we're trying to hide. We do not glaze
the entire surface.
So if you have a layer line split as I
did here in between the sort of more
flesh tones and the red tones, I pull
toward I I apply those glazes just on
that line.
And in general, you want to pull towards
the color you're glazing. So if I have a
darker pink in the brush, I pull towards
the dark pink. If I have a lighter flesh
in the brush, I glaze up towards the
lighter flesh.
You glaze [music] towards the value that
is in your brush.
Because at the end of that glaze is
where you're going to deposit the most
paint.
So, you pull towards the color, towards
the value
that you're you're working with in your
brush. Lighter, pull toward light.
Darker, pull toward dark.
And you work the very specific small,
thin area of the line only.
This is not a wash. We're not covering
the whole thing.
We also don't need to do it all in one
glaze. When you apply the glaze, you hit
it on there, and then you see me how I
work around the model. I hit different
areas.
I work the whole model, and by the time
I'm done, that first area is dry. Glazes
dry quite quickly.
I then come back around to that very
first area. I hit it [music] again.
And I work my way around again.
And once that's dry, guess what? Number
three. One more time.
In general with glazes, you're going to
need at least three applications of the
thing to get toward anything that's
relatively smooth. If this is like a
display or competition project, I mean,
I've been in places where I'm glazing
10, 20, [music] 30, 50 times.
But we don't have to do that for most of
our day-to-day activities. [music]
That's a bit extreme.
But the key with the glazes is one, you
have a separate uh dollop of paint. You
thin it carefully. You rinse the brush.
You go in to the paint with that [music]
clean, just slightly damp brush. You
wick off the excess liquid. You work
only the separation lines, and you pull
towards the value that is in your brush.
Darker pulls toward dark. Lighter pulls
toward light.
If you remember those tips, those steps,
you can work it out and get it smooth.
And we sort of bookended this, right?
The reality is, you can use all of these
methods interchangeably.
Layering, like lots of different thin
layers, is a great way to get something
relatively smooth, but it's not going to
be perfect. Bringing in the glazes is
then how you take it to the next level.
Wet blending is a great start that gives
you a wonderful value sketch and lets
you establish something that's pretty
smooth without those hard lines, but
you're going to need something like
feathering and smudging to really push
the values in the full contrast, and
potentially glazing to then smooth out
any inconsistencies in your wet blend.
So, we can work through these four
methods.
And in fact, when I work models, I
usually work my way through all of
these. Skin, I tend to do more layering
and glazing.
Cloth and things like that, I used I
tend to do more wet blending, feathering
and smudging, and then finally a light
glazing at the end.
But combine these tricks together and
you have all the tools in your toolbox
you need to achieve smooth blends with
your miniatures with acrylic paints.
All right. Uh I'm kind of showing the
guy on screen right now of where he is
at this moment. I still got a little
more to do in him, but that was the key
areas I wanted to show you.
If you liked this, give it a like.
Subscribe for additional hobby cheating.
We've got new videos here every Saturday
trying to help you take your next step
on your hobby journey.
If you'd like to support the channel,
there's lots of ways you can do so. You
can check down in the uh in the comments
below. Uh down there, there is affiliate
links that save you money and uh help
contribute to the channel in a big way.
That is really appreciated when folks
use those.
There's also, of course, the books that
Uncle Adam and I write. Our newest game
uh came out just not too long ago called
Repent, Ye Foolish Gods about playing a
sect of dark warriors taking revenge
against the dark gods and their
followers. Check it out, as well as our
other games. Of course, there's also our
Patreon focused on reviewing feedback
and taking your next step on your hobby
journey. we'd love to have you as part
of the community.
Elsewhere in the Vincey Cinematic
Universe, we have of course Fireball
Gazebo, my RPG podcast with Ninjon, as
well as uh Snarl Cast, my indie
wargaming podcast with Uncle Adam. So,
check all that stuff out, support the
channel, it's really appreciated. But as
always, I thank you so much for watching
this one,
and we'll see you next time.
>> [music]